Welcome to the world of wireless audio bliss with AirPods Pro! These incredible earbuds offer next-level sound quality and seamless device compatibility, making them perfect for all your listening needs.
In this blog post, we’ll guide you through how to pair AirPods Pro with various devices, from iPhones and Android phones to MacBooks.
Quick Summary
- Pairing AirPods Pro with an iPhone is a quick and easy process while pairing with other devices like Android phones or MacBooks can be done by turning on Bluetooth and selecting “AirPods” or “AirPods Pro.”
- Troubleshooting tips include checking Bluetooth connectivity, resetting the AirPods Pro, updating software regularly, and resolving interference issues.
- Customizing settings allows for personal preferences such as noise cancellation, touch controls, audio sources, automatic ear detection, and Siri integration. Sharing audio with a friend and using transparency mode are convenient features of AirPods Pro.
How To Pair AirPods Pro With Your Devices
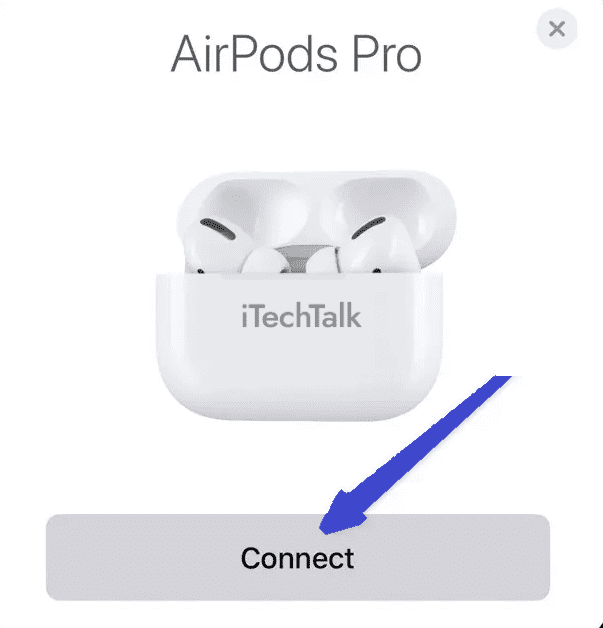
Pairing with an iPhone is as easy as holding the charging case next to your iPhone and tapping “Connect” while pairing with other devices can be done by turning on Bluetooth and selecting “AirPods” or “AirPods Pro.”
Pairing With An iPhone
Pairing your AirPods Pro with your iPhone is a quick and easy process.
To ensure a seamless connection, follow these steps:
- Ensure your iPhone’s Bluetooth is turned on by going to Settings > Bluetooth.
- Open the lid of your AirPods Pro charging case without removing the earbuds.
- Hold the charging case close to your iPhone.
- A setup animation should appear on your iPhone screen. Tap on “Connect.”
- Press and hold the setup button on the back of the AirPods case until you see a white blinking light.
- Wait for a few seconds as your iPhone pairs with the AirPods Pro.
- Once paired successfully, you’ll see an on-screen confirmation and battery life information for the AirPods Pro and their charging case.
Now you can enjoy high-quality audio with your AirPods Pro and iPhone!
Pairing With An Android Phone
To pair AirPods Pro with an Android phone, follow these steps:
- Turn Bluetooth on your Android phone by selecting ” Bluetooth ” in the Settings menu.”
- Open the charging case of your AirPods Pro and press and hold the button on the back until the LED light flashes white.
- From the list of available devices on your phone, select “AirPods” or “AirPods Pro” to connect them.
- Once connected, you can control playback, access Siri or Google Assistant for voice commands, and adjust settings in the Bluetooth menu.
Note: Some features, such as automatic ear detection and seamless switching between devices, may not be available when using AirPods Pro with an Android device.
Pairing With A MacBook
To pair AirPods Pro with a MacBook, follow these steps:
- Turn on Bluetooth on your MacBook by going to System Preferences > Bluetooth.
- Open the lid of your AirPods case and press and hold the button on the back until the light starts flashing.
- Your AirPods should appear in the list of available devices on your MacBook. Click “Connect” next to them.
- Once connected, you can use your AirPods to listen to music or take phone calls on your MacBook.
Note: If you are having trouble connecting your AirPods to your MacBook, try resetting them by holding down the button on the back of the case for 15 seconds until the light flashes amber. Then, go through the pairing process again.
Entering Bluetooth Pairing Mode
To enter Bluetooth pairing mode with your AirPods Pro, follow these steps:
- Place your AirPods Pro in their charging case.
- Press and hold the button on the back of the case until it flashes white.
- Release the button, and your AirPods should now be in pairing mode.
- On your device, go to Settings, then Bluetooth.
- Choose “AirPods” or “AirPods Pro” from the list of available devices.
- Follow any remaining prompts to complete the pairing process.
Remember that if you’re having trouble connecting your AirPods Pro to a device, there may be connection issues or interference causing problems.
Ensure both devices have Bluetooth turned on and are within range of each other. If necessary, try resetting your AirPods or updating their software to resolve any issues.
Troubleshooting Common Connection Issues
If you encounter connection issues with your AirPods Pro, don’t worry – we’ve got you covered!
This section provides troubleshooting tips to help you fix common issues like checking Bluetooth connectivity, resetting the AirPods Pro, and resolving interference problems.
Checking Bluetooth Connectivity
One of the most important aspects of using AirPods Pro is ensuring proper Bluetooth connectivity.
Here are some steps to follow to check Bluetooth connectivity:
- Make sure your AirPods Pro is charged and turned on.
- On your device, open the Settings app and navigate to Bluetooth settings.
- Look for “AirPods” or “AirPods Pro” in the list of available devices.
- If your AirPods Pro is connected, it will say “Connected.” If not, it will say “Not Connected.”
- Try turning off Bluetooth and turning it back on to reset the connection.
- Move closer to the device you want to connect your AirPods Pro with if there is a weak signal.
Following these steps, you can ensure that your AirPods Pro is properly connected via Bluetooth and ready for use.
Resetting AirPods Pro
Sometimes, it may be necessary to reset your AirPods Pro if you encounter connection or audio problems.
Here are the steps to reset them:
- Place both AirPods in the charging case and close the lid.
- Wait for at least 30 seconds.
- Open the lid of the case and press and hold the setup button on the back until the status light flashes amber three times and then flashes white.
- Your AirPods have now been reset.
Note: Resetting AirPods Pro will remove all saved settings and pairings, so you must re-pair your AirPods with your devices.
Updating Software
To keep your AirPods Pro working smoothly and securely, it’s important to update their software regularly.
Here are the steps you need to follow:
- Check for Updates
- Connect your AirPods Pro to an iPhone or iPad.
- Go to Settings > General > About > AirPods.
- Look for the Firmware Version listing.
- Update Your AirPods Software
- Ensure that your AirPods are inside the charging case and have a charge.
- Leave the charging case open and put them near the connected device.
- Wait until your device shows that an update is available.
- Tap on the “Update” button.
- Wait for Installation
- Keep your earbuds in their charging case during installation.
- Wait until the update is fully installed, as a green checkmark indicates.
- Check Your Software Version
- To confirm if the firmware has been updated, go to Settings > General > About > AirPods and look for Firmware Version listed with the latest version number.
Regularly updating your AirPods Pro software will ensure they function optimally and receive new features, bug fixes, and security updates.
Resolving Interference Issues
Interference issues can sometimes arise when using AirPods Pro.
Here are some tips to resolve them:
- Move your AirPods closer to your device: If the connection is weak, try moving the AirPods closer to your device.
- Reduce Wi-Fi activity: High levels of Wi-Fi activity may cause interference with Bluetooth connectivity. Try reducing Wi-Fi activity if possible.
- Power off nearby Bluetooth devices: Other Bluetooth devices nearby may cause interference. Turn off any unused devices in the area.
- Avoid areas with high levels of electromagnetic interference: Certain areas, such as hospitals or airports, may have high levels. Avoid using AirPods Pro in these areas if possible.
- Reset the AirPods Pro and reconnect: If all else fails, try resetting it by holding the setup button for 15 seconds until they flash amber and reconnect to your device.
Following these steps should help you resolve interference issues using your AirPods Pro.
Tips And Tricks For Using AirPods Pro
Make the most of your AirPods Pro by customizing settings, using Siri, sharing audio with a friend, and trying out transparency mode.
Using Siri With AirPods Pro
I love using Siri with my AirPods Pro! It’s so convenient and easy to access.

Here are some tips on how to use Siri with your AirPods Pro:
- To activate Siri, say “Hey Siri” or press and hold the force sensor on either AirPod.
- You can ask Siri to play music, skip a track, pause or resume playback, and adjust the volume.
- You can also ask for directions or make calls without taking out your phone (as long as it’s nearby).
- If you have HomeKit – enabled devices, you can control them through Siri on your AirPods Pro.
- Remove one of the AirPods from your ear to end a call or stop playing music.
With these simple tips, using Siri with your AirPods Pro should be a breeze!
Customizing Settings
One great thing about AirPods Pro is the ability to customize settings to fit your preferences.
Here are some ways you can do it:
- Turn on/off noise cancellation: You can switch between the noise-canceling and transparency modes with a long press on the stem of either earbud.
- Personalize touch controls: Customize what happens when you double-tap either earbud by going to the Bluetooth settings on your device and selecting “AirPods” or “AirPods Pro.” Then choose which action you want for each earbud.
- Choose audio sources: From the same Bluetooth settings menu, you can select which device your AirPods automatically connect to when turned on or even allow them to switch between devices when needed.
- Use automatic ear detection: With this feature enabled, AirPods Pro will pause music playback when removed from your ears and resume when inserted.
- Set up Siri integration: You can use Siri’s voice commands with AirPods Pro by enabling them in the Settings app on your Apple device.
By customizing these settings, you can make using your AirPods Pro even more convenient and enjoyable.
Sharing Audio With A Friend
Sharing audio with a friend is easy with AirPods Pro.
Here’s how:
- Have your friend connect their AirPods to their device and start playing audio.
- On your iPhone or iPad, open Control Center and tap the “Audio” icon.
- Tap the “Share Audio” button, then hold your AirPods Pro near the device.
- When prompted, tap “Share Audio” again to confirm.
- Your friend’s audio will now play through both sets of AirPods simultaneously, allowing you to share listening experiences.
Remember that sharing audio may affect battery life and sound quality, so be mindful of these factors during extended usage.
Using Transparency Mode
Transparency mode is a handy feature that allows you to hear what’s going on around you while still listening to your audio.
Here are the steps to using Transparency Mode with your AirPods Pro:
- Please put on your AirPods Pro and connect them to your device.
- Activate Transparency mode by pressing and holding the force sensor on the stem of one earbud or by saying, “Hey Siri, turn on Transparency mode.”
- You will now be able to hear sounds from both your AirPods and the environment around you.
- To adjust the level of transparency, go to Control Center on your device, select “Now Playing,” and then drag the volume slider left or right.
- To turn off Transparency mode, press and hold the force sensor again or say, “Hey Siri, turn off Transparency mode.”
Using Transparency mode can be especially useful when you need to stay alert while listening to music or taking phone calls in public places.
With just a few taps or voice commands, you can easily switch between total immersion in your audio and awareness of what’s happening around you.
Advanced Features And Customizations For AirPods Pro
Take your AirPods Pro experience to the next level by exploring the advanced features and customizations available, such as noise cancellation, personalizing touch controls, choosing audio sources, and using automatic ear detection.
Activating Noise Cancellation
One of the most impressive features of AirPods Pro is noise cancellation. This feature blocks out external sounds in your environment, allowing you to focus on your music or phone call.
Here are the steps to activate noise cancellation on your AirPods Pro.
- Put your AirPods Pro in your ear.
- Open Control Center on your device and press and hold the volume slider.
- Tap the Noise Cancellation button to turn it on or off.
- You can also activate noise cancellation with Siri by saying, “Hey Siri, turn on noise cancellation.”
- If you want to activate Transparency mode instead, which allows outside sounds to come through while still playing audio, tap the Transparency button in Control Center.
Following these steps, you can easily switch between Noise Cancellation and Transparency modes while using your AirPods Pro for the best listening experience possible.
Personalizing Touch Controls
One of the most convenient features of AirPods Pro is the ability to customize touch controls.
Here are some ways to personalize touch controls:
- Open the Settings app on your iPhone and select Bluetooth.
- Tap the “i” icon next to your AirPods Pro and scroll down to “Press and Hold AirPods.”
- From here, you can customize what happens when you press and hold either earbud, such as skipping a track or invoking Siri.
- You can customize double-tap actions for each earbud by selecting “Left” or “Right” from the settings menu.
- Double-tapping an earbud can be configured to play or pause music, skip a track, go back a track, or summon Siri.
- Using these customizations, you can minimize your phone usage while completely controlling your audio experience.
- It’s important to note that any changes made to touch controls will apply only when using them with your Apple device.
- With these personalized touch controls, users can interact with their AirPods Pro more effectively and easily adapt them to their preferences.
Overall, personalizing touch controls offer greater control over audio playback and help ensure that AirPods Pro works exactly as you want them to when in use.
Choosing Audio Sources
One of the great things about using AirPods Pro is the ability to switch between different audio sources easily.
Here are some quick steps on how to choose your audio source:
- Make sure your AirPods Pro is connected to your device via Bluetooth.
- On your device, navigate to the audio or music app you want to use.
- Play the audio content you want to hear.
- Select your AirPods Pro as the output device from Control Center on an iPhone or iPad or the Menu Bar on a Mac.
- The audio should now be playing through your AirPods Pro.
It’s also worth noting that if you receive a phone call while listening to music or other audio, your AirPods Pro will automatically switch over to allow the call through.
Once the call is over, your AirPods will switch to whatever app or source you previously listened to.
With these simple steps, you can easily enjoy your favorite audio content with your AirPods Pro without any hassle.
Using Automatic Ear Detection
One of the convenient features of AirPods Pro is Automatic Ear Detection. This means they will automatically pause music or audio when you remove one or both AirPods from your ears and resume playback when placed back in your ears.
Here are some tips for using this feature:
- Ensure Automatic Ear Detection is turned on in Settings > Bluetooth > AirPods Pro.
- To manually pause audio without removing an AirPod, double-tap one of them to activate the touch control feature.
- When using Automatic Ear Detection with phone calls, removing an AirPod during a call will switch to a single-ear mode and place the call on hold until the AirPod is replaced.
- You can customize what happens when you double-tap an individual AirPod by going to Settings > Bluetooth > AirPods Pro > Left/Right under Double-Tap on AirPod.
- If you experience issues with Automatic Ear Detection not working properly, try resetting your AirPods by holding down the button on the back of the case for 15 seconds until the LED flashes amber.
Conclusion
Pairing AirPods Pro is easy, no matter your device. With a few simple steps, you can enjoy wireless audio and take advantage of the many cool features of these earbuds.
If you’re having trouble connecting your AirPods to your device, don’t worry – our troubleshooting tips will help you get back up and running in no time. And with advanced customizations like noise cancellation and touch controls, you can further personalize your experience.