If you have a voice memo that you need to convert to an MP3, first you will have to download a third-party app like iConverter. You will then need to send your voice memo to iConverter and tap on the Convert button. Your file will be converted to an MP3, and from there, you can share it with someone else or download it to your files.
If you’re anything like me, you probably make a lot of voice memos. Voice memos that take up a whole lot of space on your iPhone. To take up less space, you can convert these voice memos to a smaller format like MP3. But how do you convert voice memos to mp3 on iPhones?
There are about a handful of third-party apps that you can download that can do this job for you. The problem is, most of those apps are either bad or involve too many steps to do what you need none.
In today’s article, I’m going to show you the two best third-party apps to convert your voice memos into this smaller format. The only thing you’re going to need is your iPhone, so let’s get started.
Can I Convert Voice Memo To MP3 On My iPhone Natively?
No, you can not.
On the Mac you can with the Apple Music App or with iTunes. On your iPhone, the only way you can do the conversion that you need is through a third-party app.
Related Reading
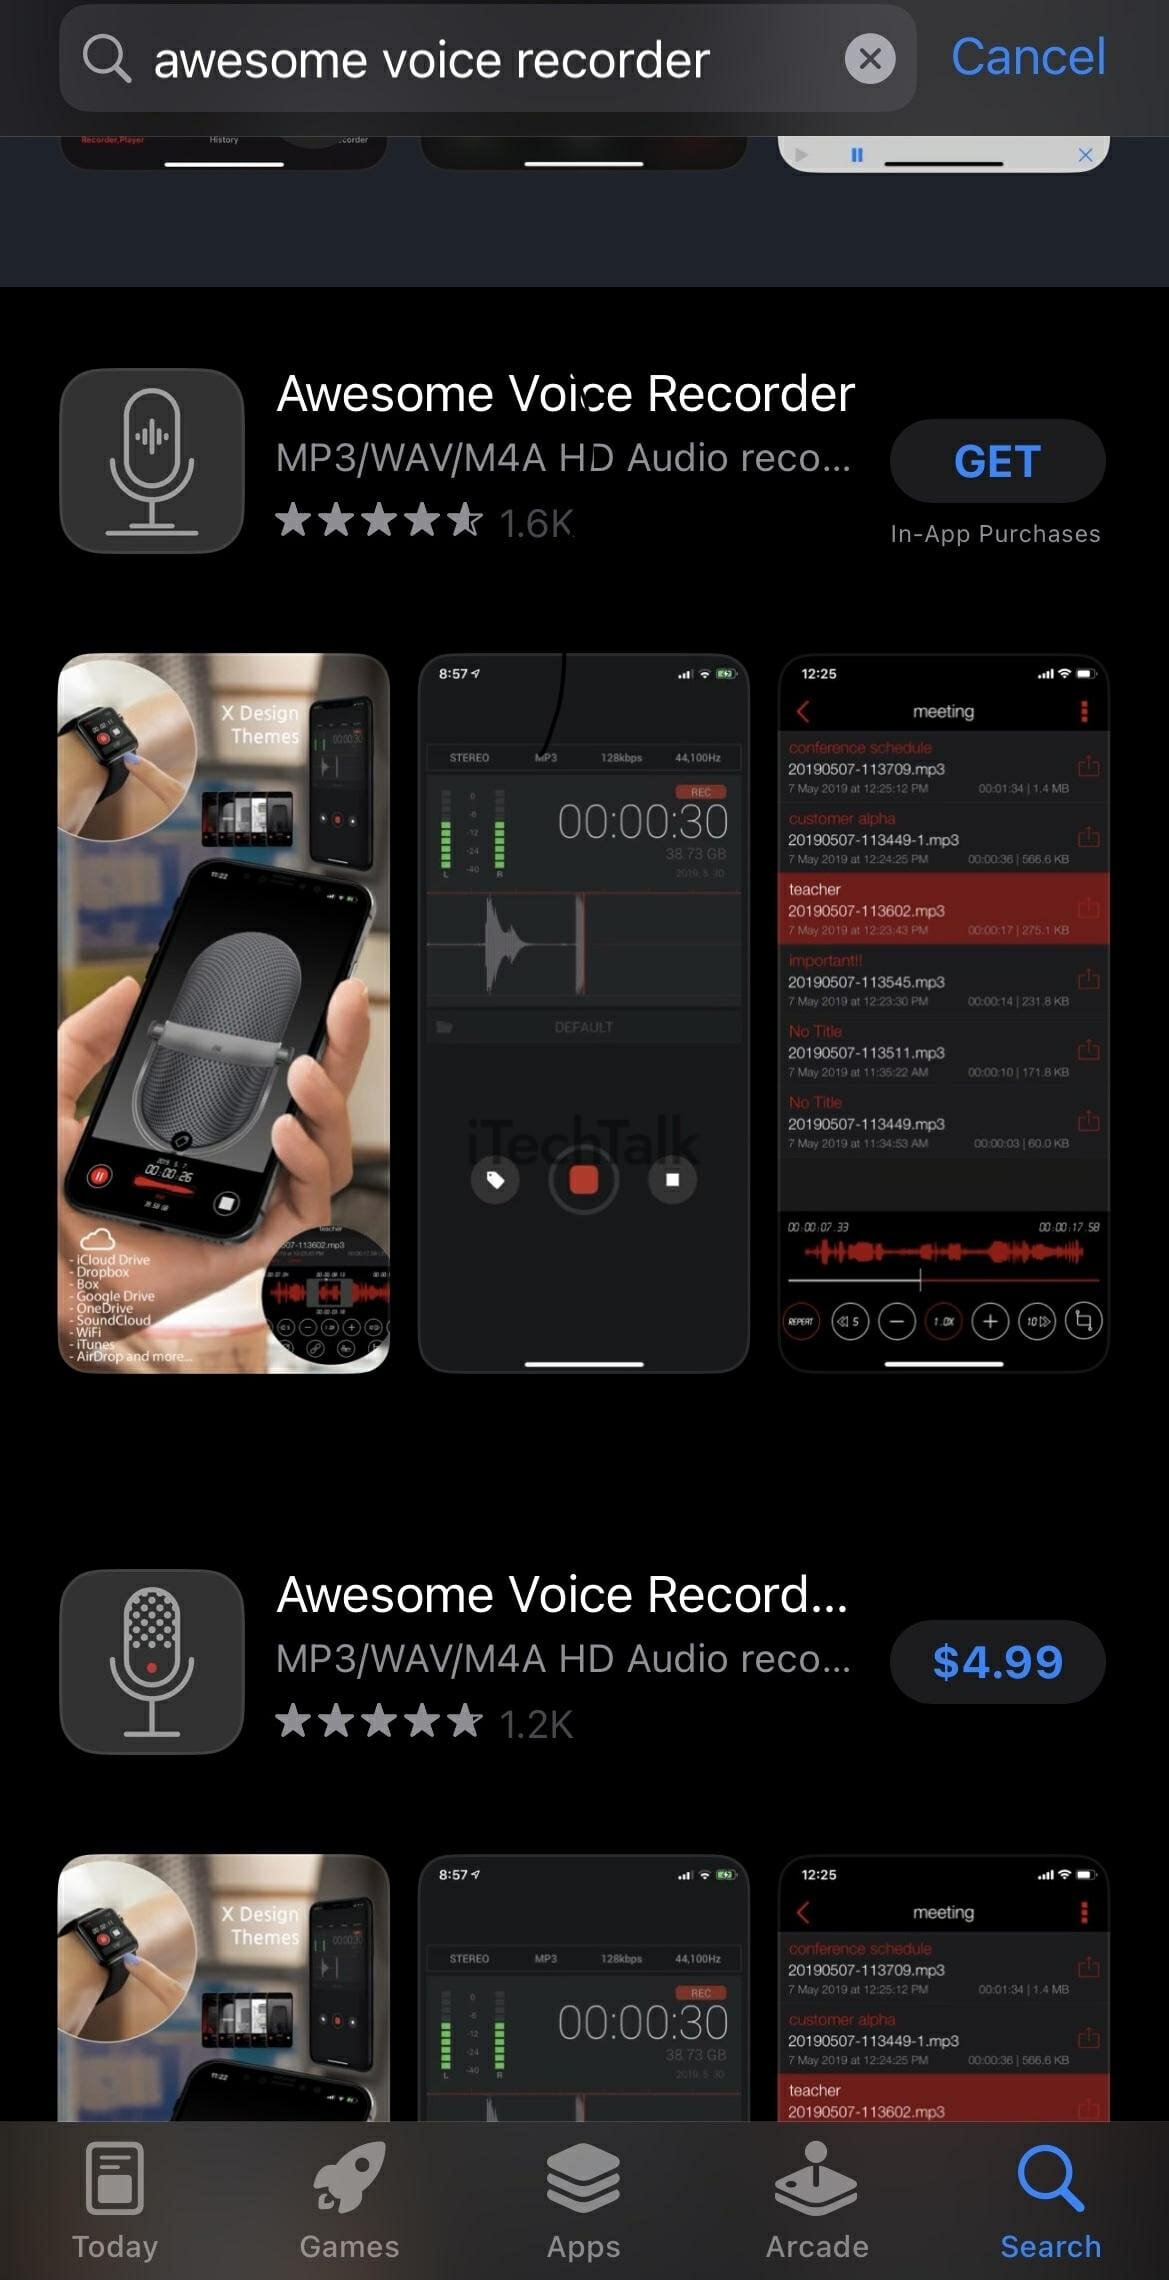
Use Awesome Voice Recorder To Convert MP3 On iPhone
Awesome Voice Recorder is one of the most popular apps in the app store to convert any audio. It may feel like many steps are involved, but the end result is high quality.
Step 1: Download Awesome Voice Recorder
On your iPhone, open the
App Store. Search for
Awesome Voice Recorder or
AVR.
Tap on the
Get button to start downloading the app.
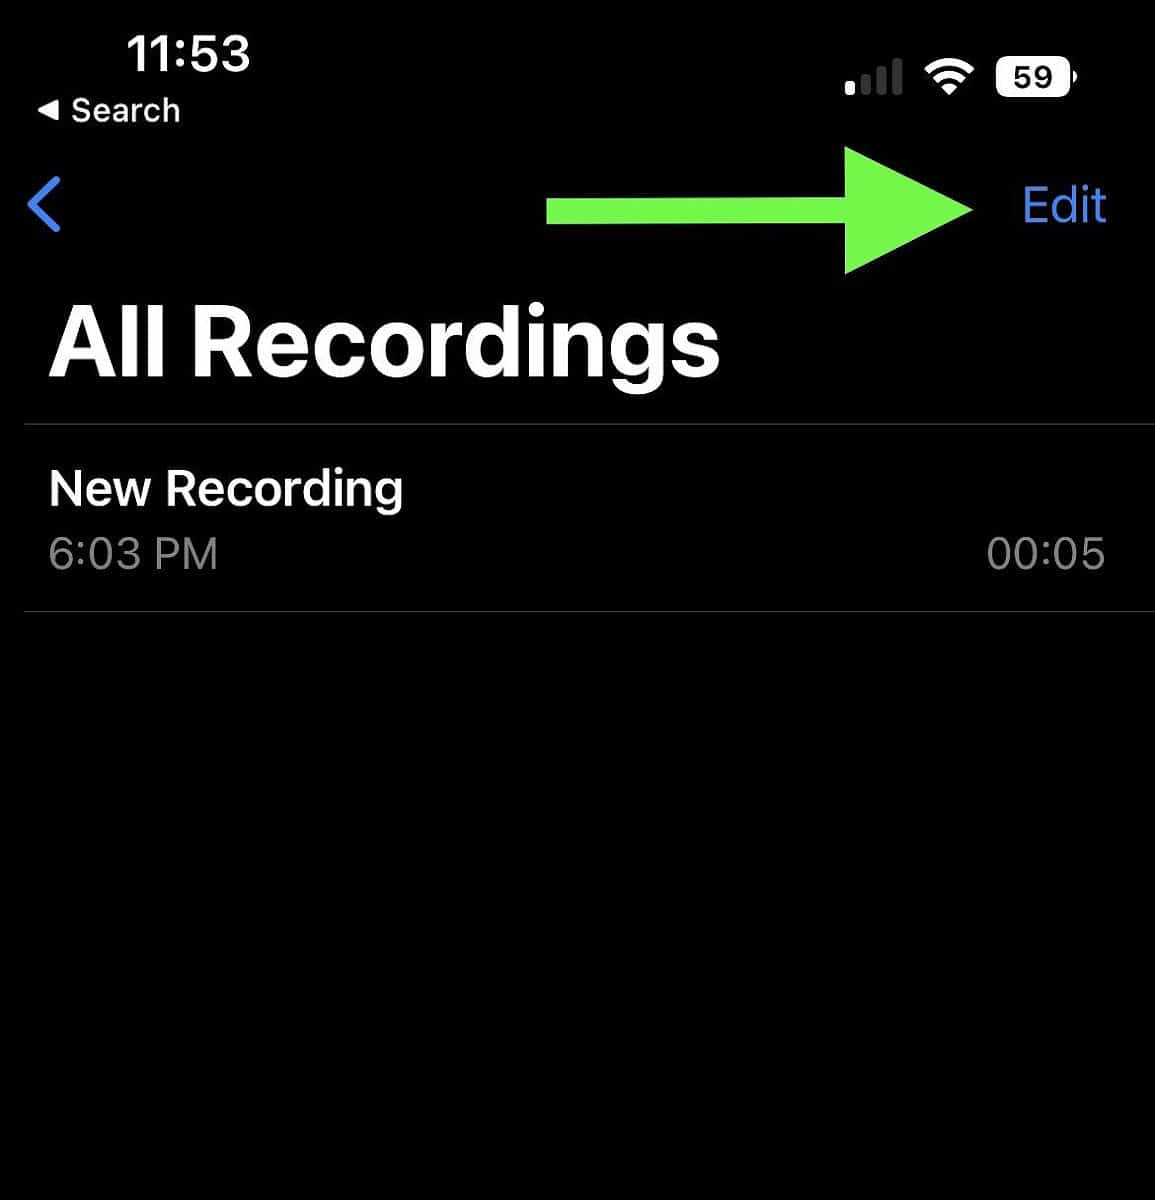
Step 2: Send Your Voice Memo To AVR
Once your voice memo is ready, tap on
Edit.
Then, select the memo, by tapping on the
checkmark box.

Once you have your voice memo selected, tap on the
Share button.

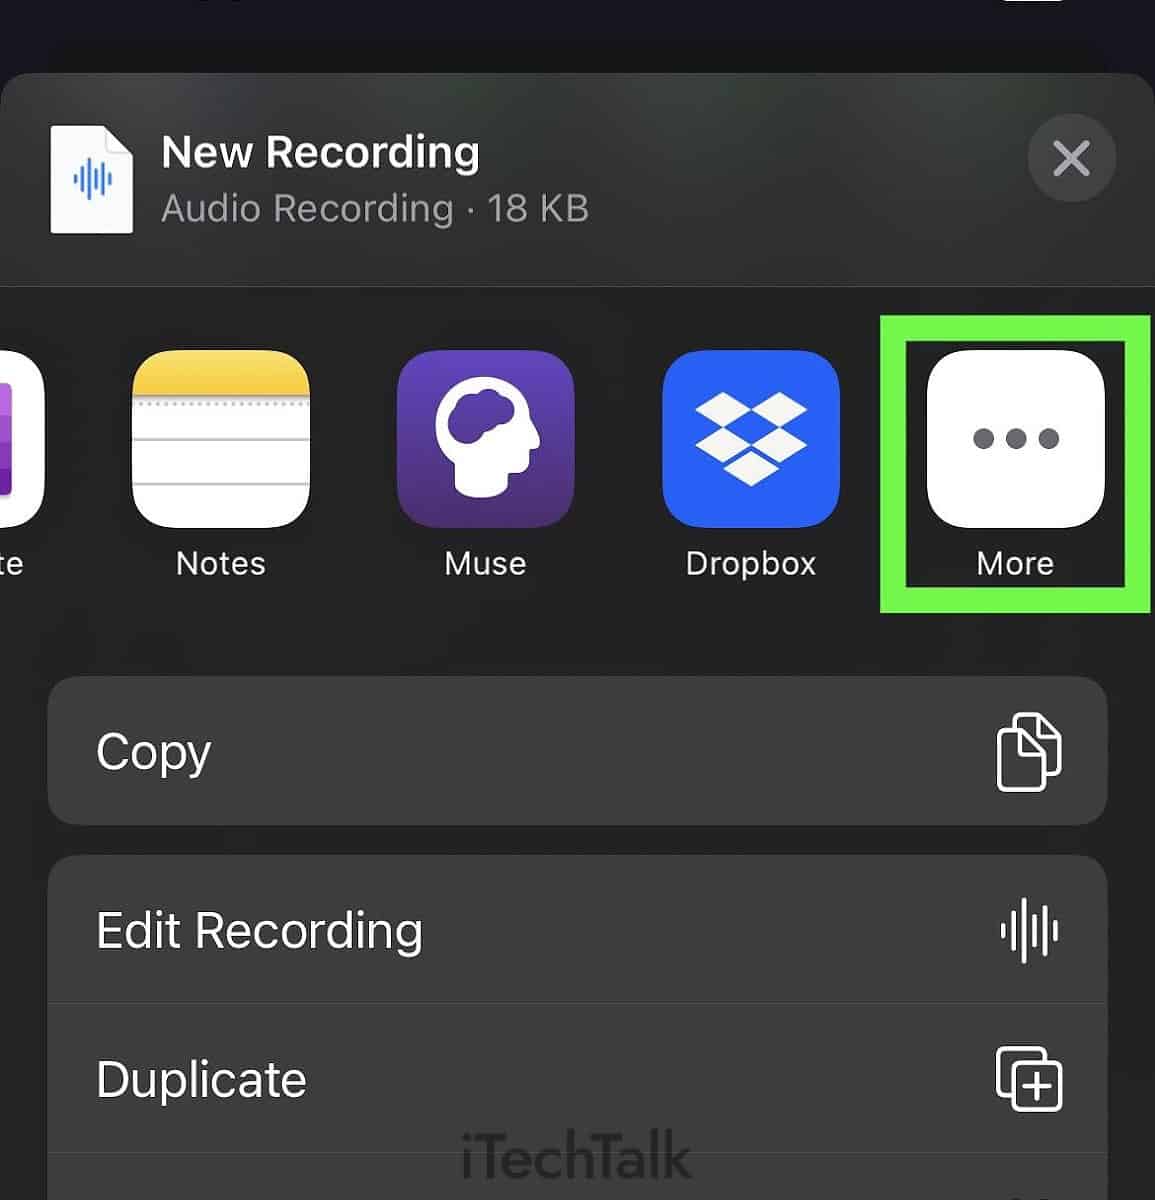
On the menu that pops up, scroll to the right and tap
More.

In the long list that appears, select
AVR.

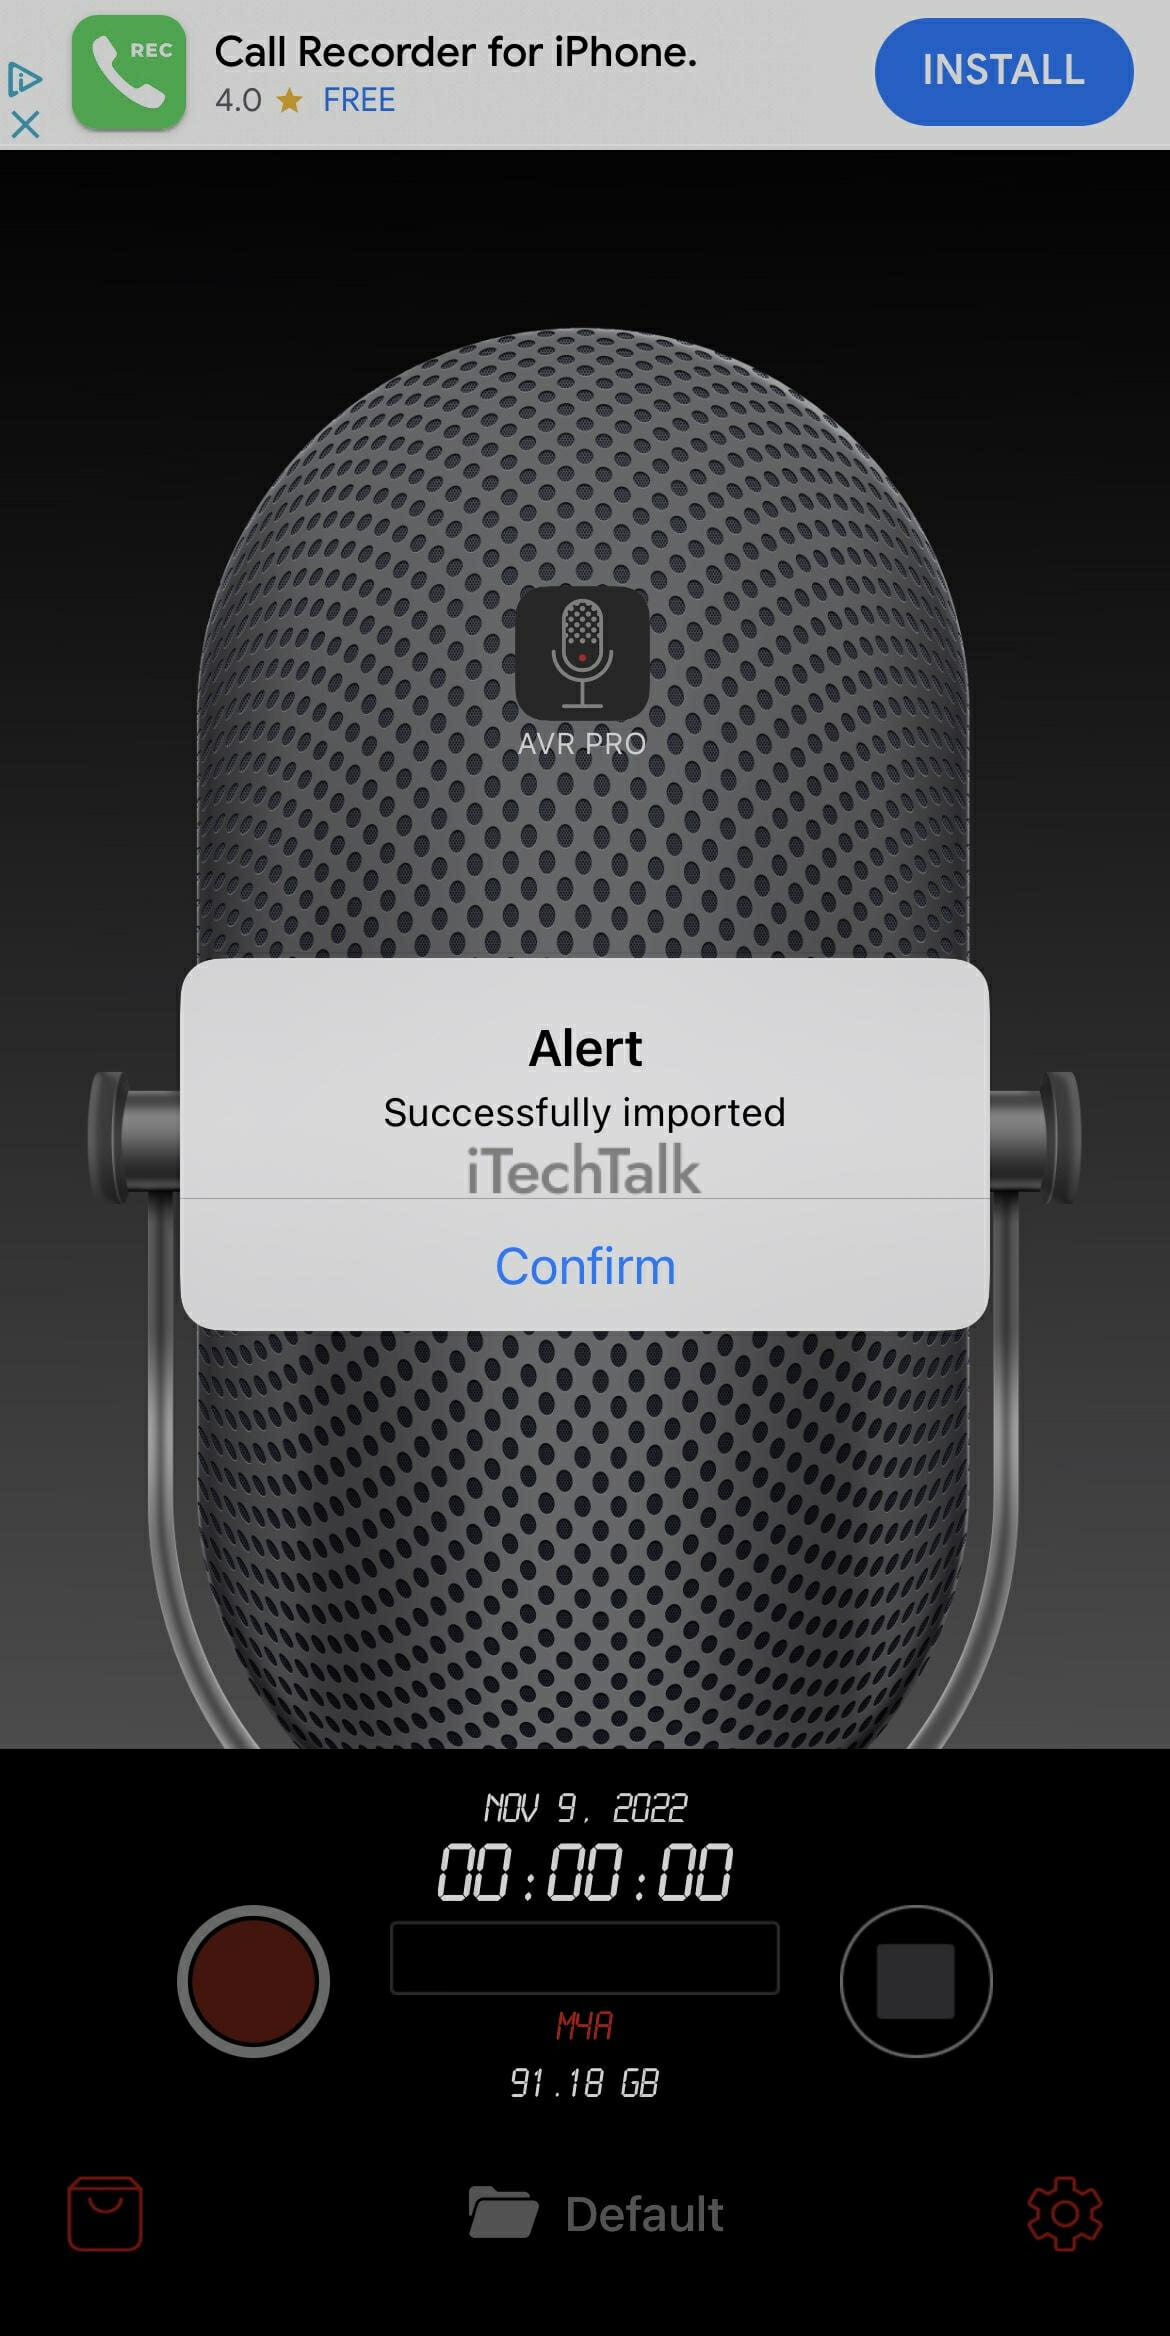
Your voice memo will now be sent to Awesome Voice Recorder. A message will pop up telling you this if you did everything right.
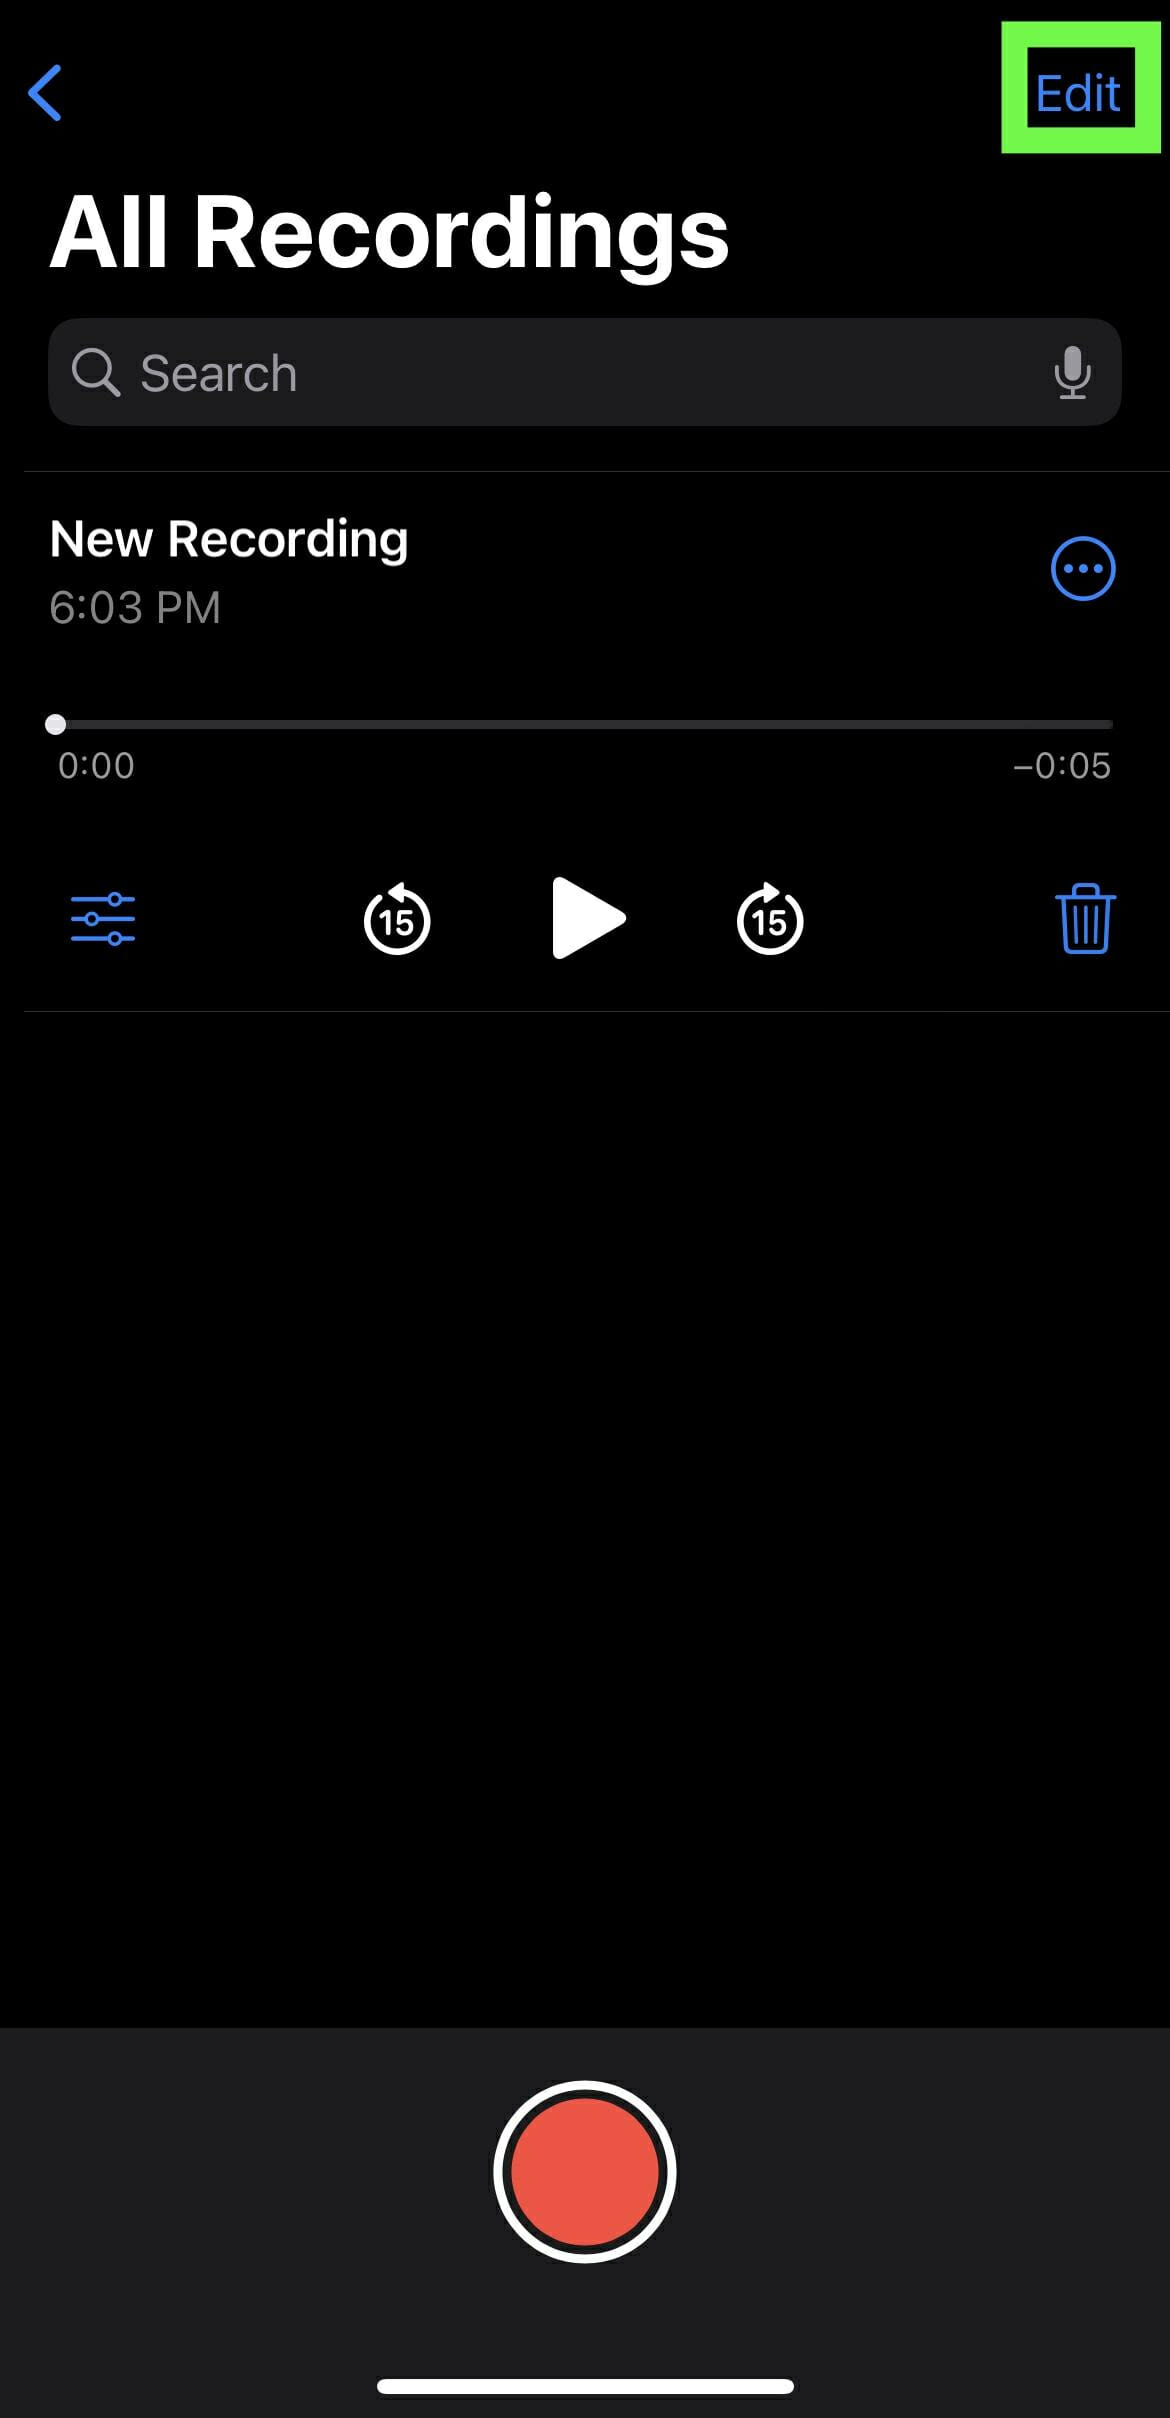
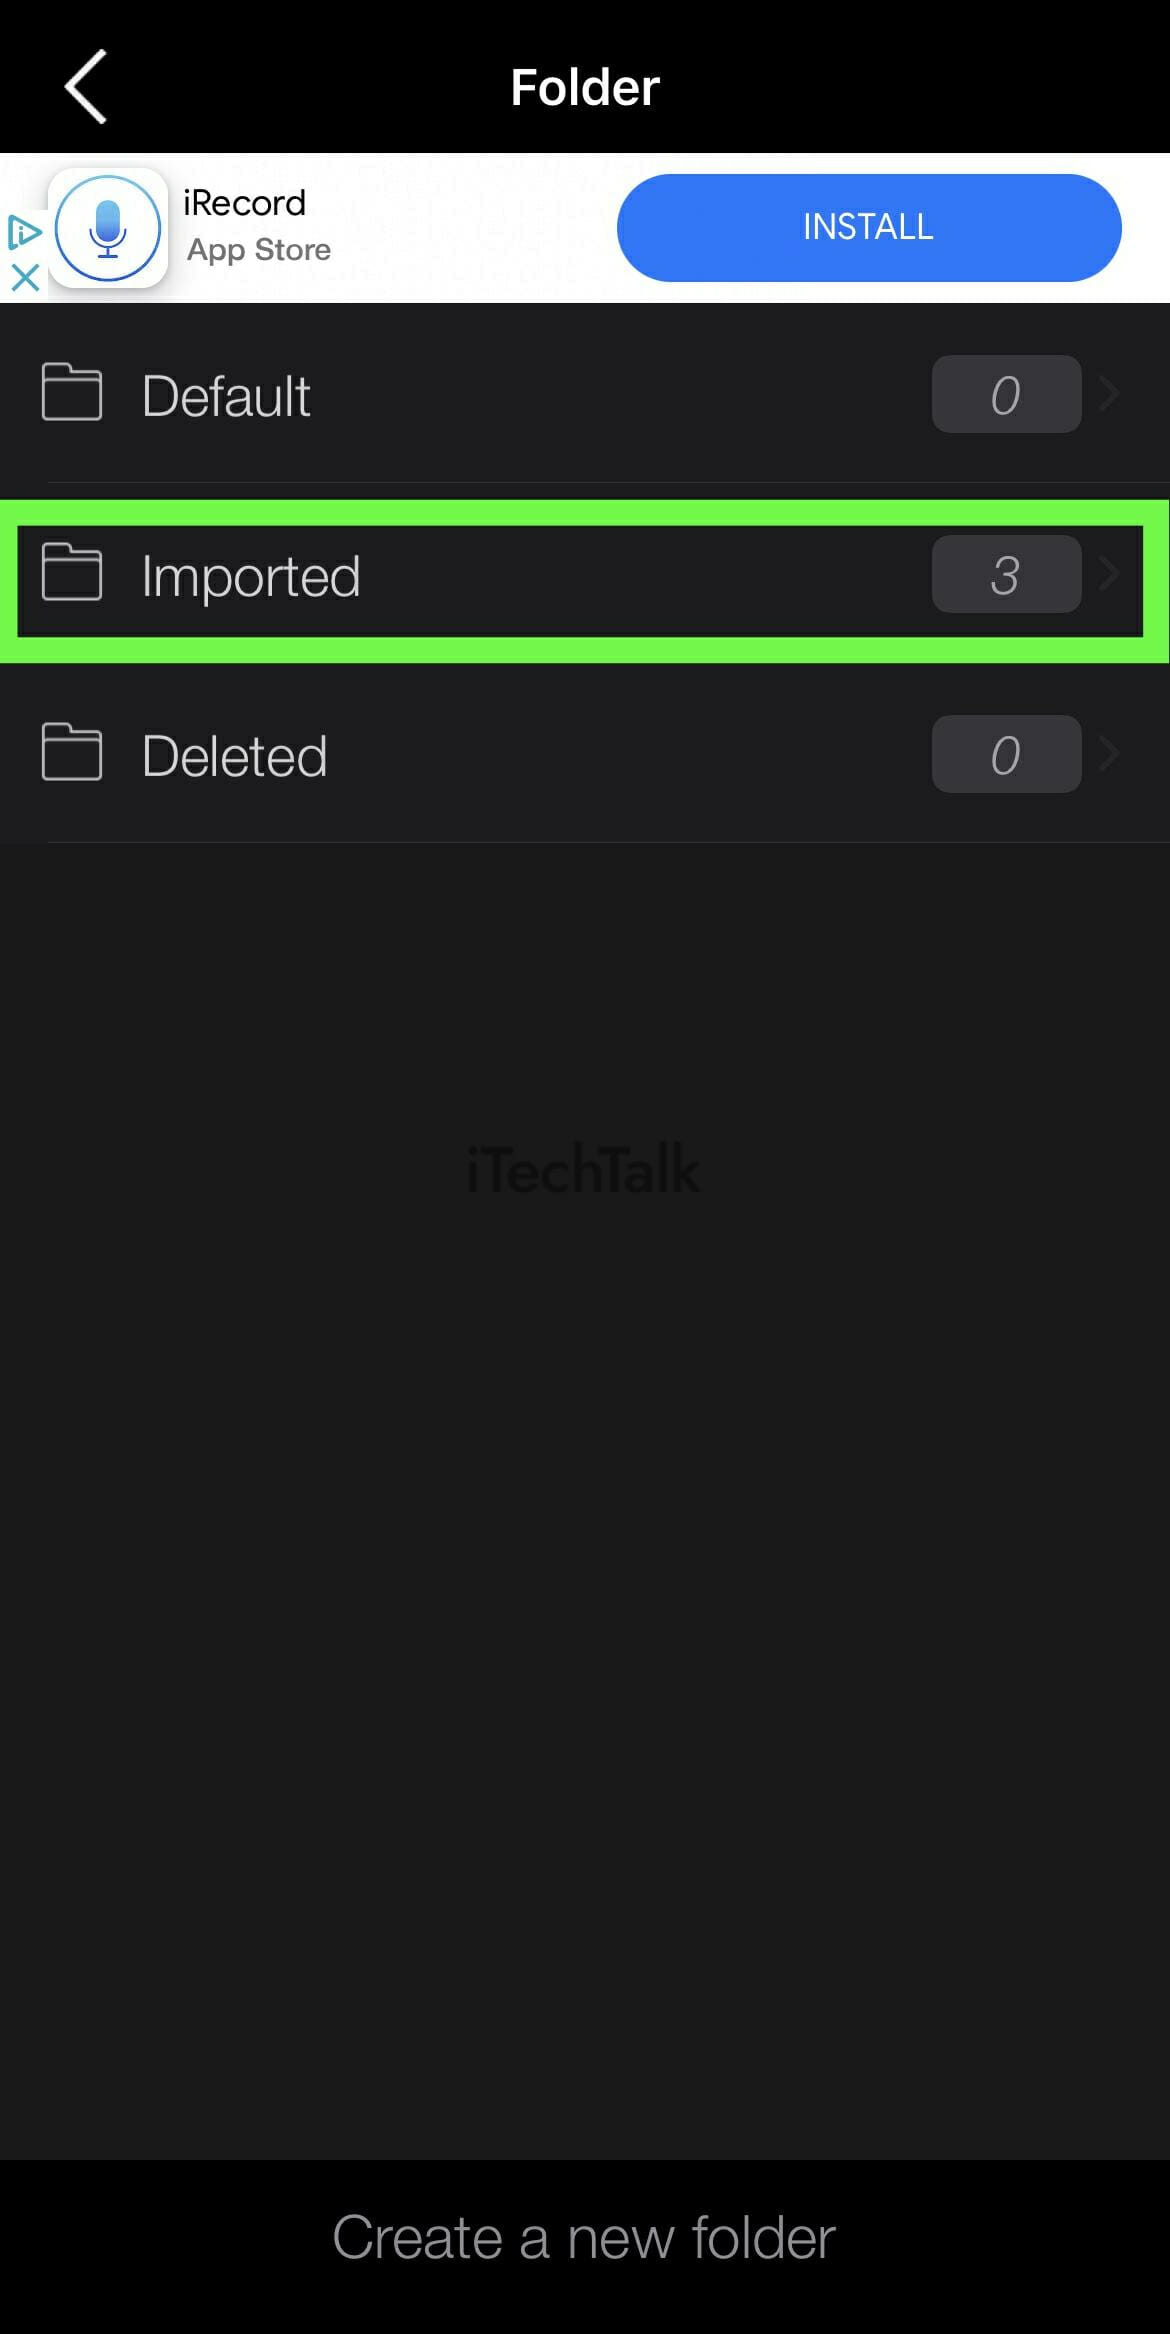
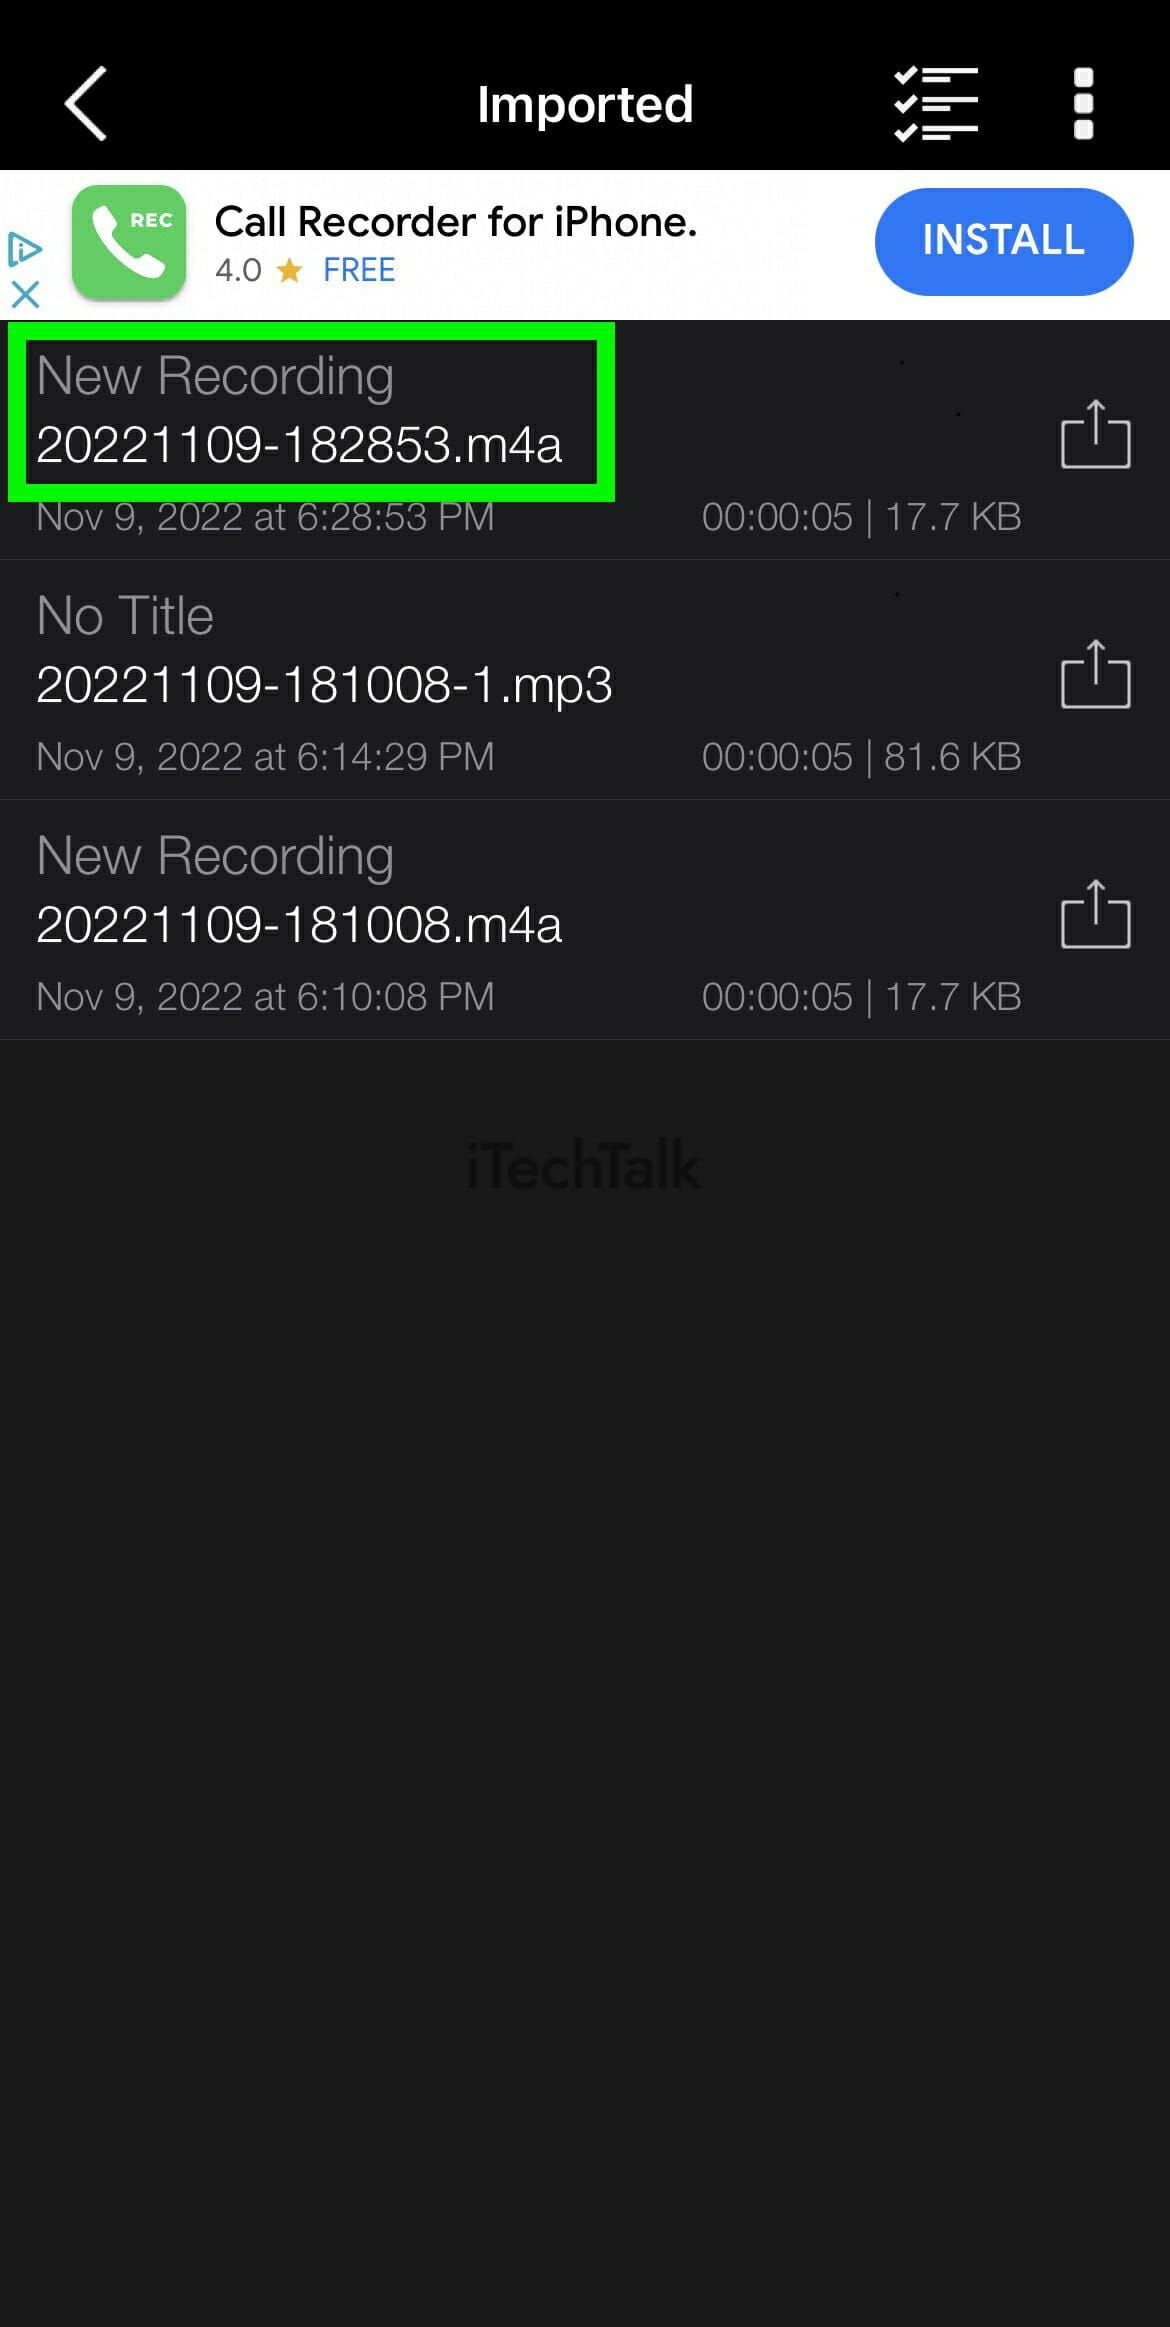
Step 2: Find Your File
Tap on the
Menu icon to see a list of all the folders available in the app. Tap the Imported folder to find your file.
Your voice memo should be the first one you see.

Step 3: Reformat Your Voice Memo
To reformat your voice memo from m4a to MP3, first tap the
Share button. Then, tap on
Edit.


You will be presented with a handful of icons to choose from. The icon at the end is the
Reformat button. Tap on it to reformat your file.
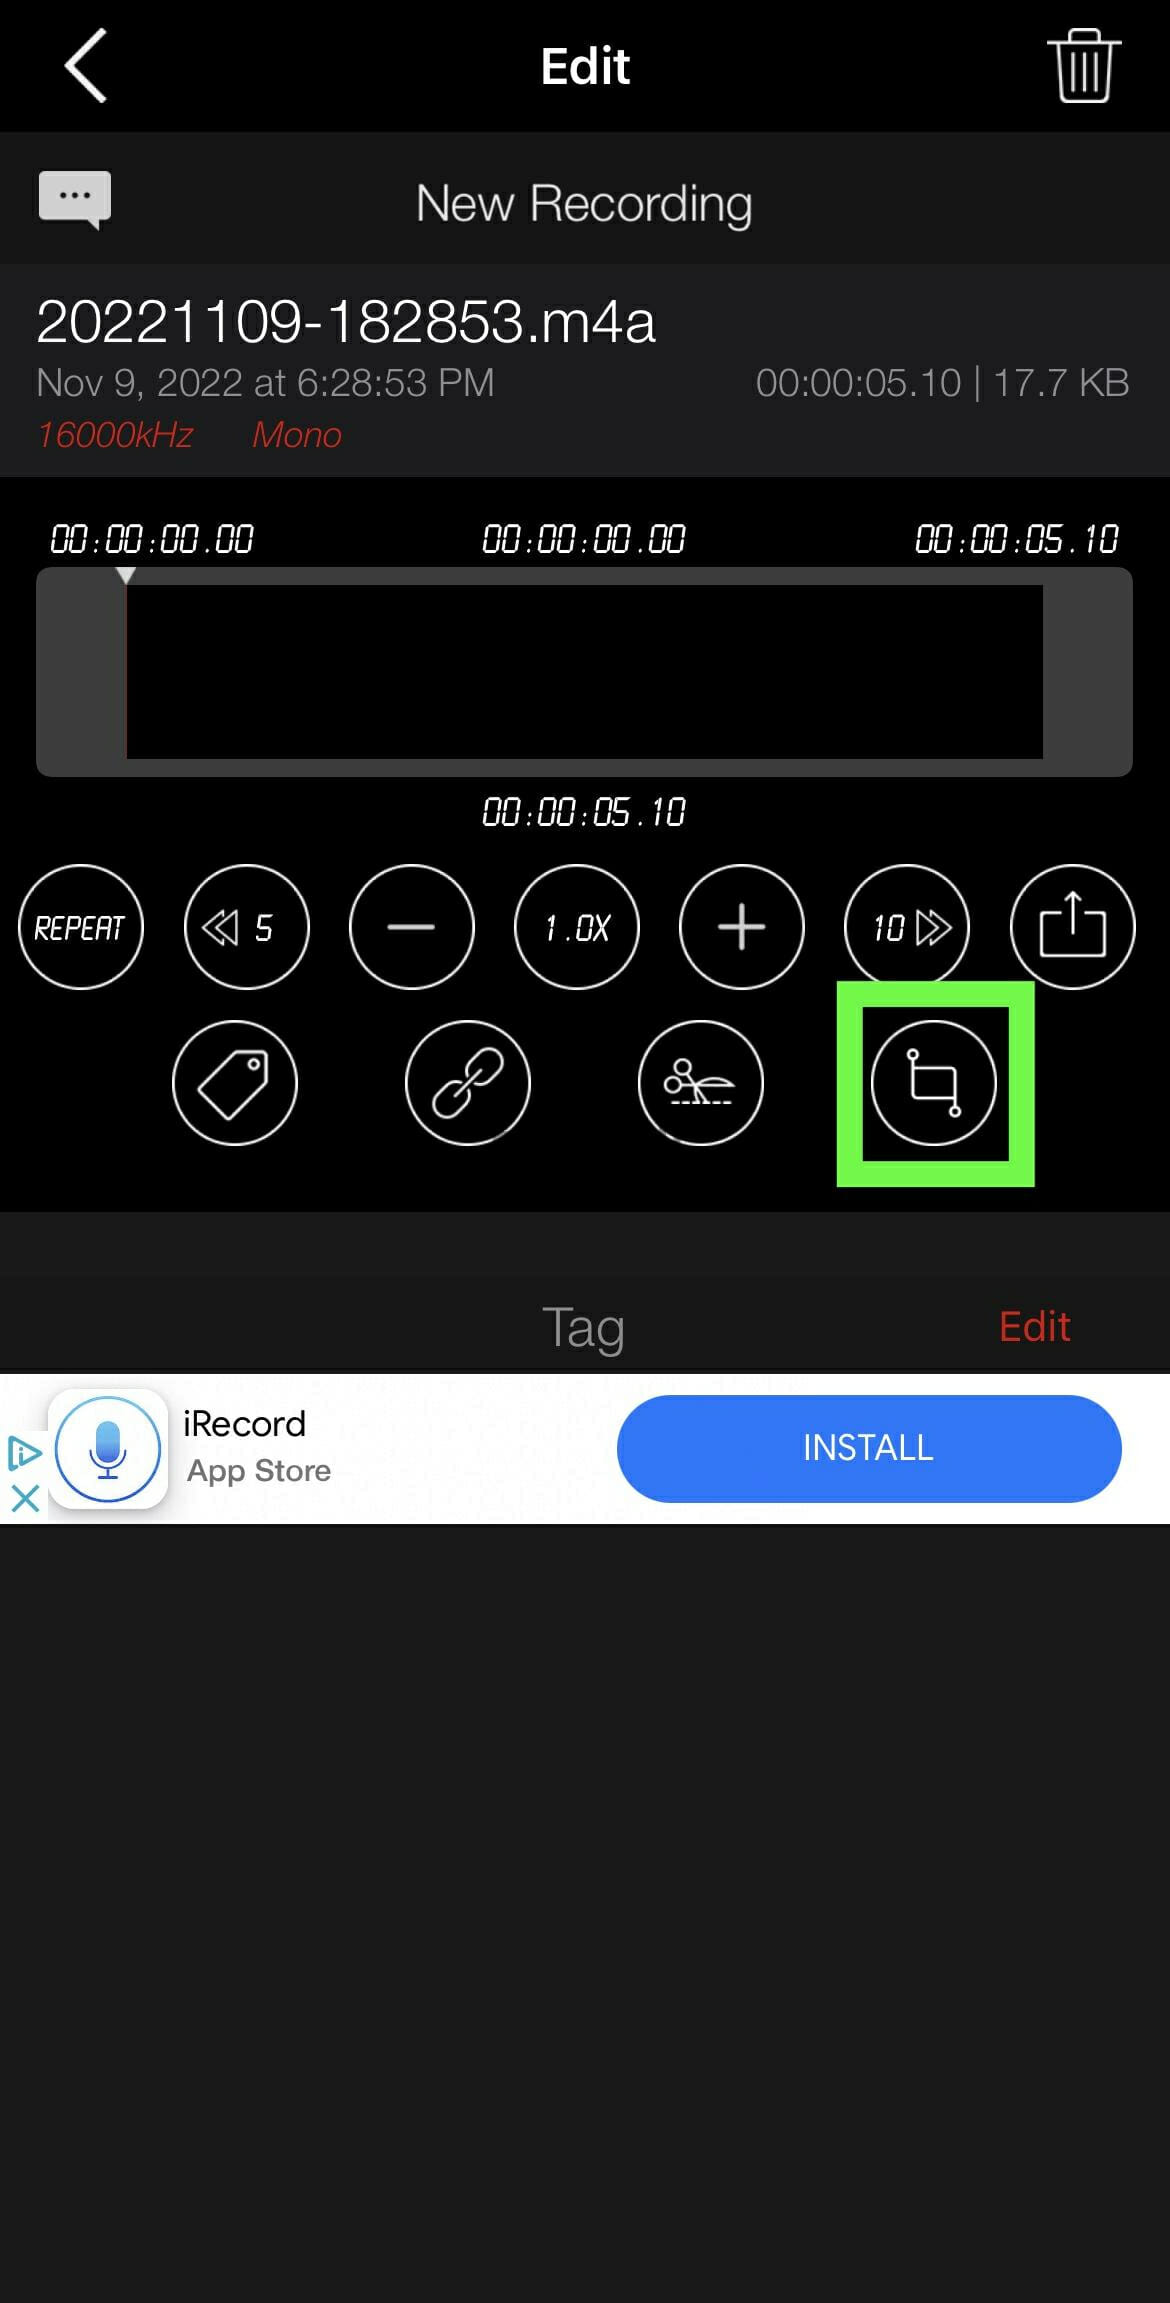
You now have four different file types that you can choose from. MP3 is the last option on the list. Tap on it to convert your file into an MP3.
Depending on the size of your file, this can be a long process, so you may have to be patient.

When your file is finished converting, you will see an MP3 extension at the end of your file.

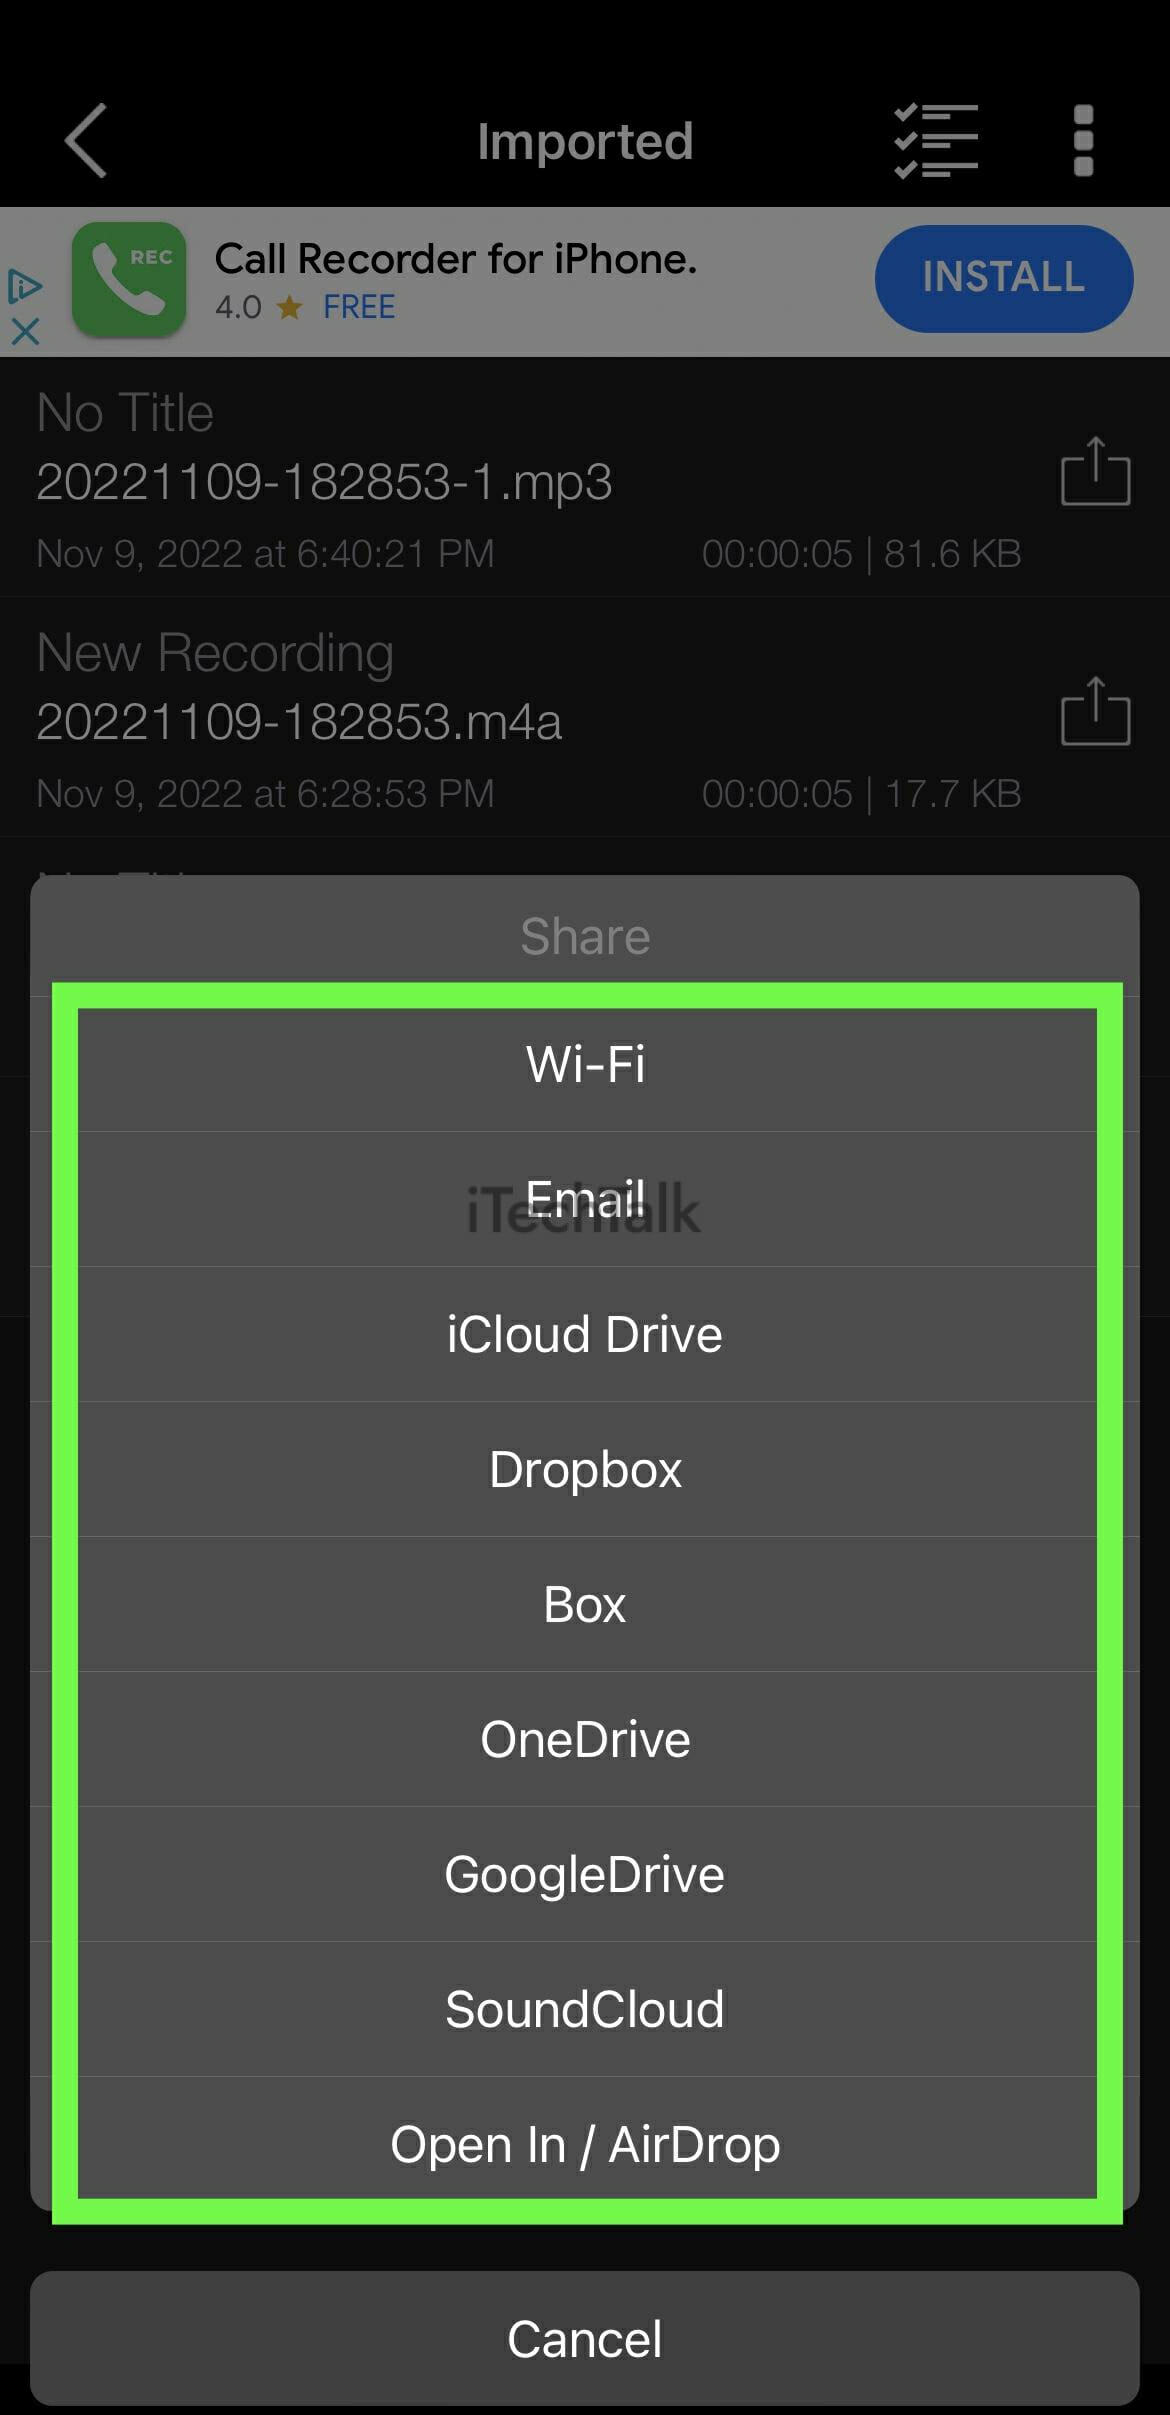
Step 4: Share Your MP3
Now that your voice memo is an mp3, you can now share it with yourself or with someone else.
To do this, tap on the
Share button, then tap on
Share.

You will be presented with a list of export options.
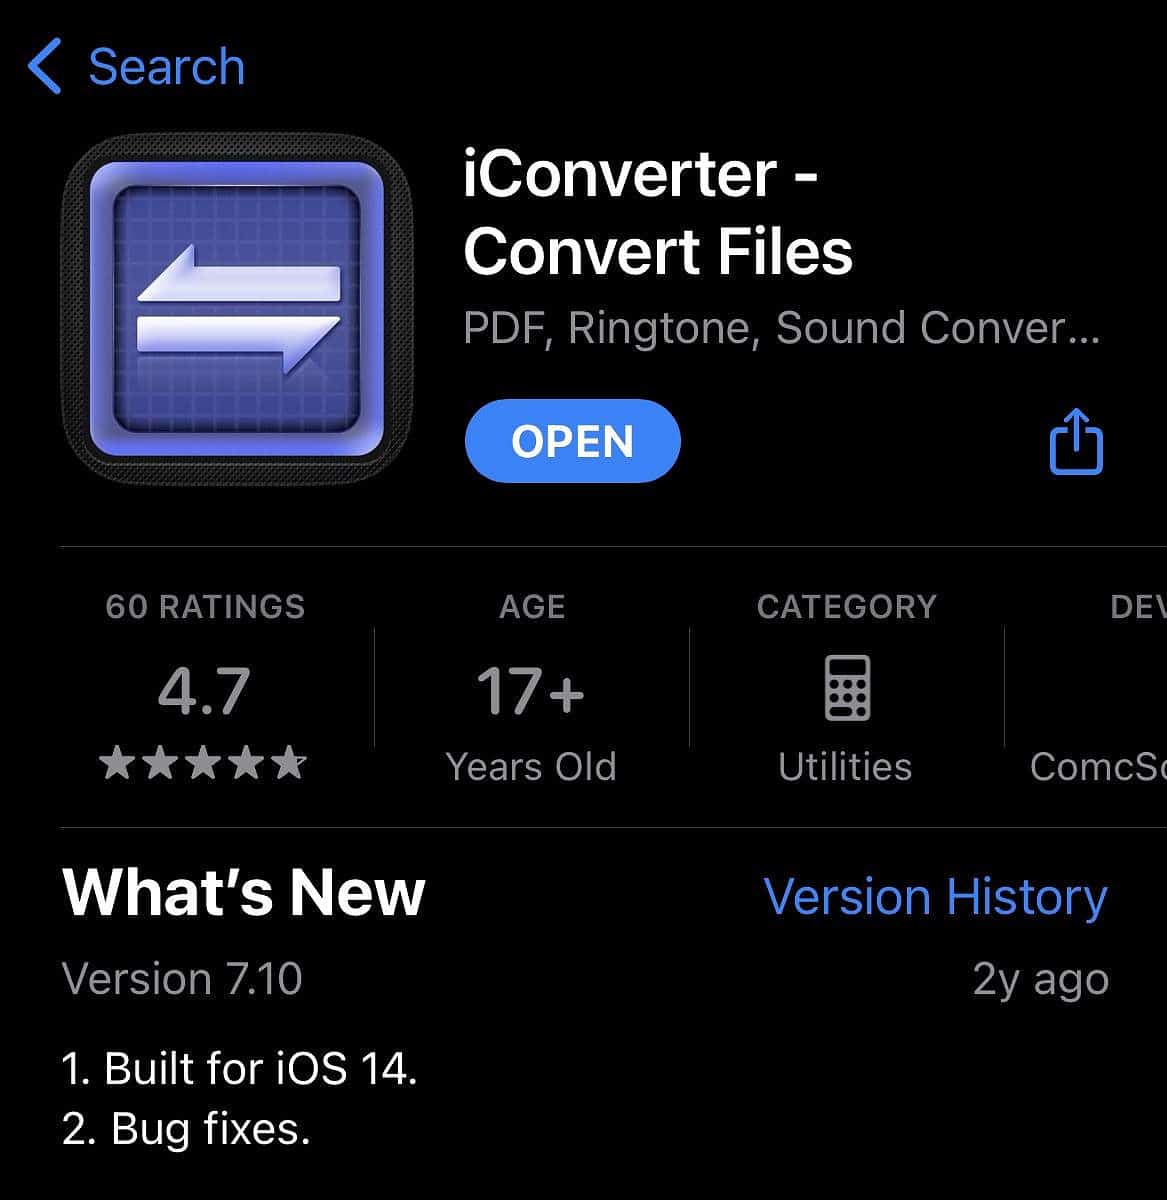
Use iConverter To Convert Your Voice Memo Without iTunes
iConverter is a newer game in town, but honestly, it seems even easier to convert your voice memo into an MP3.
Step 1: Download iConverter
Open up the app store. Search for and then download
iConverter.
Step 2: Send Your Voice Memo To iConverter
With your voice memo recorded in the Voice Memos app, tap on
Edit.
Then, select your recording by taping on the
checkmark box, next to it.
Once your memo is selected, tap on the
Share button.

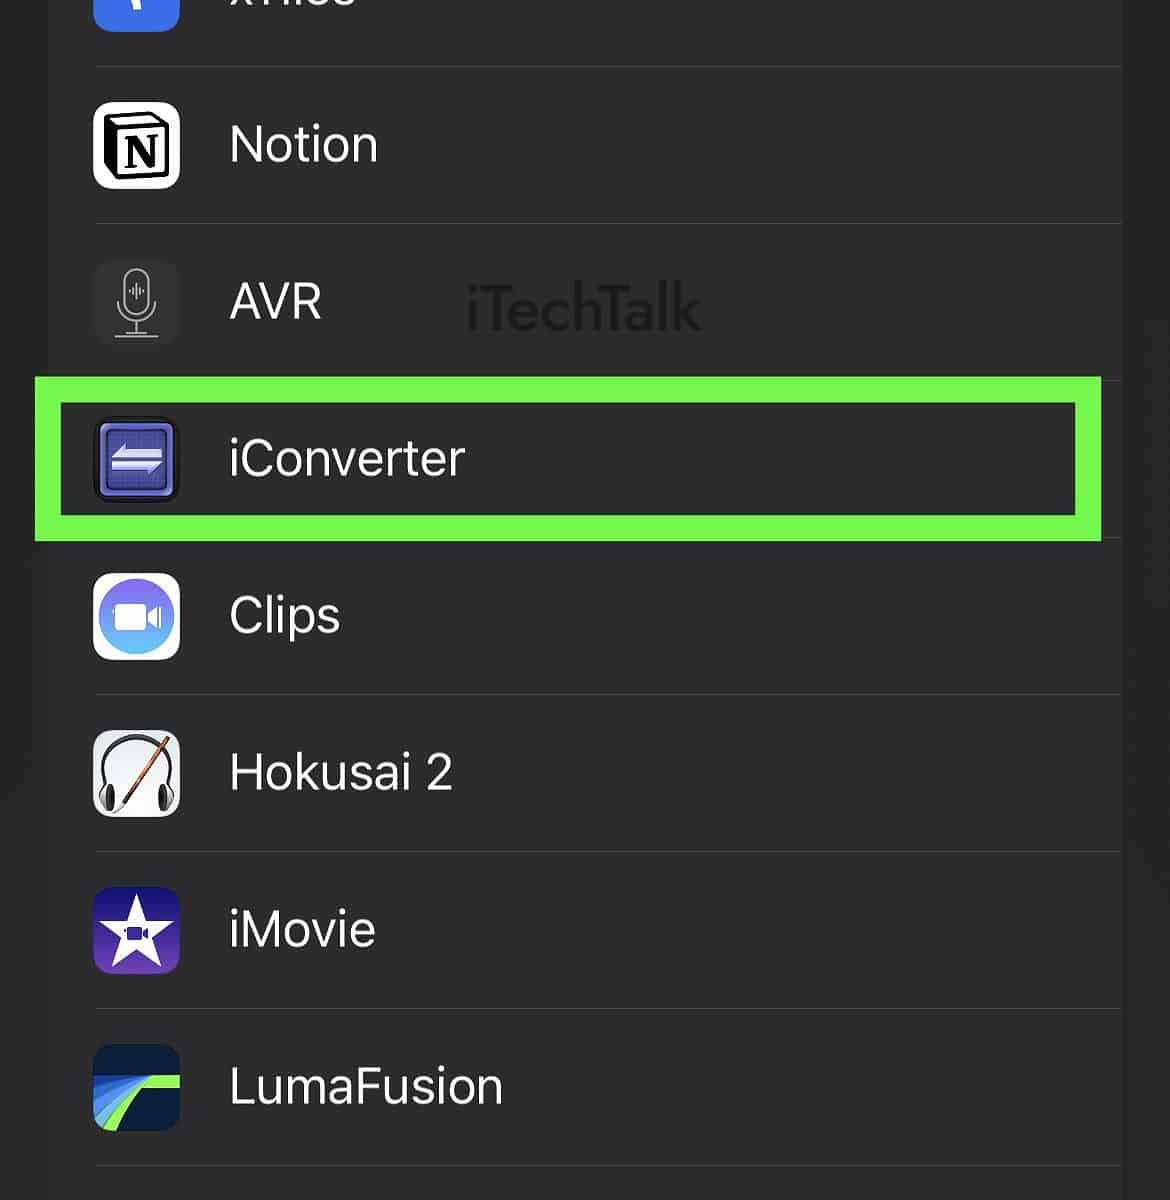
In the share menu, scroll to the right and tap on the
Three Dots icon.
In the list that pops up, choose iConverter.
Step 3: Convert Your File
By selecting iConverter, the app itself will
open up on the local files page.
Tap on the file that you just sent to iConverter.
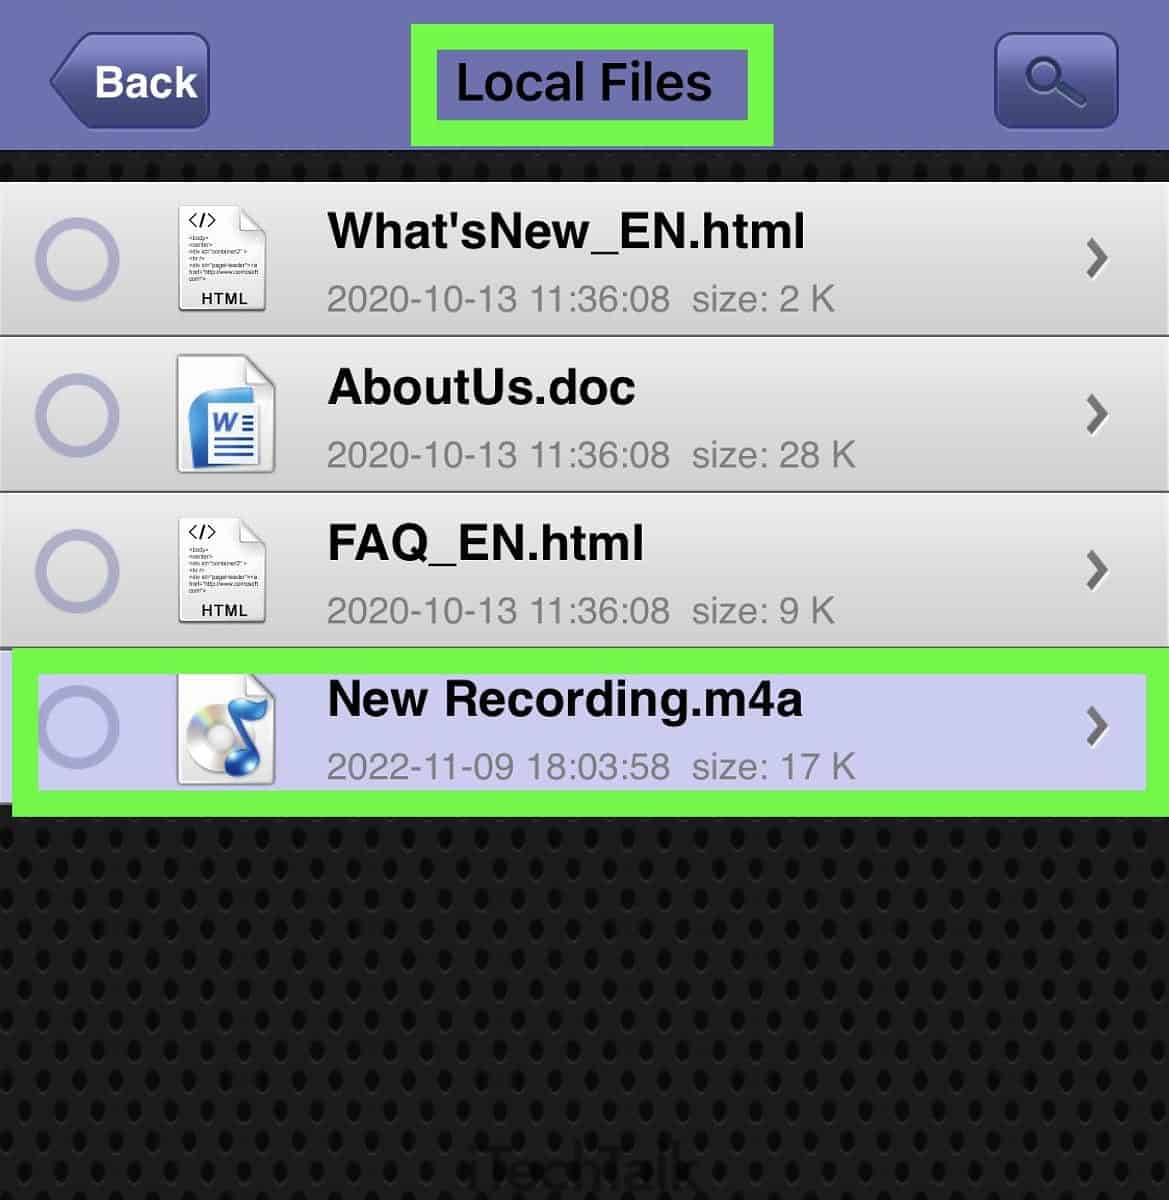
When the
file opens, you can preview it if you want.
When you’re ready, tap on the
Convert button.

You will be asked which type of file you would like to convert to. Choose
MP3.

Once your file is finished converting, you will see a pop-up message letting you know.
It will also tell you where your file has been saved.

Step 4: Share Your New MP3 File
To get your new MP3 off of your phone, first, tap on the back button to go back to your list of MP3s.

You will know that the process worked when you see the MP3 extension on your voice memo.
Tap on the file itself, and then tap on
Share.


You can now share your voice memo to all of the social media you need to or download it to your files.

Those were the two best ways to convert voice memos to MP3 on iPhones. You are now on your way to saving a whole lot of space on your phone.
If you enjoyed what you read, let me know in the comment. Also, please share this article with anyone you know who needs to convert their voice memo into an MP3.