To split the screen on your Mac, you can click and hold the full-screen button in the top left corner or press and hold the Control key while simultaneously pressing the left or right arrow key to move an active window to one side.
Are you looking to maximize your productivity on your Mac? A handy feature available is the ‘Split Screen’ function, a
multitasking gem hidden in plain sight.
This guide will offer step-by-step instructions and tips on efficiently using Split Screen On Mac to
manage two apps or windows side by side conveniently on your Mac.
Ready to
supercharge your multitasking skills? Let’s dive in!
Quick Summary
- Split Screen on Mac allows you to open two apps or windows side by side for enhanced multitasking and productivity.
- Split View in macOS or activate it through Mission Control to split your screen.
- Third-party apps like Magnet, BetterSnapTool, and Divvy provide more control and customization options for split-screen functionality.
- Adjusting and customizing split screens involves resizing and moving windows, using window snapping, and utilizing the various options Split View offers.
How to Use Split Screen On Mac
To use Split
Screen on your Mac, you can utilize the Split View feature in macOS or activate it through Mission Control. Additionally, there are third-party apps available that provide more control over split-screen functionality.
Using Split View in macOS
Start by opening the first app you want to use in
full-screen mode. Press Control + Command + F, the
keyboard shortcut for entering full-screen mode on a Mac.

Next, press Control-Up Arrow or swipe up with three or four fingers on the trackpad to activate
Mission Control. Here, you can see all your open apps and desktops.
Activating Split View with Mission Control
To
activate Split View with Mission Control on your Mac, follow these simple steps:
- Open the apps you want to use in Split View.
- Move your cursor to the top of one of the app windows to reveal the menu bar.
- Click and hold on the green fullscreen button in the window’s top-left corner.
- A drop-down menu will appear with two options: “Enter Full Screen” and “Tile Window to Left of Screen.”
- Select “Tile Window to Left of Screen” from the dropdown menu.
- The app window will snap to the left side of your screen, and all other open app windows will be displayed as thumbnails in Mission Control.
- Click on the thumbnail of another app window you want to use in Split View.
- The second app window will snap to the right side of your screen, creating a split-screen view with both apps side by side.
Using a Third-Party App for More Control
You can also enhance your split screen experience on Mac
using a third-party app that provides
more control and customization options.
These apps offer additional features such as resizing windows precisely, creating custom window layouts, and even saving window arrangements for future use.
They give you more flexibility in managing your workspace and allow you to multitask easily. Some
popular third-party Mac split screen management apps include Magnet, BetterSnapTool, and Divvy.
With these apps, you can take full advantage of the split screen functionality on your Mac and customize it according to your preferences for maximum productivity.
Adjusting and Customizing Split Screen
In Adjusting and Customizing Split Screen, you can easily resize and move windows to suit your preferences. Window Snapping allows for easy alignment of windows, while Split View Options offer additional customization features.
Resizing and Moving Windows
To make the most of your split screen experience on Mac, you’ll want to know how to resize and move windows easily.
Here’s how:
- Click and drag: Move your cursor to the window’s top edge until it turns into a hand icon. Then, click and drag the window to the desired position on your screen.
- Resize from edges: Move your cursor to any edge or corner of a window until you see a double-sided arrow icon. Click and drag the edge or corner to resize the window.
- Full-width resizing: Double-clicking on the window’s top bar will automatically resize it to fill that half of the screen.
- Use keyboard shortcuts: Pressing Control + Left Arrow or Control + Right Arrow will move the active window between halves of the screen.
- Snap windows with Split View: Split View in macOS allows you to automatically snap two windows in equal sizes, making it easier for multitasking. To activate Split View, click and hold on the green maximize button at the top-left corner of an app’s window and choose which half of your screen you want it to occupy.
- Adjusting split sizes: While in Split View, hover over the divider between two apps’ windows until it changes into a double-sided arrow cursor. Click and drag left or right to adjust the size ratio between them.
Using Window Snapping
Window snapping is a handy feature that allows you to
resize and position windows on your Mac quickly.
Here’s how you can use
window snapping to enhance your
split-screen experience:
- To snap a window to the left or right side of the screen, click and drag the window to one edge until you see a translucent outline appear.
- Release the mouse button, and the window will automatically resize and snap into place on the screen’s left or right side.
- If you want to switch the snapped window between the left and right sides, click and drag it towards the opposite edge until it snaps into place again.
- To adjust the width of a snapped window, move your cursor over the separator line between two windows until it changes to a horizontal double-sided arrow.
- Click and drag this separator to resize the windows’ widths according to your preference.
- Hold down the Option key while dragging the separator line if you need more control over window resizing. This allows you to adjust both windows simultaneously, maintaining their relative sizes.
- To unsnap a window from its current position, click and drag it away from the edge until it detaches from its snapped state.
Split View Options
Split View on Mac offers several options to customize and enhance your multitasking experience.
Here are some of the split-view options you can utilize:
- Adjusting Window Size: You can easily resize the windows in Split View by hovering your cursor over the window’s edge until it turns into a double-headed arrow. Click and drag the edge to increase or decrease the size of each window.
- Moving Windows: To rearrange the position of windows in Split View, click and hold the title bar of a window, then drag it to the desired location on either side of the screen.
- Exit Full-Screen Mode: If you want to exit Split View and return to regular full-screen mode for a specific app, move your cursor to the top of the screen and click the green button at the window’s top-left corner.
- Resizing Windows Equally: To have both windows in Split View occupy an equal amount of space on your screen, hover over the divider between them until you see a double-headed arrow, then click and drag to resize them equally.
- Adjusting Split View Orientation: By default, Split View arranges windows side by side horizontally. However, if you prefer a vertical arrangement with one window stacked above the other, click and hold on any window’s title bar while in Split View and drag it towards either edge until a blue highlight appears.
- Opening Additional Apps: While using Split View, you can quickly open additional apps for multitasking. Access Launchpad or use Command + Spacebar to open Spotlight search, then find and open another app as needed.
- Exiting Split View: To exit Split View entirely and return to regular desktop mode with all windows visible, press Control + Up Arrow or swipe up with three or four fingers while in any app’s fullscreen view.
Troubleshooting Split Screen Issues
If you’re experiencing any issues with Split Screen on your Mac, don’t worry – we’ve got you covered! From troubleshooting common problems to providing solutions, this section will help you get your Split Screen up and running smoothly.
Keep reading to resolve any
split screen issues and make the most out of this multitasking feature.
What to Do If Split Screen Isn’t Working
If you’re experiencing issues with split screen on your Mac, here are some troubleshooting steps to help you resolve the problem:
- Check if Split View is supported: Not all Mac models support Split View. Check Apple’s official website or user manual to ensure your Mac is compatible.
- Update macOS and apps: Ensure that your macOS is up to date, as well as the apps you’re trying to use in Split View. Outdated software can sometimes cause compatibility issues.
- Restart your Mac: A simple restart can often resolve minor glitches and refresh system settings.
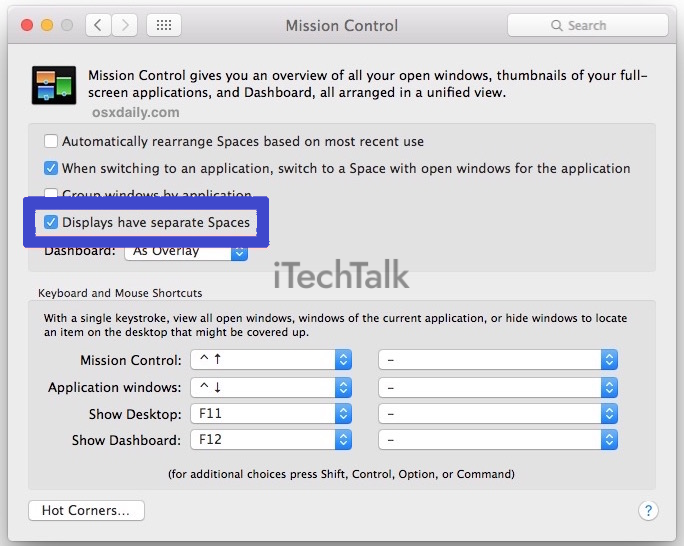
- Disable “Displays have separate Spaces”: Open System Preferences > Mission Control and uncheck the option “Displays have separate Spaces”. Then, log out and log back in to see if it fixes the problem.
- Reset Mission Control preferences: In System Preferences, go to Mission Control and click on the “Reset To Defaults” button. This will reset any custom configurations related to Split View.
- Disable third-party apps: If you have any third-party apps that modify window management or virtual desktops, try disabling them temporarily to see if they conflict with Split View.
- Check for hardware limitations: If using multiple monitors or an external display, ensure your hardware supports the resolution necessary for Split View.
- Contact Apple Support: If none of the above solutions works, contact Apple Support for further assistance and guidance tailored to your issue.
Conclusion
In conclusion, learning to split screen on your Mac can greatly enhance your multitasking capabilities and
improve productivity.
Whether you’re using Split View in macOS, activating it with Mission Control, or using a third-party app for more control, the ability to have
two windows open side by side can make your workflow more efficient.
With the tips and troubleshooting options provided, you can master the art of splitting screens on your Mac and take full advantage of this useful feature. So go ahead and start exploring the world of split screen on your Mac today!
FAQs
1. How do I split the screen on my Mac?
To split the screen on your Mac, you can use two methods. First, you can click and hold the full-screen button in the top left corner of a window and drag it to either side of the screen until it expands to fill half of the display. Alternatively, you can press and hold the Control key while simultaneously pressing the left or right arrow key to move an active window to one side.
2. Can I adjust the size of each split-screen window?
Yes, once you have split your screen, you can adjust the size of each window by hovering over its border until a resizing cursor appears. You can then click and drag that border inward or outward to resize it according to your preference.
3. What if I want more than two windows open in split screen mode?
Unfortunately, macOS only supports splitting the screen into two halves by default. However, third-party apps allow for more advanced multitasking capabilities with multiple windows open at once.
4. How do I exit split screen mode on my Mac?
To exit split screen mode on your Mac, click and hold on any fullscreen button in one of the windows or press the Esc (Escape) key on your keyboard when any active window is selected in Split View mode