One of the ways to dismiss the “Printtool trying to modify” warning is to delete any printers that haven’t been unused for a long period of time. You can do this by selecting Printers & Scanners in System Settings, then clicking the Remove button next to the printer you need to delete. When asked if you’re sure, select Delete Printer.
Printing issues can be some of the most frustrating issues in our modern area. Paper jams and low ink are one thing, but driver issues can be particularly bad. Getting a message like “Printtool is trying to modify the printer settings” is confusing and sounds like an impossible problem to fix.
That’s where this post comes in. I’ll explain exactly what this warning means and all the ways you can dismiss it.
Is The “Printtool Is Trying To Modify The Printer Settings” Warning Some Kind Of Virus?
Don’t panic. This message is not the result of a virus.
“Printtool” is a system process within the driver of your printer that allows users to modify the settings of the printer. This includes changing the paper size, type of toner or ink cartridge, and other printing options.
The software also allows users to customize print jobs and ensure that they are optimized for the best possible outcome. Printtool is a
system process that’s native to macOS and can be viewed in the Activity Monitor.
Getting this warning is a normal thing that is usually due to an unused printer that needs to be deleted, an outdated driver, or the person trying to use the printer does not have permission to do so.
How To Delete Unused Printers
One of the biggest reasons for getting the Printtool warning is an unused printer that’s gumming up the works. This unused printer is confusing your Mac, and removing it may fix your issue.
To delete an unused printer:
- Click the Apple Logo in the top left corner of your screen, then select System Settings.

- Scroll down and click on Printers & Scanners.

- Look through the list of available printers that pop up. Select the printer(s) that appears to not be available.
- Click the minus sign (or Remove button) next to the unavailable printer.
- You will see a message that asks: “Are You Sure You Want To Delete This Printer?“
- Select Delete Printer.
How To Remove An Old Printer Driver And Download The Latest One
The Printtool warning might be your Mac trying to tell you that your printer’s driver is outdated.
Due to the complexity of making sure that every important file is removed before downloading the updated version, it’s best to remove your printer completely from the Utilities folder:
- Open up a Finder window from your Dock.
- At the top of the screen, click the Go Menu, then select the Utilities folder.
- Inside the Utilities folder, locate and click on the Printer Setup Utility.
- Find the printer you need to delete and select it. At the bottom of the window, click Delete Printer.
- You will be asked to confirm that you wish to delete the printer. Click OK.
- To make sure that your printer (and printer driver) are completely deleted, empty your Trash Can.
After you’ve successfully deleted your printer and its driver, you will need to download the latest
software for your printer.
Every printer is obviously different, both in its capabilities and its manufacturer. It will be up to you to research your manufacturer’s website and the page you need to download your software from.
Here are some generalized instructions on how to download your printer’s latest driver:
- Visit the manufacturer’s website, locate the model of your printer and download the latest software package (which will contain the correct and most recent printer driver).
- Once you have downloaded the driver, double-click on the file to begin the installation process. Follow any prompts that appear during installation.
- Once the installation is complete, open up a Finder window.
- In the Go Menu at the top of the screen, select Utilities.
- In this folder, open Printer Setup Utility, select your printer from the list of available printers, and click on Add Printer or Scanner at the bottom of the window to finish the setup.
How To Give Necessary User Privileges
The final way to get rid of the Printtool warning is by giving yourself the privilege of using the printer. It sounds strange, especially if you brought the printer, but your Mac may need to be told that you have permission to use it.
Here is how to give permission to use your printer for yourself or another user:
- Open up Spotlight, either by pressing Command + Space Bar or by clicking the Spotlight icon in the Menu Bar.
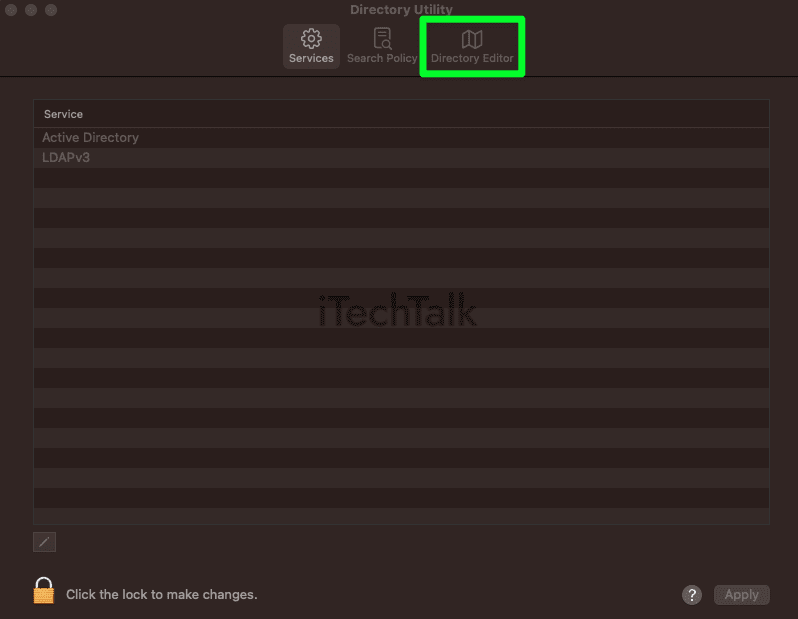
- Type in Directory Utility.

- Select the Directory Editor tab.
- In the Viewing drop-down menu, select Groups.
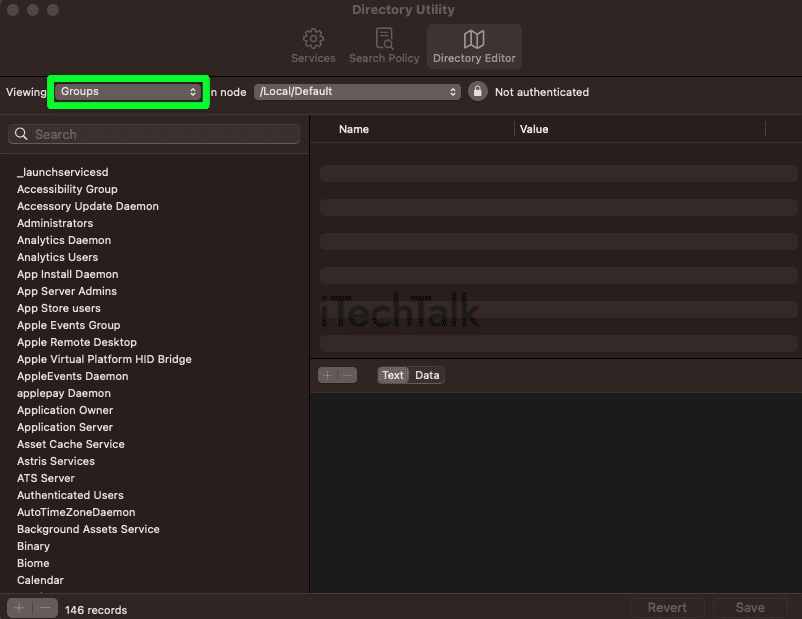
- Type Print in the search box.
- In the results that pop up, select Print Administrators.

- You will see a little Lock icon next to the words Not Authenticated. Click it to open up a pop-up window. In this window, enter your User name and your password.

- Click on Group Membership. Then select the Add button (the Plus sign) near Group Membership.
- Enter your Username or the Username that keeps getting the Printtool warning.

- Click on Save, then close the Directory Utility.
- Restart your Mac, by clicking the Apple Logo and selecting Restart.
- After your computer boots back up, test out the printer and see if the issue has been fixed.
Conclusion
There are three reasons why you may be getting the “Printtool is trying to modify the printer settings” warning:
- There’s a printer that needs to be deleted
- A driver that needs to be updated
- A Username that needs permission to use an available printer.
Attempting each one of these solutions is bound to get your printer printing again.