Getting the “cannot verify server identity on imap.gmail” on your iPhone is a confusing warning. This warning is due to the Mail App not connecting properly with the servers and is not restricted to Gmail alone. To fix this, you can try restarting your device, updating your iOS, or removing your email account and adding it back.
Email is supposed to be easier than traditional snail mail. It usually is, but when you get a warning like the “cannot verify server identity on imap.gmail”, it can feel like you should quit using email altogether and break out the stamps. Don’t worry though, there are fixes for this issue. I’m going to cover all of these solutions below.
What Is the “Cannot Verify Server Identity On imap.gmail” On iPhone?
Cannot Verify Server Identity is an error
iPhone users may see when connecting to a mail server.
This can happen if the mail server’s SSL certificate is not set up correctly or if the iPhone cannot verify the server’s identity.
What Are The Causes Of The “Cannot Verify Server Identity” Error?
This error is often associated with Apple’s Mail App.
One possible cause of the “Cannot Verify Server Identity” error on an iPhone is that the device is trying to connect to a server that has an invalid or self-signed SSL certificate.
This can happen if someone tries to spoof a legitimate website or the server’s administrator has not properly configured the server.
Another possibility is that the device’s clock is not set correctly, which can cause it to fail to verify the server’s identity.
A Possible Bug
There is a “bug” in iPhone & iOS that causes an error message to appear when trying to connect to a mail server using SSL. This is because the iPhone & iOS do not trust the server’s SSL certificate.
To fix this, you must install a server certificate on the iPhone & iOS. You can do this by going to
Settings > Mail, Contacts, Calendars > Account > Advanced > SSL.
How To Fix The “Cannot Verify Server Identity” Issue
There are plenty of ways to try and solve this issue. I’ll be covering the easy ways of doing this, as well as the more difficult ones.
Close the Mail App and Reopen it:
If your Mail app isn’t working properly, one thing you can try is to close the app and then reopen it. This can sometimes fix minor glitches and get the Mail app working again.
To close the Mail app, tap and hold onto the app until you see an
X pop up in the corner. Tap on it to close the app down.
Related Reading
Restart Your Device
If your device is unresponsive, or if you’re experiencing other problems, one troubleshooting method you can try is restarting your device. This will often fix minor issues and help your device run more smoothly.
Restarting your device depends on the model you own. If you’re not sure how to restart your iPhone, you can
click here.


Remove Your Email Account And Add It Back:
Removing your email account and adding it back will often fix minor issues with your email account.
- To remove your email account, go to the Settings app and tap on Accounts & Passwords.
- Then tap on the email account that you want to remove.
- Tap on the delete button and confirm that you want to delete the account.
- Once the account is deleted, go back to the Accounts & Passwords page and tap on Add Account. Then follow the prompts to add your email account back.
Update iOS And Carrier Settings:
As an iPhone user, you should keep your software up to date. This includes both the iOS operating system and the “carrier settings” that come from your cell phone carrier.
To update your iOS:
- Connect your iPhone to a power source and a Wi-Fi network
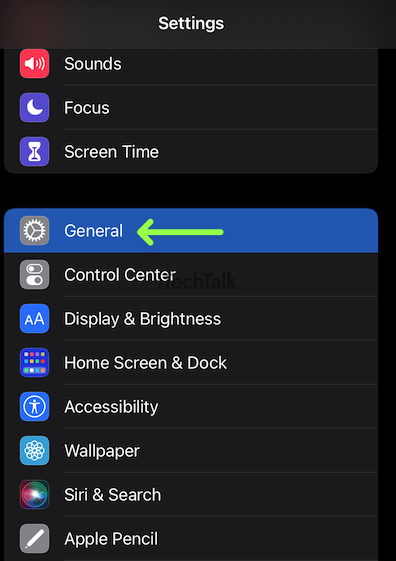
- Go to Settings > General > Software Update.
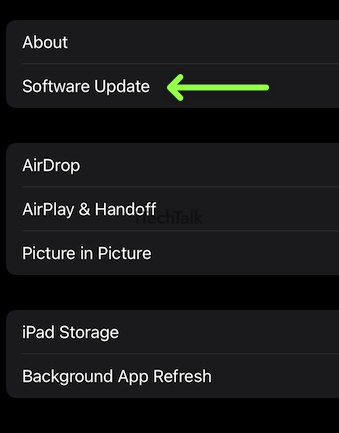
- Tap Download and Install if an update is available.

To update your carrier settings:
- Connect your iPhone to a power source and a Wi-Fi network
- Go to Settings > General > About
- If an update is available, you’ll see an option to Update Carrier Settings.
Reset All Settings
Reset All Settings is an option found in the Settings app that lets you reset all of your device’s settings to their defaults. This can be useful if you’ve made a lot of changes to your settings and want to start fresh or if you’re having problems with your device and want to try resetting it to see if that helps.
Keep in mind that Reset All Settings will not delete any of your data or apps, but it will reset all of your device’s settings to their default values.
To reset your device’s settings:
- Open up your Settings app.
- Go to General > Reset.
- Tap on Reset All Settings and enter your passcode when prompted.
Disable SSL
Some websites offer the option to disable SSL, which can be helpful if you’re having trouble accessing a site.
To do this, you’ll need to edit the site’s URL. In the address bar, find the “
https://” portion of the URL and delete it. Then, type in “
http://” in its place. This should allow you to access the site without any problems.
Keep in mind that this method will make your connection less secure, so only use it if you absolutely need to.


Your Last Resort: Factory Reset
A factory reset, also known as a master reset, is a software restore of an electronic device to its original system state in an attempt to restore it to its original manufacturer settings.
A factory reset is often necessary when an electronic device begins to malfunction or perform erratically. Sometimes this is the only way to return the device to its original working state.
To do this, go to the Settings app and tap
General > Reset. Then tap on
Erase All Content and Settings. You’ll need to enter your passcode to confirm.
Remember, this is a last resort.
Use Tenorshare ReiBoot
If you’re looking for a quicker way to solve your “Can not Verify Server Identity,” you can download the Tenorshare ReiBoot software.
Once you download this software, you just need to plug your iOS device to your computer and run it.
Tenorshare Reiboot can fix all sorts of problems with your iOS device. This software is a hundred percent worth it if you want to try it this way.

Did one of these solutions fix your “cannot verify server identity” issue? If so, please leave a comment and let me know which one.
Also, if you know someone who’s stuck with this problem, please share this article with them.