Are you struggling with
managing storage space on your iPad or simply looking to declutter and remove all photos in one fell swoop? You’ve come to the right place.
In this blog post, we will walk you through
multiple methods how to
delete all photos from iPad quickly and efficiently, as well as share some tips for
safe deletion and
alternative ways to manage your digital memories.
Quick Summary
- There are two main methods for deleting all photos from an iPad: using the Photos app or utilizing third-party apps.
- Before permanently deleting any photos, it’s important to back them up in case they’re needed later. This can be done through syncing with a computer or cloud storage services like Google Drive or Dropbox.
- Checking iCloud storage and disabling photo syncing can also help ensure the safe deletion of photos. Additionally, users can organize their remaining photos into albums for easier management and use cloud storage services for additional backup and organization capabilities.
Methods For Deleting All Photos From IPad
There are two main methods for deleting all photos from an iPad: using the Photos app to select and delete all photos or utilizing third-party apps.
Using The Photos App To Select And Delete All Photos
Deleting all
photos from your iPad is a simple process with the Photos app.

Below are the steps to quickly remove all pictures from your device:
- Open the Photos app on your iPad.
- Tap on the “Library” tab on your screen’s bottom.
- Select “All Photos” to view every image stored on your device.
- In the top right corner, tap “Select” to enable photo selection.
- You can now swipe through and manually select each photo or press Command+A on a connected keyboard to select all photos in one go.
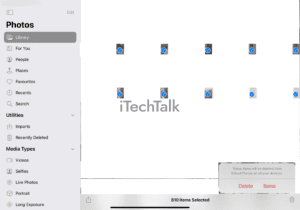
- After selecting all images, tap the trash icon in the top right corner.
- Confirm the deletion by tapping “Delete (number) Items.”
- Be aware that deleted photos will be moved to the “Recently Deleted” folder for 30 days before being permanently erased.
- To delete these photos, open the Recently Deleted folder from your Library and tap “Select.”
- Choose any remaining photos, or tap “Delete All,” followed by a confirmation prompt.
Remember that this method may not remove photos from other synced devices or iCloud storage, so double-check each platform as needed. And always back up any valued images before performing any bulk deletion tasks!
Utilizing Third-party Apps
There are several
third-party apps available that can help with bulk photo deletion on an iPad.
Here are some examples:
- iMyFone Umate Pro: This app is designed for iOS devices and can permanently erase photos from an iPad with just a few clicks.
- PhoneClean: Another app that specializes in cleaning up junk files and unwanted data from iOS devices, including photos.
- Gemini Photos: This app uses AI technology to scan and identify duplicate or similar photos, making it easier to delete them in bulk.
- Image Cleanup: A simple app allowing users to select multiple photos and delete them quickly.
- Clean Master: While primarily designed as a tool for cleaning up Android devices, this app also offers a similar feature for bulk photo deletion on iOS devices like the iPad.
It’s important to note that while third-party apps can help delete photos from an iPad, users should always be cautious about downloading and using these apps, as they may not always be reliable or secure.
Tips For Safe Deletion Of Photos
Backing up photos is crucial before deleting all photos from your iPad. Additionally, checking iCloud storage and disabling photo syncing can help ensure safe deletion.
Backing Up Photos
As an SEO and copywriter, I know how vital it is to back up important data regularly. It’s no different with your photos on iPad.
Before permanently deleting any photos from your device, it’s essential to back them up in case you need them later.
One way to do this is by regularly syncing your iPad with a computer or laptop using iTunes or iCloud.
Another option for backing up photos is
cloud storage services like
Google Drive or Dropbox. These services store your photos in the cloud, making them accessible from anywhere as long as you have an internet connection.
In summary, backing up photos before deleting them from an iPad should be a
top priority for everyone who values their memories.
Checking iCloud Storage
To ensure the safe deletion of photos from an iPad, it is essential to check the iCloud storage. An iPad’s storage may be linked with other iOS devices, and
deleting photos on one device might also delete them on others.
Checking iCloud storage helps identify any problems with syncing or automatic backups and ensures that important data stays secure.
To check iCloud storage, users can go to “Settings,” then “iCloud,” and select “Storage.” Here users can see how much space they have left in their iCloud account and what type of data takes up the most space.
If there are issues with backing up photos to iCloud,
freeing up some cloud storage by deleting unnecessary files could help resolve the problem.
Disabling Photo Syncing
To ensure that photos are permanently deleted from an iPad, it’s important to
disable photo syncing.
This prevents new photos from being added to the device and ensures all
deleted photos won’t reappear when synced with iCloud or other devices.
To do this, go to Settings, then tap on your Apple ID at the top of the screen.
It’s also a good idea to check for duplicate photos in iCloud before disabling syncing. This can be done by signing into your
iCloud account on a computer and checking which photos have been uploaded already.
Additionally,
deleting large videos or apps can help free up more storage space on your iPad.
Permanently Erasing Photos From The Device
If you want to get rid of your photos on your iPad permanently, there are some steps you can take. First, make sure to back up any important pictures before deleting them.
It’s important to note that once photos are permanently deleted from an iPad, they may still exist on other synced devices or in cloud storage services like iCloud.
To ensure the complete removal of these images, consider wiping out the photo album or disabling photo syncing altogether.
Alternative Methods For Managing Photos On An iPad
Organizing photos into albums can help users quickly access and group their photos while using cloud storage services for photo storage. Management provides an additional backup layer in case of data loss or damage to the device.
Organizing Photos Into Albums
As someone who loves taking photos, I know how quickly the Camera Roll on my iPad can become cluttered. One way to
keep things tidy and make it
easier to find specific photos is by organizing them into albums.
Here are some tips for doing just that:
- Open the Photos app and select “Library.”
- Scroll through your photos and select the ones you want to add to an album.
- Tap “Add To” at the bottom of the screen and then select “New Album.”
- Give your album a name and tap “Save.”
- To add more photos to an existing album, select the photos and tap “Add To,” followed by the album’s name.
- To view your albums, go back to the main menu of the Photos app and select “Albums.” From there, you can easily access all of your organized photos.
Organizing your photos into albums makes them easier to find and frees up space in your Camera Roll since you can
delete duplicate or unwanted photos after they have been added to an album.
Using Cloud Storage Services For Photo Storage And Management
One alternative method for managing photos on an iPad is to use
cloud storage services like iCloud, Google Photos, or Dropbox.
These services allow you to store and access your photos from any device connected to the internet.
Syncing your photos with a cloud-based service allows you to easily organize, share, and edit them without taking up space on your iPad.
The added benefit of using these services is that they offer automatic backups of your photos in case something happens to your device.
With iCloud specifically, there is also an option for
optimized photo storage which will automatically upload original copies of all new images and videos to the cloud while leaving lower-resolution copies on the device so as not to take up too much space.
Syncing Photos With A Computer For Backup
One way to ensure the safety of your photos before deleting them from your iPad is to sync them with a computer for backup.
Here are the
steps to follow:
- Connect your iPad to your computer using a USB cable.
- Open iTunes on your computer.
- Click on the device icon in the top-left corner of iTunes.
- Select “Photos” from the options on the left-hand side of the screen.
- Check the box beside “Sync Photos.”
- Choose where you want to sync your photos from (e.g., iPhoto or Aperture).
- Select whether you want to sync all photos or only selected albums.
- Click on “Apply” in the bottom-right corner of iTunes.
- Wait for iTunes to finish syncing your photos with your computer.
By following these steps, you can have peace of mind knowing that your important photos are backed up on your computer before deleting them from your iPad.
Conclusion And Summary Of Steps To Delete All Photos From IPad
In conclusion, deleting all photos from an iPad can be done using the Photos app or third-party apps, and it’s important to take caution when permanently erasing photos by backing them up first.
Choose The Desired Method
When it comes to deleting all photos from an iPad, multiple methods are
available.
Some users prefer the traditional method of selecting and deleting photos individually through the Photos app, while others opt for third-party apps that can assist with bulk photo deletion.
Whatever method you choose, it is important to back up
any important photos before permanently erasing them from your device.
Once you’ve selected your desired method,
select all photos in your library and confirm the deletion.
It’s also a good idea to
double-check for any missed photos and ensure
syncing is disabled on other devices to avoid accidental deletion elsewhere.
Select All Photos
One of the simplest ways to delete all photos from an iPad is by selecting all photos at once. This can be accomplished within the Photos app on your device.
To
select all photos, open the Photos app and tap on “Library” at the bottom of the screen.
Next, tap “Select” in the upper right-hand corner of your screen and press down with two fingers anywhere in your photo library to enable
multiple selection mode.
You can now
swipe left or right using one finger to select individual photos or drag both fingers across the screen to select many photos at once quickly.
It’s important to note that when deleting large quantities of photos, it’s easy to miss a few here and there inadvertently.
Confirm Deletion
Before confirming the deletion of all photos from your iPad, it is essential to double-check and ensure that you have selected all the desired images. Once you confirm the deletion, there is no way to undo it.
Moreover, if you have synced your iPad with devices like an iPhone or computer, deleting photos may not delete them from these other devices.
Therefore, checking whether you want to keep copies of specific images on other synced devices before confirming photo deletion is crucial.
Double-check For Any Missed Photos
After selecting and deleting all photos from your iPad, it’s important to
double-check for any missed photos. One way to do this is by reviewing the
Recently Deleted folder in the Photos app.
It’s also good to
check other synced devices like your iPhone or computer to ensure all unwanted photos have been successfully removed.
Enjoy The Freed-up Storage Space On Your IPad.
Once you have deleted all your unwanted photos from your iPad, you should notice a
significant increase in available storage space.
This will allow you to download new apps or take more photos without worrying about running out of room on your device.
It can also
improve the performance of your iPad by
freeing up storage that may have been slowing down the device. With this newfound space, you can
use your iPad without managing and constantly deleting photos.