Are you worried about
accidental touches on your iPad or want to
restrict access for your kids while they use the device? You’re in the right place!
In this blog post, we will provide a
step-by-step guide on how to
lock iPad screen from touch using various methods like
Guided Access and
AssistiveTouch.
Whether it’s ensuring uninterrupted video playback or setting up
parental controls, these handy solutions can make all the difference.
Quick Summary
- Locking the iPad screen from touch is useful in various situations, such as when using it with children or to prevent accidental touches.
- Different methods include disabling touch screen settings, using Guided Access, AssistiveTouch, or the Sleep/Wake button.
- Customizing settings for better usability and adding security measures like restricting certain features through Accessibility Settings can optimize your iPad experience.
- Other ways to limit access on an iPad include parental controls and setting up a passcode for added protection.
Understanding The Need To Lock Your iPad Screen From Touch
As a tech-savvy individual, I can attest to the numerous reasons why one might want to
lock their iPad screen from touch. For instance, many parents seek ways to limit their child’s access to certain apps or content on the device.
By locking the screen, they ensure that kids only engage with age-appropriate and safe material.
Another common scenario is watching videos on your iPad – who hasn’t experienced those accidental touches that pause or close the video at an exciting moment?
Locking the screen prevents these unintended interruptions and lets you enjoy your media in peace.
Moreover, professionals often need this
functionality during presentations when they display important information on an iPad for a group of people.
Disabling touchscreen input isn’t just limited to kids and entertainment purposes; it also plays a crucial role in
maintaining privacy and security for
sensitive data on iPads used by businesses or even individuals concerned about prying eyes snooping through their files.
Different Methods To Disable Touchscreen On iPad
There are various ways to disable the touchscreen on your iPad, including disabling touchscreen settings, using the triple-click method, and locking the screen using
Guided Access or AssistiveTouch.
Disabling Touchscreen On iPhone And iPad
To disable the touchscreen on your iPhone or iPad, there are a few methods you can use:
- Triple-click Method: By triple-clicking the side/power button, you can enable/disable the touchscreen on iPhone and iPad.
- Guided Access: This feature allows you to disable certain parts of the screen or disable touch input entirely. Go to Settings > Accessibility > Guided Access to turn this on.
- AssistiveTouch: This feature places a virtual button on the screen that you can use to lock or unlock the screen. Go to Settings > Accessibility > Touch > AssistiveTouch to turn this on.
Remember that when using Guided Access, you need to set up a passcode beforehand, and don’t forget to tap “End” in the top left corner of the screen when exiting Guided Access mode.
Triple-click Method
Another way to
disable the touchscreen on your iPad is through the
Triple-click Method.
This option works for both iPhones and iPads, and it involves pressing the power button or side button three times quickly.
This method can come in handy when you need to
prevent accidental touches while holding your iPad while watching videos or reading e-books.
It’s also useful when
handing over your device to kids with difficulty keeping their hands still.
How To Lock iPad Screen From Touch
There are three ways to lock the iPad screen from touch: Guided Access, AssistiveTouch, or the Sleep/Wake button.
Using Guided Access
If you want to lock your iPad screen from touch, using Guided Access is a handy feature.

Here are some steps to follow when using Guided Access:
- To enable Guided Access, go to Settings > Accessibility and turn it on.
- Open the app you want to use and triple-click the Home button.
- Adjust any settings for Guided Access, such as disabling certain buttons or features.
- Set up a passcode for Guided Access by going into Passcode Settings.
- Tap on Start in the top right corner of the screen.
- To exit Guided Access, tap on the End button in the top left corner of the screen and enter your passcode.
- You can also set up an Accessibility Shortcut for easy access to Guided Access by going into Accessibility settings and enabling it.
Overall, using Guided Access is a great way to lock your iPad screen from touch when you need to keep children within a specific app or limit access for security purposes.
Remember that setting up a passcode is crucial for added protection.
Using AssistiveTouch
AssistiveTouch is a useful accessibility feature that can also help lock the iPad screen from touch.
Here’s how to use it:
- Go to Settings, then General, and select Accessibility.
- Scroll down and tap on AssistiveTouch.
- Turn on the toggle switch next to AssistiveTouch.
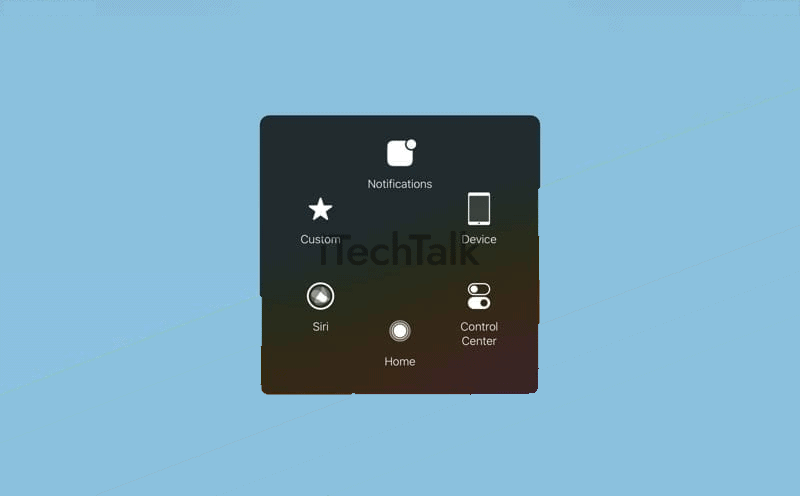
- A small, circular button will appear on your screen – tap it to access AssistiveTouch options.
- Select Device, then tap and hold Lock Screen until “Slide to power off” appears.
- Swipe the “Slide to power off” slider to turn off your iPad’s touchscreen.
Note: To unlock your device after using AssistiveTouch, press the home button twice or use Touch ID if enabled.
AssistiveTouch can easily lock your iPad screen from touch with just a few taps – no need for multiple button presses or setting up Guided Access.
Using The Sleep/Wake Button
Another simple method to lock your iPad screen from touch is using the Sleep/Wake button. Located on the top of your iPad, pressing this button will put your device to sleep and turn off the screen.
To unlock it, simply press the button again or use Touch ID if enabled.
However, remember that this option does not provide as much security as the earlier methods.
Tips And Tricks For Using Guided Access And AssistiveTouch
Customize Guided Access settings for better usability, enable Accessibility Shortcut for convenient access, and restrict certain features for added security.
Customizing Settings For Better Usability
Customizing settings can help use Guided Access and AssistiveTouch more
user-friendly and
efficient.
Here are a few tips:
- Enable Accessibility Shortcut: This feature allows quick access to Guided Access and AssistiveTouch by triple-clicking the Home button or side button.
- Set up a Passcode: Setting up a passcode for Guided Access helps prevent unauthorized exit from the locked screen.
- Restrict Certain Features: In the Guided Access settings, you can choose which features should be disabled while in use, such as volume buttons or touch input.
- Adjust Time Limits: You can set a time limit for Guided Access sessions or adjust the idle timer to end the session automatically after a certain period of inactivity.
- Customize Touch Gestures: With AssistiveTouch, you can customize different touch gestures to perform specific actions, making navigating your iPad without touching the screen easier.
By customizing these settings, you can optimize your iPad experience and make it easier to use Guided Access and AssistiveTouch to lock your screen from touch.
Enabling Accessibility Shortcut For Convenient Access
If you find yourself using
Guided Access and
AssistiveTouch frequently, it might be convenient for you to enable the Accessibility Shortcut.
This lets you quickly turn on these features by
triple-clicking the Home button.
To set up this shortcut, go to Settings > General > Accessibility > Accessibility Shortcut and select
Guided Access or AssistiveTouch (or both).
I find this feature very useful as I am always
switching between different accessibility settings based on my needs at that time.
Restricting Certain Features For Security
As a security measure, you can restrict certain features on your iPad by enabling Guided Access. This feature allows you to
limit access to certain areas of the screen or disable functions such as volume control or touch input entirely.
For example, if you’re demonstrating an app and want to ensure that the user doesn’t accidentally exit the app or make unwanted changes, you can use Guided Access to lock down those parts of your screen.
FAQs And Additional Tips
– Other Ways to Limit Access on iPad: For additional security measures, consider setting up a passcode for your iPad and enabling Touch ID.
– How to Lock Screen on iPad While Watching Video: To lock the screen while watching a video, tap the Sleep/Wake button once.
– How to Disable Touch Screen on iPad for Kids: Enable Guided Access and set restrictions within the selected app to prevent accidental taps or access to other apps.
– How to Lock iPhone Screen from Touch: Follow similar steps as locking an iPad screen with Guided Access or using the Sleep/Wake button.
– Setting up Passcode for Guided Access on iPhone: Go to Settings > General > Accessibility > Guided Access and turn it on. Tap Passcode Settings and enter a passcode.
– Preventing Accidental Touch on iPad: Adjust your settings by enabling AssistiveTouch or changing your device’s touch sensitivity level in the Accessibility settings of the Settings app.
Other Ways To Limit Access On iPad
If you’re looking to limit access to your iPad beyond just disabling touch, a few options are available.
Here are some other ways to limit access on an iPad:
- Use parental controls: The Screen Time feature on newer iPads allows parents to set time limits for certain apps and monitor their children’s usage.
- Set up a passcode: While this doesn’t necessarily prevent others from using the iPad, it does prevent unauthorized access to sensitive information or purchases.
- Use Touch ID or Face ID: If your iPad has these features, enabling them can ensure that only approved users can unlock the device.
- Enable restrictions: The Restrictions menu in the Settings app allows you to disable certain apps and features altogether, such as the camera or Siri.
- Set an auto-lock timer: You can adjust the time before your iPad automatically locks itself when left idle, which can help prevent unauthorized use.
- Use a lock screen wallpaper: Many third-party apps allow you to add a custom message or image to your lock screen, which can discourage anyone from attempting to use your iPad without permission.
Remember that
no solution is foolproof when limiting access on an iPad – it’s important to consider multiple options and customize them based on your specific needs and concerns.
How To Lock Screen On iPad While Watching Video
If you want to lock the screen on iPad while watching a video, a few options are available. One way is to use
Guided Access, found in the
Accessibility settings.
Open the video app or website you want to watch and triple-click the home button (or side button on newer models) to enable Guided Access.
Another option is to enable
Auto-Lock in your iPad’s display settings. This will cause your device to lock automatically after a certain period without activity, so long as it is not plugged in or charging.
How To Disable Touch Screen On iPad For Kids
As a parent, it can be difficult to monitor your child’s screen time and keep them from accidentally opening unwanted apps or making accidental purchases. Fortunately, there are a few ways to disable the touch screen on iPad for kids.
One option is to use
Guided Access, which lets you lock the iPad into one app and disable certain features, such as touch input. To enable Guided Access, go to Settings > Accessibility > and toggle it on.
Another way to
disable touch input on an iPad is by using
AssistiveTouch. This feature creates a virtual home button that can be used instead of the physical one.
To enable AssistiveTouch, go to Settings > Accessibility > Touch > AssistiveTouch and toggle it on.
By disabling the touch screen through these methods, parents can have peace of mind knowing their children won’t accidentally navigate away from educational games or potentially harmful content while using their iPads.
How To Lock iPhone Screen From Touch
To lock the iPhone screen from touch, access the
Accessibility menu under Settings. From there, select
Guided Access and turn it on.
Next,
set up a passcode for Guided Access in Passcode Settings.
Guided Access will
restrict touch input to only one specific app or feature until you exit it using the End button in the top left corner of your screen.
It’s an excellent way to
prevent accidental touches or limit access for children attempting to navigate outside a designated app or game.
Conclusion
Locking the iPad screen from touch can be useful
in various situations, such as when using it with children or to prevent accidental touches.
This blog has outlined different methods to disable the touchscreen on your iPad, including using Guided Access and AssistiveTouch.
It’s easy to customize settings for better usability and added security measures like restricting certain features through Accessibility Settings.
Remember that
Triple-click Method is also another handy way to disable the touchscreen on the iPhone or iPad quickly.