Are you looking to
enhance the security of your Mac by
encrypting your data? You’re in luck! FileVault, a
built-in disk encryption program available on
Mac computers, is specifically designed for this purpose.
This blog will provide a
step-by-step guide on how to turn on FileVault and
start protecting your sensitive information today.
Stick around; We’ve lots to share about
safeguarding your digital world with FileVault!
Quick Summary
- FileVault is a built-in disk encryption program for Mac computers that enhances security by encrypting your data.
- Enabling FileVault protects sensitive information, prevents unauthorized access, and safeguards against data theft on your Mac.
- To turn on FileVault on macOS, open System Preferences, go to Security & Privacy, click on the FileVault tab, click on the lock icon, enter your admin password, and then click “Turn On FileVault.”
- Creating and storing a recovery key for emergencies is important when using FileVault. The recovery key is a backup plan if you forget your login password or lose access.
Why Use FileVault for Mac Data Encryption
FileVault is an essential security feature that protects sensitive information, prevents unauthorized access, and safeguards against data theft on your Mac.
Protects sensitive information
Securing sensitive information is a top priority, and that’s where FileVault steps in. As an excellent security feature on Mac computers, it performs
on-the-fly encryption to protect your data.
This means each time you create or edit a document, add new photos or download files, FileVault encrypts them immediately.
Your important documents, personal photos, and confidential financial records – all become
unreadable to anyone without the correct credentials.
Even if your Mac gets lost or stolen, the thieves can’t access this encrypted data without your administrator’s name and password.
Now breathe easy knowing that your sensitive information remains safe and secure with FileVault enabled
under robust Mac encryption software layers.
Prevents unauthorized access
FileVault is a powerful tool that
prevents unauthorized access to your sensitive data on your Macbook. By enabling FileVault, you create an
additional layer of security that protects your files and documents from prying eyes.
With FileVault activated, anyone without the necessary login credentials cannot view or modify your encrypted data.
When you turn on FileVault, it
encrypts the entire contents of your startup disk automatically.
This means that even if someone gains physical access to your Macbook or removes the hard drive, they won’t be able to read the encrypted information without the correct password or recovery key.
With this level of protection, you can have peace of mind knowing that your personal and confidential information remains secure.
Remember, creating and safely storing a recovery key for emergencies is crucial when using FileVault. If you forget or lose access to your login password, the recovery key is a backup plan to regain control over your encrypted data.
Safeguards against data theft
FileVault is an incredibly important feature for Apple MacBook owners as it
safeguards against data theft. By enabling FileVault, you can ensure your
sensitive information remains secure and
protected from unauthorized access.
With the increasing prevalence of cyber threats and data breaches, it has become crucial to take proactive measures to safeguard your personal and confidential data.
Encrypting your Mac’s disk with FileVault adds a
layer of security that prevents anyone without the correct login credentials from accessing your files or stealing valuable information.
With FileVault activated, even if your MacBook gets lost or stolen, you can have peace of mind knowing that your data is encrypted and cannot be easily accessed by unauthorized individuals.
Don’t compromise the security of your valuable information – turn on FileVault today!
How to Turn On FileVault on macOS
To turn on FileVault on macOS, open System Preferences, go to Security & Privacy, click on the FileVault tab, click on the lock icon, enter your admin password, and then click “Turn On FileVault.”
Open System Preferences
Follow these steps to turn on FileVault and protect your sensitive data on your Macbook. First,
open System Preferences on your Mac.
This can be done by clicking on the Apple menu in the top left corner of your screen and selecting “System Preferences.” Once you have opened System Preferences,
navigate to the “Security & Privacy” option.

In the Security & Privacy window,
click on the “FileVault” tab. You may need to click the lock icon at the bottom left corner and enter your administrator password to make changes.
Finally,
click “Turn On FileVault” to enable this essential data encryption feature for enhanced security.
By enabling FileVault through these straightforward steps, you proactively safeguard your important information from unauthorized access or potential data theft.
Go to Security & Privacy
To
turn on FileVault and secure your Mac data, you’ll need to navigate to the Security & Privacy settings.
Here’s how:
- Click on the Apple menu at your screen’s top left corner.
- Select “System Preferences” from the drop-down menu.
- In the System Preferences window, click on “Security & Privacy.”.
- Next, navigate to the “FileVault” tab in the Security & Privacy preferences.
- To make changes, click the lock icon at the window’s bottom-left corner and enter your administrator password when prompted.
- Once unlocked, click “Turn On FileVault” to enable disk encryption and protect sensitive information.
Click on the FileVault tab
To
turn on FileVault and
enable data encryption on your Mac, navigate to the “FileVault” tab in your Mac’s
Security & Privacy settings. Once you’ve opened
System Preferences, go to Security & Privacy and find the
FileVault tab.
Here, you will see options related to FileVault activation and management. By clicking on this tab, you can easily access the necessary settings to protect your sensitive information from unauthorized access and potential data theft.
Remember that enabling FileVault adds an
extra layer of security to your Mac by encrypting your files, making them accessible only with the correct login credentials.
Click on the lock icon and enter your admin password
To
turn on FileVault and ensure the security of your Mac’s data,
click on the lock icon within the Security & Privacy settings. This action prompts you to
enter your admin password, confirming that you have administrative access to make changes.
It is essential in enabling FileVault and protecting sensitive information from unauthorized access or theft.
Remember that by entering your admin password, you are taking a proactive measure toward safeguarding your data privacy and adding an extra layer of security to your Macbook.
Click on “Turn On FileVault”
To turn on FileVault and activate the powerful
data encryption feature on your Mac, follow these simple steps. First, open
System Preferences and navigate to the
Security & Privacy section.
Next, click on the FileVault tab.
You will notice a lock icon in the bottom left corner – click on it and enter your
administrator password when prompted. Now, with the lock unlocked, you can easily click “Turn On FileVault” to initiate the encryption process for added security and protection of sensitive information.
Remember, enabling FileVault may take some time as it encrypts your home folder into a secure FileVault file that only you can access with your login credentials.
Creating a Recovery Key for FileVault
To ensure the security of your encrypted data, it is important to
create a recovery key for FileVault, which acts as a backup in case you forget your password or encounter any issues with accessing your data.
Choose to create a recovery key
To further enhance the security of your encrypted data, creating a recovery key when turning on FileVault is highly recommended.
This recovery key serves as an
additional layer of protection in case you forget your password or encounter any issues accessing your encrypted files.
Creating a recovery key ensures that there’s always a way to
regain access to your important information if necessary.
It’s crucial to store this recovery key safely, separate from your computer, such as a secure external drive or even in cloud storage.
The importance of the recovery key cannot be understated. It acts as a
lifeline that allows you to reset your password and decrypt your files should the need arise.
So take that extra step and set up this essential safeguard with FileVault encryption on your Macbook for added peace of mind.
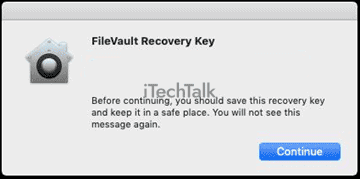
Store the recovery key in a safe location
After creating a recovery key for FileVault, it is crucial to
store it in a secure location. This ensures you can
access your encrypted data if you ever forget your password or experience other issues.
Remember, there is no way to recover your data without the recovery key! Consider saving the recovery key on an external USB drive or securely storing it in a password manager.
By keeping the recovery key safe and easily accessible only to yourself, you can have peace of mind knowing that your encrypted data always remains protected.
Understand the importance of the recovery key
The recovery key is a crucial element when enabling FileVault on your Mac. It
acts as a safeguard if you forget your login password or experience issues accessing your encrypted data.
Think of it as a spare key to unlock your files when needed.
Creating and storing the recovery key in a safe location ensures that you have a
backup plan to regain access to your encrypted files.
Remember, without the recovery key, there is no way to recover or reset your password and retrieve your data if you forget it.
So, keep this key safe and separate from your computer for added security.
Enabling FileVault with a recovery key provides an extra layer of protection for your sensitive information while maintaining easy access for authorized users.
It’s always better to be prepared and have peace of mind knowing that even if something unexpected happens, you can still securely access important files on your Macbook.
Encryption Process and Activation
During the encryption process, FileVault will convert your home folder into a secure encrypted file, ensuring your data is protected.
Learn more about activating and managing FileVault on macOS for enhanced data security and peace of mind.
FileVault encryption process initiates
To ensure the utmost security for your Macbook, FileVault initiates the
encryption process as soon as you enable it. This means that all the
data on your computer will be encrypted and protected from unauthorized access.
It’s important to note that once FileVault is turned on, the initial encryption process may take some time.
This ensures that
every bit of information on your device is securely locked away, safeguarding your data in case your Mac ever gets lost or stolen.
With FileVault active, you can have peace of mind knowing that your
sensitive information is always confidential and protected.
Wait for the encryption process to complete
Enabling FileVault on your Mac initiates the
encryption process to protect all your data. During this time, you’ll need to
wait patiently for the encryption process to complete.
It’s essential to note that this process may take some time, depending on the amount of data and system specifications. Once the encryption is finished, your files will be secured and protected from unauthorized access.
Remember, during this period, it’s crucial not to interrupt or shut down your Mac to avoid any potential complications with the encryption process.
Once completed, you can enjoy
enhanced security and peace of mind knowing your confidential information is safe against potential threats.
User login becomes necessary to access encrypted data
To ensure your encrypted data’s security, a user
login is necessary.
Once
FileVault is enabled on your Mac, any time you start up or reboot your computer, you will be prompted to enter your username and password before gaining access to your encrypted files.
This
additional layer of protection ensures that only
authorized individuals can view and use the data stored on your Macbook. It’s essential to safeguard
sensitive information from
potential threats or unauthorized access.
By implementing this user login requirement, you can have
peace of mind knowing that even if someone has physical access to your device, they won’t be able to view or manipulate the encrypted data without logging in with the appropriate credentials.
Enable FileVault on other user accounts if required
To further
enhance the security of your Mac, you can also
enable FileVault on other user accounts if needed. This ensures that all sensitive information is protected across
multiple user profiles.
To do this, follow these steps:
- Open System Preferences and navigate to Security & Privacy.
- Click on the FileVault tab.
- You will see a list of user accounts on your Mac.
- To enable FileVault for a specific user account, click the lock icon and enter your admin password to make changes.
- Select the desired user account(s) by checking the box next to their names.
- Click “Turn On FileVault” for each selected account.
By enabling FileVault on other user accounts, you extend the
data encryption benefits beyond just your profile, ensuring
comprehensive protection for everyone who uses your Macbook.
Conclusion
In conclusion,
enabling FileVault on your Mac is a crucial step to
ensure the privacy and security of your data.
With just a few simple clicks in the System Preferences, you can
protect sensitive information,
prevent unauthorized access, and safeguard against data theft.
Don’t wait any longer – take control of your Mac’s security by turning on FileVault today!