Experiencing sound disruptions on your Mac with Dolby Atmos? It’s a common headache for many Apple TV and other Apple device users.
This article delves into the heart of Mac Dolby Atmos Issues, providing straightforward solutions to fix them.
Get ready to enjoy crystal-clear sound once more!
Quick Summary
- Mac Dolby Atmos can encounter common issues such as crackling and popping sounds, audio cutting out or going silent, and out-of-sync audio.
- A poor Wi-Fi network, outdated macOS version, software glitches, compatibility issues, or network connectivity problems can cause these issues.
- To fix these issues, users should troubleshoot their system promptly by ensuring Dolby Atmos is enabled on their Mac, switching to a 5GHz Wi-Fi network for a more stable connection, checking if the music track is available in Dolby Atmos, disabling the “Stereo Audio As Mono” option if necessary, force quitting and relaunching Apple Music app. Additionally, updating macOS and Apple Music to the latest versions or contacting Apple Support for further assistance may be needed.
Common Mac Dolby Atmos Issues
Mac Dolby Atmos often encounters common issues that can disrupt your audio experience. These include crackling and popping sounds, audio cutting out or going silent, and out-of-sync audio.
Crackling and popping sounds
Many Mac users report experiencing crackling and popping sounds, which can ruin the immersive experience of Dolby Atmos audio.
These distortions often occur due to Mac Dolby Atmos issues, disrupting music clarity or dialogue in movies and TV shows.
A poor Wi-Fi network, an outdated macOS version and certain settings within Apple Music could be potential factors causing this problem.
Therefore, it’s crucial to troubleshoot your system promptly to ensure smooth playback and an optimized Dolby Atmos experience on your device.
Audio cutting out or going silent
One frustrating issue Mac users may encounter with Dolby Atmos is audio cutting out or going silent. This problem can occur while watching movies, listening to music, or even during video calls.
It disrupts the immersive experience and leaves you missing out on important dialogue or sound effects.
This root cause could vary, including software glitches, compatibility issues, or network connectivity problems. You can take several steps to troubleshoot and fix this problem.
First, ensure that your internet connection is stable and strong. A weak Wi-Fi signal can sometimes result in audio dropouts.
Next, check if the specific media you’re playing has a compatible Dolby Atmos track. Not all content supports Dolby Atmos, so verifying if the audio format matches what your system can handle is essential.
If these steps don’t resolve the issue, try force quitting and relaunching the application you’re using for playback (such as Apple Music).
Additionally, ensure that your macOS and Apple Music are updated with the latest versions, as updates often include bug fixes and improvements.
Out-of-sync audio
It can be incredibly frustrating if you’re experiencing out-of-sync audio while using Dolby Atmos on your Mac. This issue occurs when the audio being played is not aligned properly with the video or other sounds.
It disrupts the immersive experience Dolby Atmos is known for, leaving you feeling disconnected from what you’re watching or listening to.
One possible reason for this problem is a delay in audio signal processing. Sometimes, there can be a slight lag between when the audio is played and when it reaches your speakers or headphones.
This lag can result in an out-of-sync effect.
To fix this issue, you can take a few troubleshooting steps. First, ensure that your Mac’s operating system and Apple Music app are updated with the latest updates.
Software updates often include bug fixes and improvements that can resolve sync issues.
Additionally, check your external speaker configuration if you’re using one.
Ensure they are properly connected and set up according to Dolby Atmos guidelines. Adjusting speaker placement and angles may help improve synchronization.
It’s also worth trying different music tracks or videos to see if the sync issue persists consistently across all media files or if it’s specific to certain content only.
Finally, ensure your internet connectivity is stable, as streaming delays caused by network issues could also contribute to out-of-sync audio problems.
How to Fix Mac Dolby Atmos Issues
To fix Dolby Atmos issues on your Mac, start by ensuring that Dolby Atmos is enabled in the audio settings.
Switch to a 5GHz Wi-Fi network for a more stable connection, and check if the music track you’re playing is available in Dolby Atmos.
Also, disable the “Stereo Audio As Mono” option, force quit, and relaunch Apple Music. Make sure to update your macOS and Apple Music to their latest versions, or contact Apple Support if further assistance is needed.
Ensure Dolby Atmos is enabled on your Mac
To ensure you can fully enjoy Dolby Atmos on your Mac, ensure the feature is enabled.
Follow these steps to ensure Dolby Atmos is turned on:
- Open System Preferences on your Mac.
- Click on “Sound” or “Audio.”
- Select the “Output” tab.
- Look for your speaker or audio device for playback with Dolby Atmos.
- Check if Dolby Atmos is listed as an option for audio output.
- If Dolby Atmos is not showing up, it may be because your device does not support it or needs updating.
- Consult your device’s user manual or visit the manufacturer’s website to verify its compatibility with Dolby Atmos and update any necessary firmware.
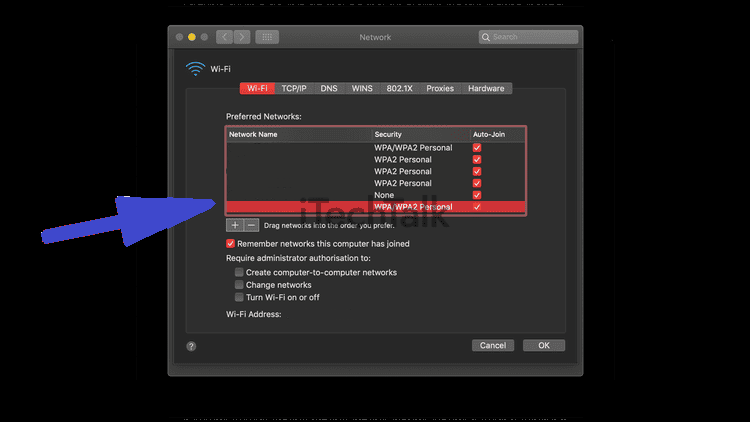
Switch to a 5GHz Wi-Fi network
If you’re experiencing Dolby Atmos issues on your Mac, switching to a 5GHz Wi-Fi network can help improve the audio performance.
Here’s how:
- Connect to a 5GHz Wi-Fi network: Switching from a 2.4GHz Wi-Fi network to a 5GHz network can provide a more stable and faster connection, which can help prevent audio interruptions or cutting out.
- Less interference: The 2.4GHz band is often crowded with other devices, such as microwaves, cordless phones, and Bluetooth devices, that can interfere with your Wi-Fi signal. The 5GHz band typically has less interference since there are more available channels.
- Better bandwidth: The 5GHz band offers more bandwidth than the 2.4GHz band, allowing faster data transfer rates. This increased bandwidth can help ensure smoother streaming of Dolby Atmos content without buffering or audio syncing issues.
- Check router compatibility: Ensure that your router supports both the 2.4GHz and 5GHz bands. Most modern routers do support dual-band functionality.
- Access router settings: Open a web browser and enter your router’s IP address in the address bar (e.g., “192.168.1.1”). You can find the IP address in the router’s manual or on its label.
- Log in to your router’s admin interface: Enter your username and password when prompted. If you haven’t changed these details, check the default login credentials in the router’s manual.
- Enable the 5GHz band: Look for an option like “Wireless Settings” or “Wireless Network.” Locate the frequency settings or channel selection options and choose the one that corresponds to the 5GHz band (usually labelled as “802.11a” or “5GHz”).
- Save and apply the settings: Click the “Save” or “Apply” button to save your changes. The router will reboot, and your network will be available for connection with the new 5GHz frequency.
Check if the music track is available in Dolby Atmos
To ensure that you’re experiencing Dolby Atmos audio issues on your Mac, the first step is to check if the music track you’re playing is available in Dolby Atmos.

Here’s how you can do that:
- Open the Apple Music app on your Mac.
- Search for the specific song or album you want to listen to.
- Click on the title to open the track.
- Look for the Dolby Atmos icon, which resembles a small speaker with sound waves around it.
- If the icon is present, the track is available in Dolby Atmos.
Disable the “Stereo Audio As Mono” option
To fix Dolby Atmos issues on your Mac, you can try disabling the “Stereo Audio As Mono” option. This option may cause audio problems with Dolby Atmos playback.
Here’s how to do it:
- Open the “Audio MIDI Setup” utility on your Mac. You can find it by searching for it in Spotlight or navigating to Applications > Utilities > Audio MIDI Setup.
- In the Audio Devices window, locate and select your output device.
- Click on the “Configure Speakers…” button at the bottom of the window.
- Ensure the “Stereo Audio As Mono” option is unchecked in the Speaker Configuration dialogue box.
- Click on the “Apply” button to save your changes.
- Restart any applications or media players you used for Dolby Atmos playback.
Force quit and relaunch Apple Music
Force quitting and relaunching Apple Music can help troubleshoot Dolby Atmos issues on your Mac.
Here’s how to do it:
- Force quit Apple Music:
- Press Command + Option + Escape on your keyboard to open the Force Quit Applications window.
- Select Apple Music from the list of applications.
- Click on the “Force Quit” button.
- Relaunch Apple Music:
- Go to the “Applications” folder on your Mac.
- Find and open Apple Music.
- Wait for the application to launch fully.
Update macOS and Apple Music
To resolve Dolby Atmos issues on your Mac, it’s essential to keep your operating system and Apple Music up to date.
Here are the steps to update macOS and Apple Music:
- Check for available updates: Go to the Apple menu in the top left corner of your screen and select “System Preferences.” Then, click “Software Update” to check for any available updates for your macOS.
- Install macOS updates: If any updates are available, click “Update Now” and follow the on-screen instructions to install them. Make sure you have a stable internet connection during this process.
- Update Apple Music: Open the App Store on your Mac and click the “Updates” tab at the top of the window. Look for any updates related to Apple Music and click on the “Update” button next to them.
- Restart your Mac: After installing any updates, it’s recommended to restart your Mac to ensure that all changes take effect.
Contact Apple Support for further assistance
If you’ve tried all the troubleshooting steps mentioned above and are still experiencing issues with Dolby Atmos on your Mac, it might be time to seek further assistance from Apple Support.
The experts at Apple Support can provide personalized guidance to help you resolve any persistent problems you may be encountering.
Here are a few ways to get in touch with Apple Support:
- Visit the Apple Support website: You can start by visiting the Apple Support website and searching for articles or solutions related to your specific issue. Many common problems have step-by-step guides you can follow to resolve them independently.
- Contact Apple via phone or chat: If you cannot find a solution on the support website, you can directly contact Apple’s customer support. To contact them, go to the Apple Support website and click the “Contact Us” link at the bottom. From there, you’ll have options to initiate a phone call or chat session with an Apple representative who can assist you further.
- Schedule an appointment at an Apple Store: If you prefer face-to-face assistance, you can schedule an appointment at an Apple Store near you. An Apple Genius will be able to diagnose and troubleshoot any hardware-related issues affecting your Dolby Atmos experience.
Tips for Optimizing Dolby Atmos on Mac
To optimize Dolby Atmos on your Mac, use high-quality audio files, keep your internet connectivity stable, update your audio drivers regularly, and be aware of any third-party interference.
Use high-quality audio files
To optimize your Dolby Atmos experience on your Mac, it’s important to use high-quality audio files. Low-quality audio can significantly impact the overall sound quality and may exacerbate any issues with Dolby Atmos.
Using high-quality audio files ensures that the audio content is properly encoded and provides the best possible listening experience.
This can help minimize crackling, popping sounds, and other distortions when playing low-quality audio through Dolby Atmos.
Investing in high-resolution music or movie downloads can make a noticeable difference in the clarity and richness of the sound produced by Dolby Atmos on your Mac.
Ensure your internet connectivity is stable
To optimize your Dolby Atmos experience on Mac, it’s crucial to have a stable internet connection. Unreliable internet connectivity can result in audio glitches and interruptions, hindering your immersive audio experience.
Ensure you are connected to a reliable Wi-Fi network or use an Ethernet cable for a more stable connection.
A strong and stable internet connection is necessary for streaming high-quality audio content in Dolby Atmos format. You may experience audio cutouts, buffering issues, or poor sound quality with a weak or fluctuating connection.
To avoid these problems, ensure your Wi-Fi signal is strong and consistent, especially when streaming content requiring high bandwidth.
Additionally, if you’re using external speakers or devices with Dolby Atmos capabilities, such as Apple TV or iPhone, make sure they are also connected to the same stable network for seamless audio playback synchronisation.
Keep your audio drivers updated
To optimize your Dolby Atmos experience on Mac, it’s essential to keep your audio drivers updated. Outdated or incompatible drivers can result in sound issues and compatibility problems with Dolby Atmos.
Regularly checking for driver updates ensures you have the latest software enhancements and bug fixes, improving audio performance and stability.
Updating your audio drivers can resolve crackling sounds, audio dropouts, and sync issues that may arise when using Mac Dolby Atmos.
Stay proactive in maintaining your system by regularly checking for driver updates from the manufacturer’s website or using reliable driver update software.
Be aware of any third-party interference
To optimize your Dolby Atmos experience on your Mac, you must know of any potential third-party interference.
Sometimes, other applications or software running in the background can conflict with Dolby Atmos and cause audio issues.
This could lead to crackling sounds, audio cuts, or out-of-sync problems. To avoid these disruptions, close unnecessary programs or disable any conflicting audio-related tools before using Dolby Atmos on your Mac.
You can enjoy a seamless and immersive audio experience without any hiccups or disruptions by eliminating external interference.
Conclusion
In conclusion, experiencing issues with Dolby Atmos on your Mac can be frustrating, but there are ways to fix them. By ensuring Dolby Atmos is enabled, having a stable internet connection, and keeping your audio drivers updated, you can optimize the performance of Dolby Atmos on your Mac.
If all else fails, contacting Apple Support for further assistance is always an option. Don’t let these technical glitches dampen your audio experience—explore the immersive sound world with Dolby Atmos on your Mac today!
FAQs
1. What are some common Mac Dolby Atmos issues?
Some common Mac Dolby Atmos issues include audio playback inconsistencies, sound distortion or low volume, compatibility problems with certain apps or devices, and configuration errors.
2. How can I troubleshoot Mac Dolby Atmos issues?
To troubleshoot Mac Dolby Atmos issues, you can try restarting your device, updating to the latest macOS version, checking for software updates for your apps and drivers, adjusting audio settings in System Preferences, and ensuring that your audio equipment is properly connected and configured.
3. Why is there no sound when using Dolby Atmos on my Mac?
There may be several reasons for no sound when using Dolby Atmos on your Mac. It could be due to incorrect audio settings or configurations, incompatible hardware or software components, a faulty cable connection, or an issue with the app or media file you are trying to play.
4. Can I uninstall/reinstall Dolby Atmos on my Mac?
Yes, you can uninstall/reinstall Dolby Atmos on your Mac by following these steps:
- Go to the Applications folder.
- Locate the “Dolby Access” application.
- Drag the application icon to the Trash bin.
- Empty the Trash bin.
To reinstall Dolby Atmos on your Mac:
- Visit the official website of Dolby and download the latest version of “Dolby Access” for macOS.
- Install the downloaded file by following the provided instructions.