In order to record your FaceTime calls on your iPhone or iPad, you need to start the built-in screen recorder before you begin your FaceTime call. You can do this by swiping down from the top of the screen and tapping the Screen Recording icon before your call. When your FaceTime call is over, you can find your recording in the Photos App.
Can you record facetime calls on the iPhone? Of course, you can!
It doesn’t matter if you need to record a FaceTime call for work, or just for yourself, you can record FaceTime calls on your iPhone, iPad, and macOS devices. Not only that, but it’s super simple!
Why Record A FaceTime Call?
People have found more ways to use FaceTime than just making calls. Many people also use it for business or to record content they post online. Here are just a few reasons you might want to record a FaceTime Call:
- You can playback business meetings and review calls at your convenience.
- Being able to interview guests for content from the comfort of your home.
- Record interviews for academic or journalistic research purposes.
- Capture the memories of your friends and loved ones on digital recordings that you can keep forever.
Can I Record A Facetime Call Legally?
Depending on the state, it may be legal to record audio or video without asking for permission first.
However, it is always best practice to get consent before beginning any recording.
If you find yourself in a situation where you must record someone without their expressed permission, check if your state requires two-party consent for recordings such as this.
Related Reading
How To Record A FaceTime Call On Your iOS Device With Audio
Recording a FaceTime call on your iPhone or iPad is a relatively easy thing to do that involves using the built-in screen recorder on your iPhone.
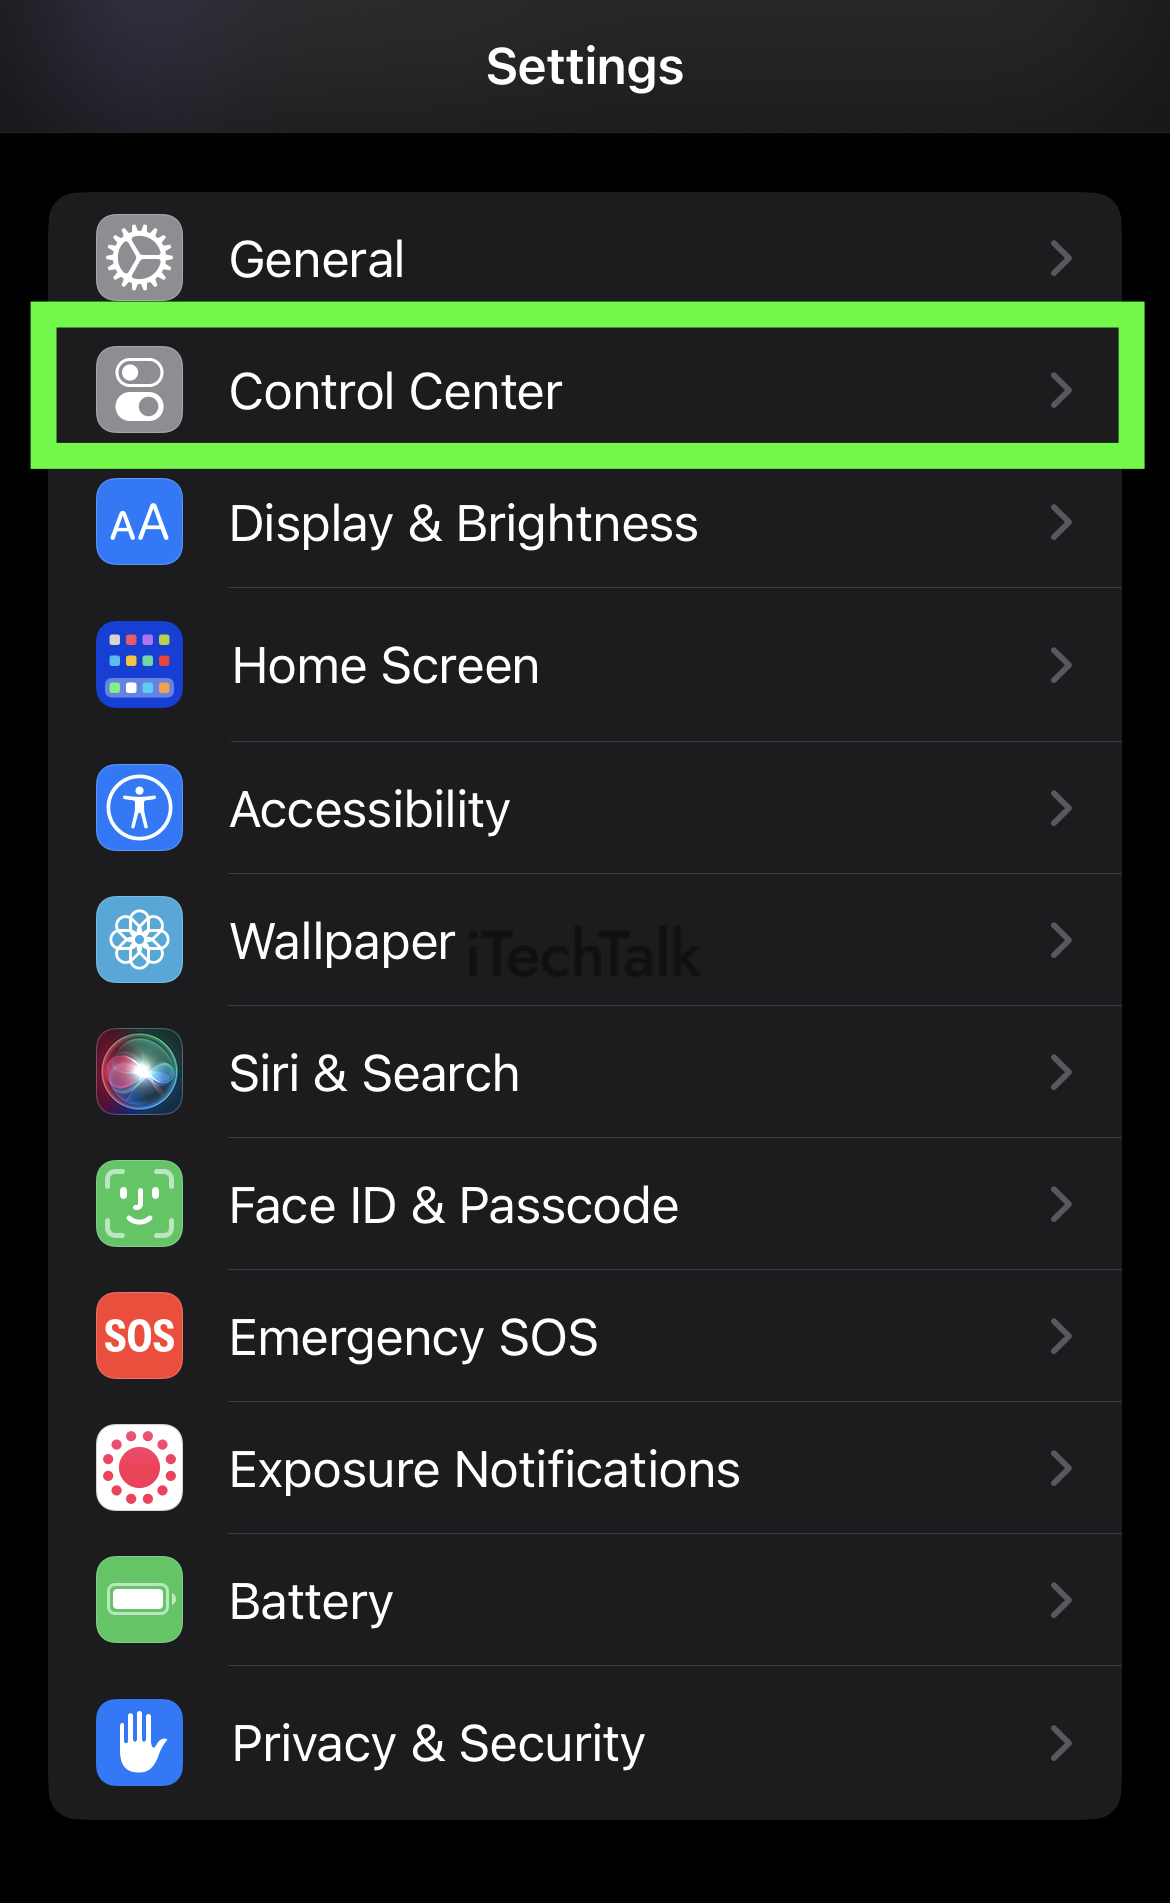
- First, you should make sure that you have Screen Recording present in your Control Center. To do this, open up your Settings App and tap on Control Center.
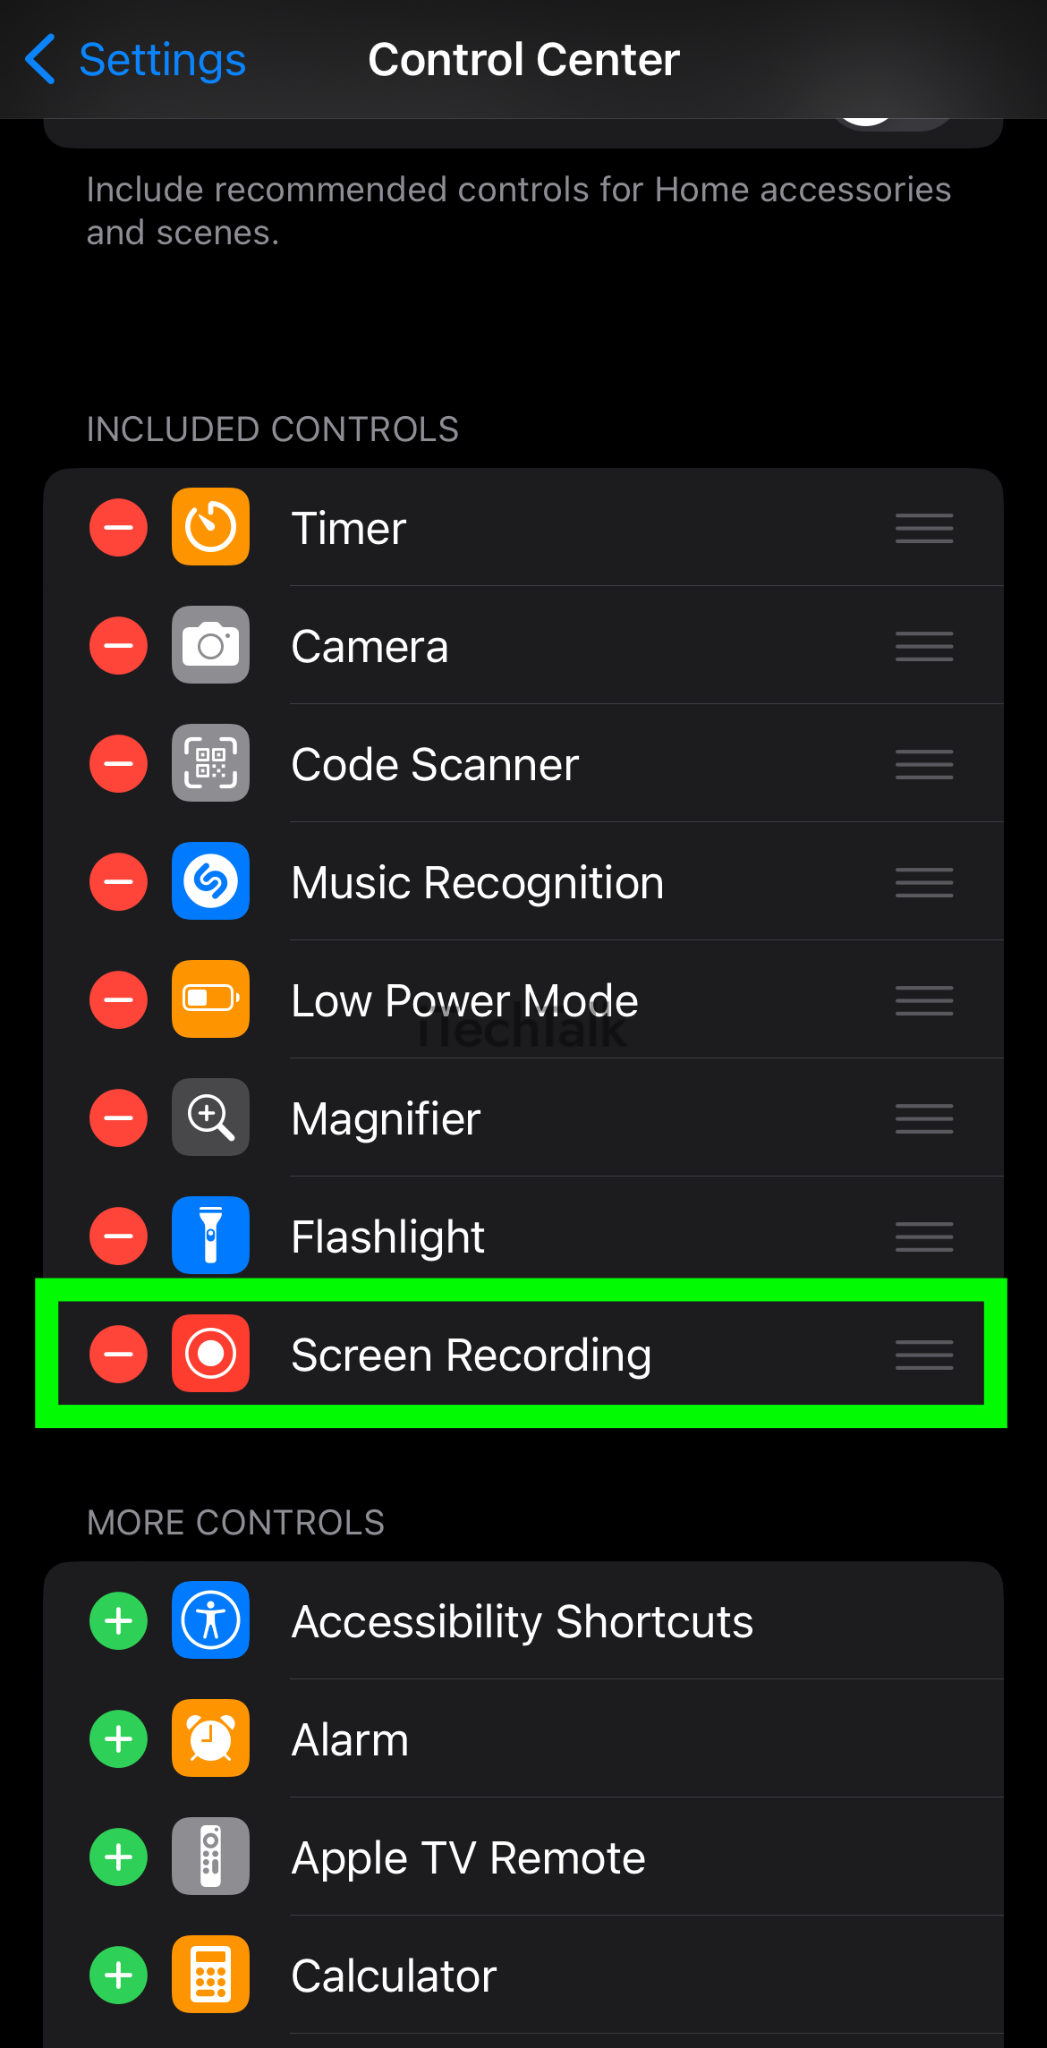
- You will want to make sure that Screen Recording is in the Included Controls section of the Control Center options. If it’s not, drag it up from the More Controls section to the Included Controls.
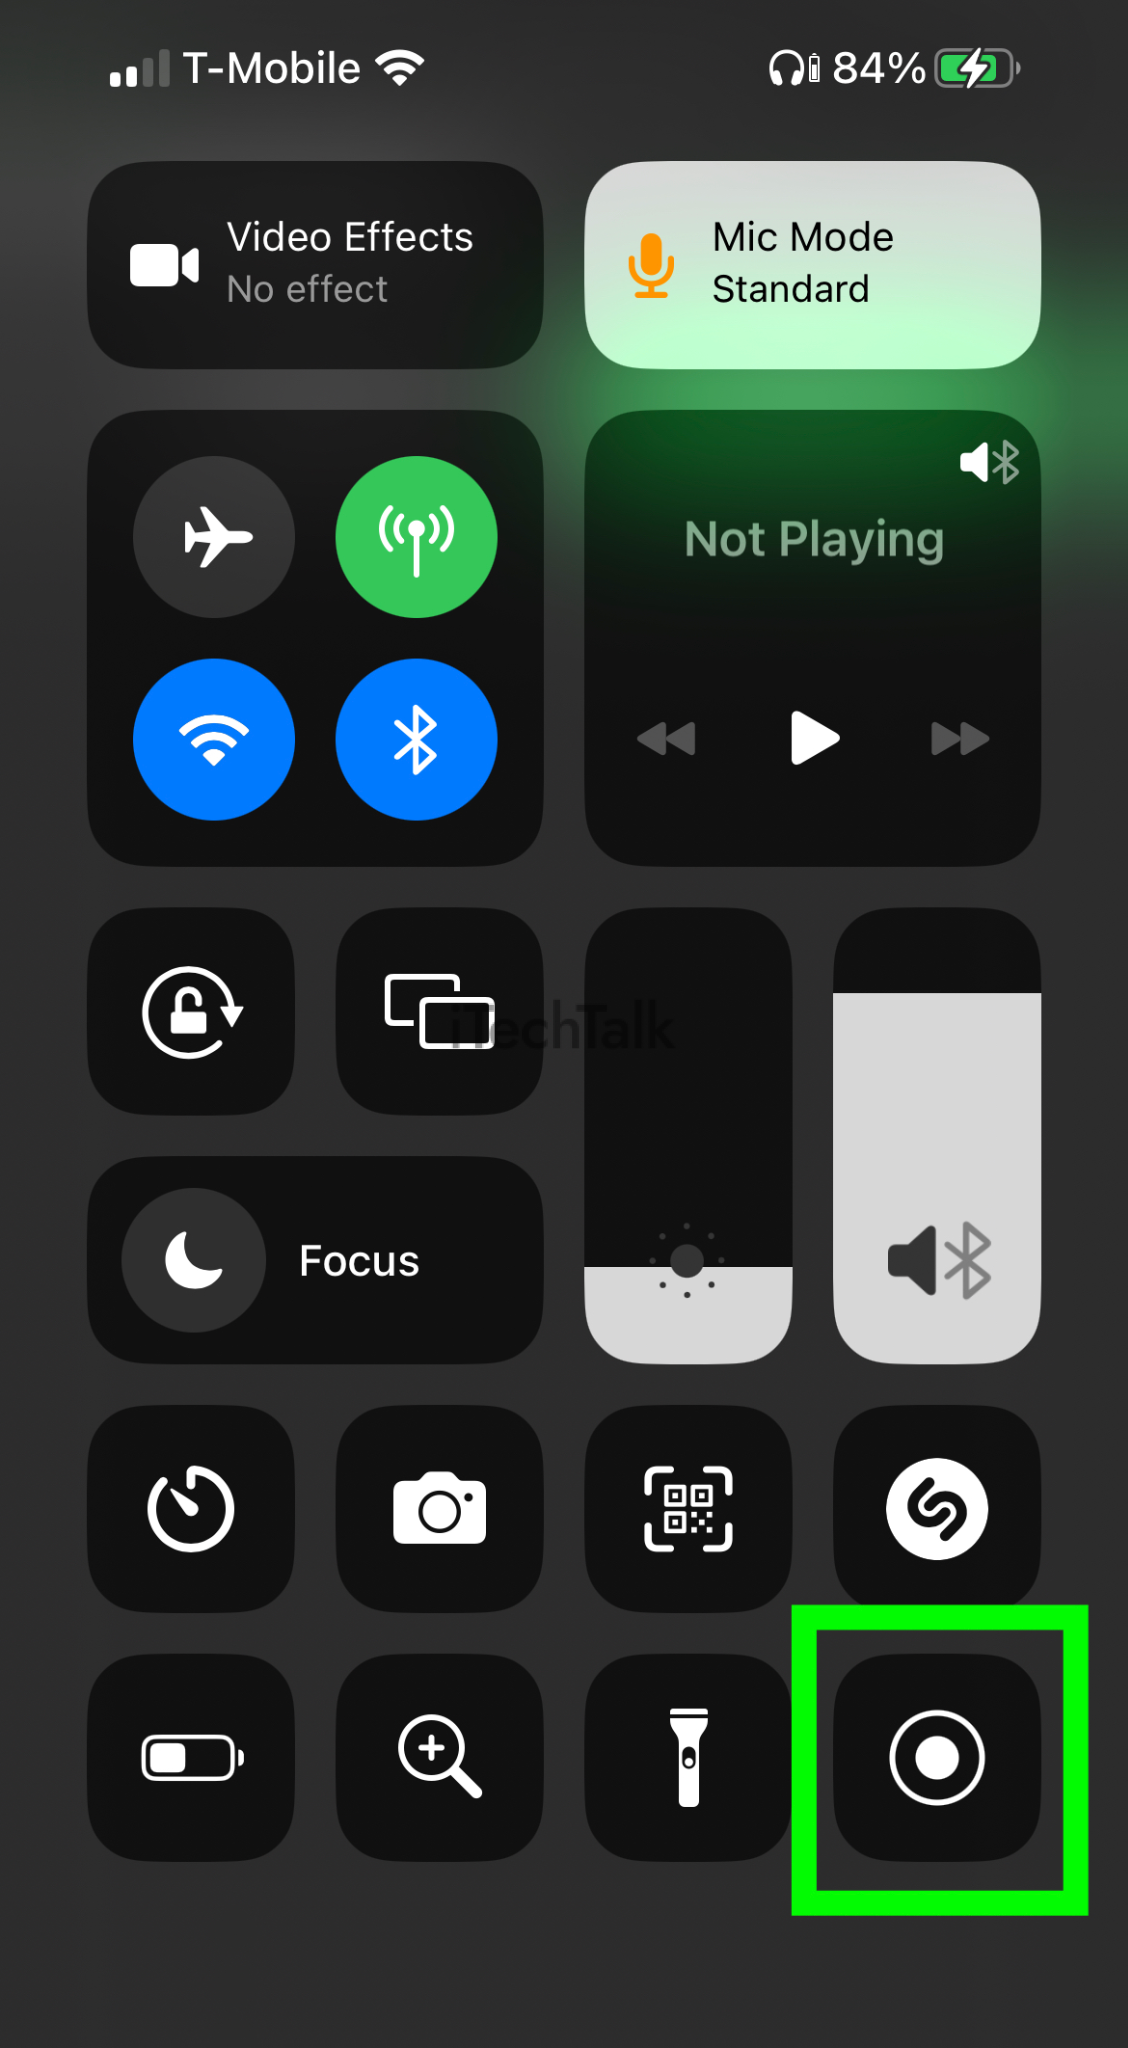
- Now that all that is set up, swipe down from the top of the screen before you start your FaceTime call to reveal the Control Center.
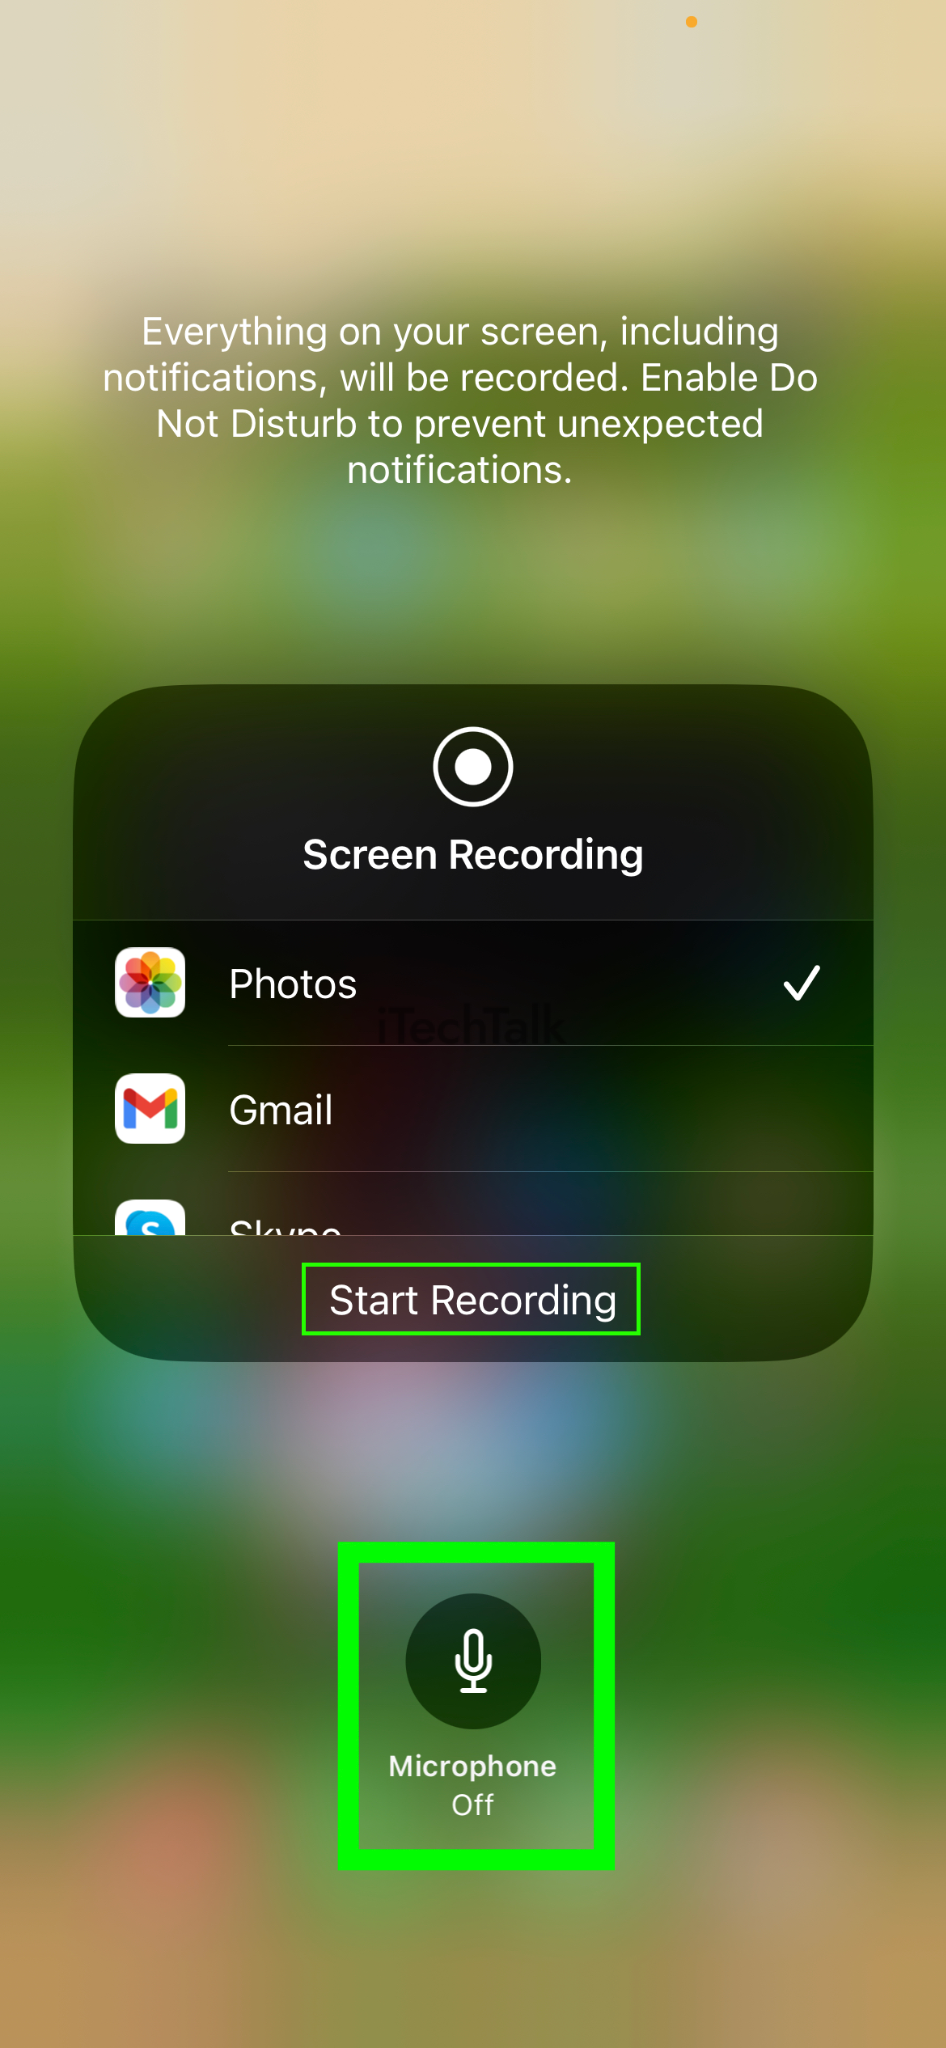
You will find an icon with a smaller hole inside a bigger one. If you were to tap this icon, you would start to record your screen, but no audio will be recorded, just video. Instead,
tap and hold on to the icon.

- A submenu will open up with the option to turn on the Microphone. Tap this button to add audio while you are recording your screen. Then, tap Start Recording.
Remember that everything you do on your phone will be recorded, including personal messages and notifications. It’s recommended that you turn on
Do Not Disturb mode, so you don’t have to worry about any privacy issues.
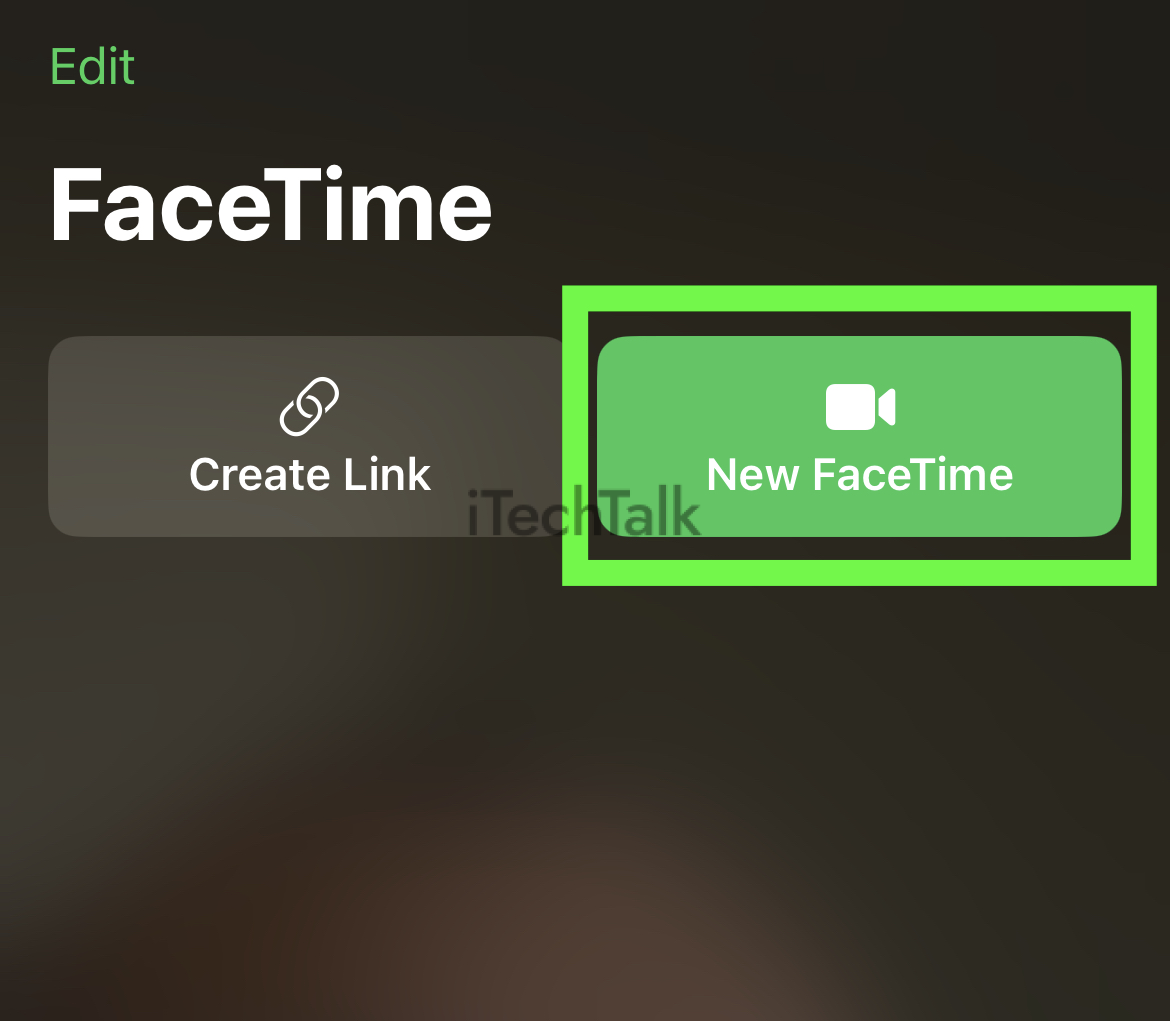
- Once you have your screen recording going, you can then do your Facetime Call just as you would normally.
- Once your FaceTime call has ended, you can stop the recording by swiping down from the top of the screen again and tapping on the screen recording icon.
- You can find your recording in the Photos app.
How To Record FaceTime Calls On Your Mac
Using your Mac to record audio FaceTime calls is also relatively simple. This will involve using the built-in screen recorder on your Mac.
Follow these steps to learn how to record FaceTime with sound on your Mac:
- Open up the Facetime App on your macOS computer.
- Press Command + Shift + 5 on your keyboard. This will open up the screen recording.
- In the Options Menu, choose where you wish to save your recorded file.
- Also under Options, make sure to select the built-in microphone for your sound source.
- If you want to record the entire screen while you are making your FaceTime call, then choose Record Entire Screen. You also have the choice to record only part of your screen by selecting Record Selected Portion.
- To record only part of your screen, you just need to select the area you wish to record by dragging your mouse.
- To start screen recording your FaceTime call, click Record.
- You can now start your FaceTime call like you normally would.
- You can stop the recording when your call is over by clicking Stop Recording. You can play back your video by navigating to where you wished to save the clip earlier.
Alternative Screen Recorders For Your iPhone / iPad
If you feel like the normal built-in screen recorder is a little plain and you want to add some style to your recordings, then you will want to look into alternative screen recorders.
Here are three of the best alternative screen recorders you can find on the App Store.
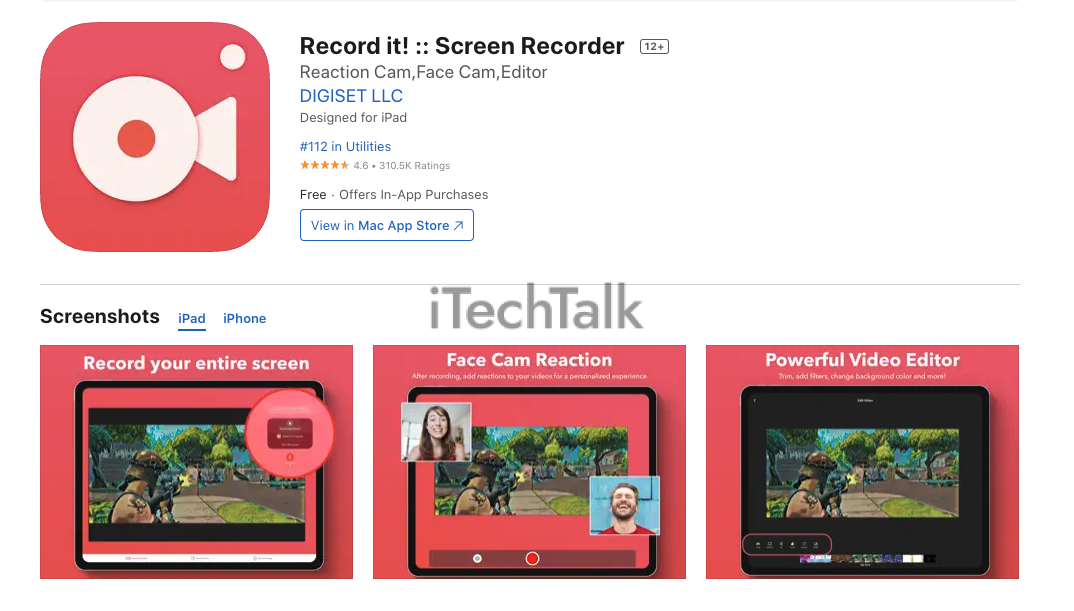
Record It! – Screen Recorder
Record It! is a screen recorder for iPhone and iPad that allows you to record your favorite games and apps. You can add video reactions with audio commentary to your recordings.
The app also has a video editor, so you can trim your videos, change the playback speed and add filters. This lets you take your FaceTime recordings to a whole new level.
Record It is a free app that offers in-app purchases.
Screen Recorder – AZ Recorder
Screen Recorder – AZ Recorder is one of the best screen recording apps you can find on the app store. AZ Recorder allows you to capture your FaceTime recordings and then edit them later with its built-in editor.
This app lets you adjust the FaceCam size and lets you share your recording with one click. These benefits are not limited to just the recordings you take. You can also import and edit external clips that you have on your iPhone or iPad’s hard drive.
Screen Recorder – AZ Recorder is a free app with an optional monthly subscription of $3.49 per month.

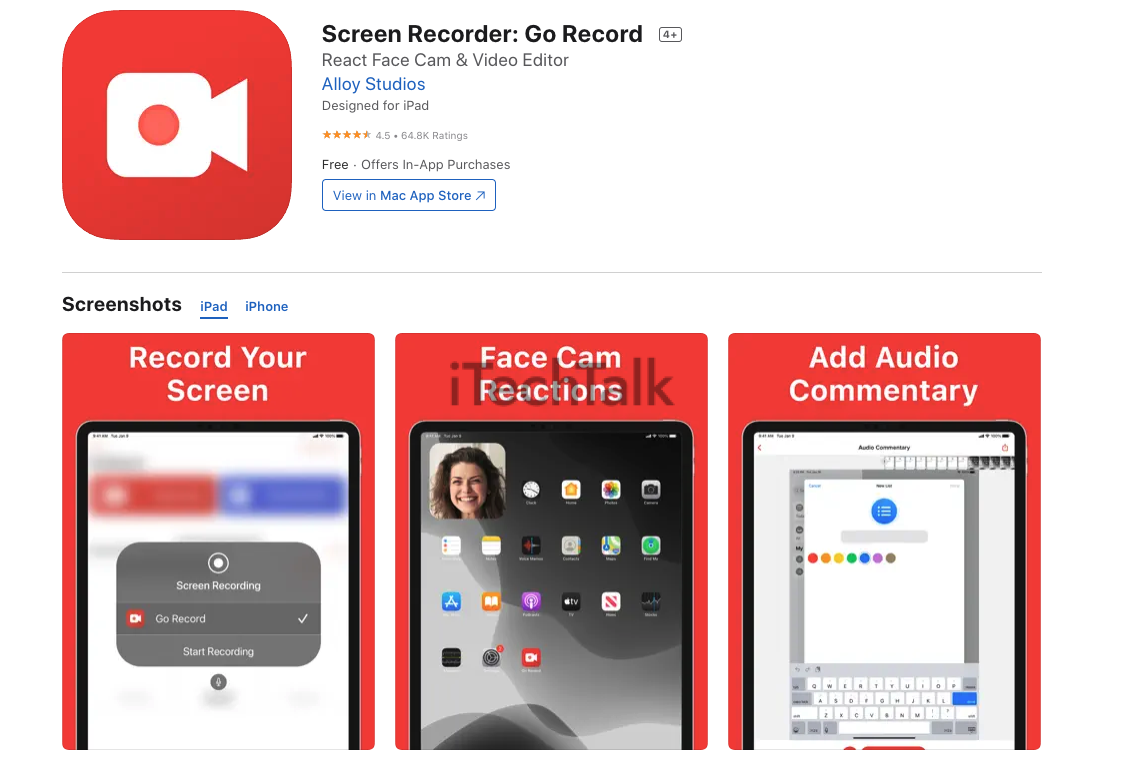
Screen Recorder: Go Record
With Go Record, you can record your screen with reactions using Face Cam, and add reactions however you please before easily exporting it to another app.
Whether you’re trying to show off a new game, provide detailed instructions, or just record a funny moment, Go Record does an excellent job recording your screen. If you’re using Go Record to record FaceTime calls, you also get to edit your clips with its powerful editing tools.
Go Record is a free app with optional in-app purchases.
I hope you enjoyed reading about how to record your FaceTime calls, both for free and with some paid options.
Remember, to record your FaceTime calls, you need to swipe down the top of your screen and tap on the Screen Recording button before you start your FaceTime call.


 I hope you enjoyed reading about how to record your FaceTime calls, both for free and with some paid options.
Remember, to record your FaceTime calls, you need to swipe down the top of your screen and tap on the Screen Recording button before you start your FaceTime call.