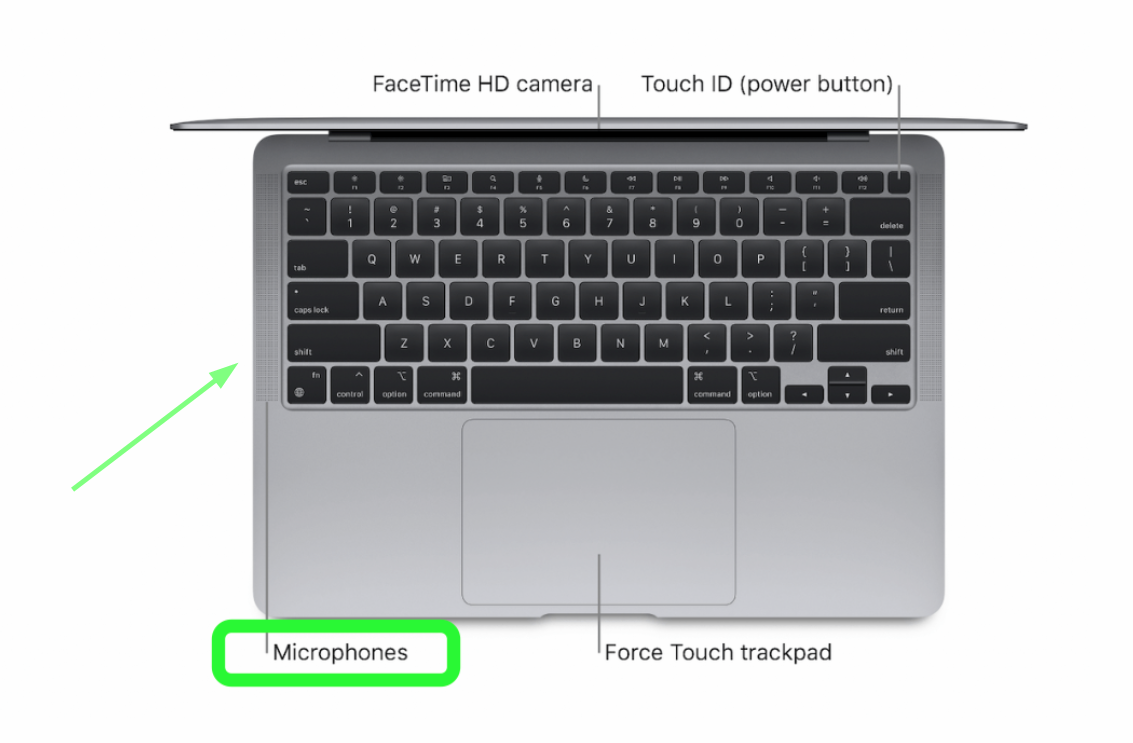
The built-in microphone in your MacBook Air is located under the left speaker. Not next to the camera where most people believe it is. It’s not visible to the eye, so there’s no reason to look for it physically. Just aim your voice toward the left speaker and not toward the camera.
Have you ever FaceTimed with someone on your MacBook Air, and the person on the other side can’t hear you well? Instinctively, you’ve probably aimed your voice toward the camera. It turns out, that’s not where the speaker is.
Keep reading below to learn where the speaker is on the MacBook Air and how you can get the most out of it.
Where Is the Built-in Microphone On MacBook Air Located?
The microphone on the MacBook Air is located under the left speaker grille. All microphones are found in the bottom casing, making it difficult to spot them on the device.
The most common misconception is that the microphone is situated near the camera. So if you’re trying to speak into the microphone, don’t aim for the camera, aim for the left speaker.
Are there Microphones on All Macbook Air models?
As long as your MacBook Air is made after 2006, it has a built-in speaker.
The MacBook Air only has one built-in speaker, as opposed to the MacBook Pro, which has multiple.
Is The Macbook Air Mic Good Enough For Calls?
The internal microphone in the MacBook Air is a great option for basic recording needs. It can pick up sound clearly and is perfect for online video chats or voice recordings. It is more than adequate for most purposes.
You’ll probably need an external microphone if you’re looking for a microphone to use in a meeting or to record audio. This includes voice recording or podcasting. The built-in microphone will pick up any background noise and is not ideal.
Related Reading
How To Check The Microphone Settings on a Mac
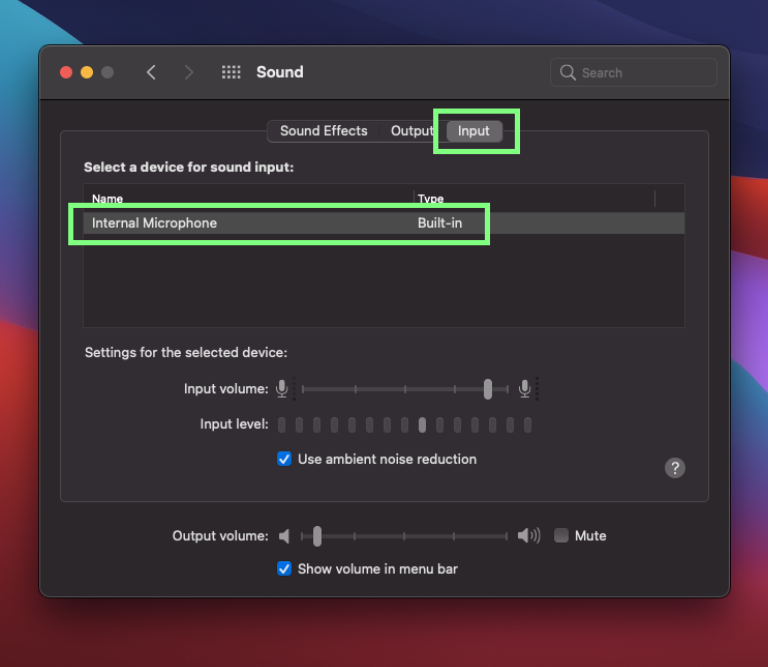
If you feel like something is wrong with your microphone, you should check your microphone settings. To check your Mac’s microphone settings:
- Open System Preferences and click on the Sound icon.
- Under the Input tab, you should see your microphone listed along with its current volume level. If the volume is low, increase it by clicking and dragging the slider to the right.
- You can also test your microphone by clicking on the Test button. If you’re having any problems with your microphone, make sure that the correct input device is selected under the Input tab.

How To Revoke Privileges To Apps Using Your Mac’s Microphone
It’s possible that you accidentally allowed access to your microphone or changed your mind about giving an app access later on.
If that’s the case, you can easily revoke access privileges:
- Open System Preferences and click the Security & Privacy icon.
- Under the Privacy tab, select microphone and then click the lock in the bottom left corner.
- You’ll see a list of apps that have requested access to your microphone. To revoke access, simply click the “x” next to the app’s name.


Can I use an external microphone with my MacBook Air?
Of course! It’s often recommended.
There are multiple ways to connect an external microphone to a MacBook Air:
- One way is to use the headphone jack on the MacBook Air to plug in the microphone. This works if your headphones have a microphone attached.
- You can also plug in a microphone using the USB port. Most external mics use USB these days.
- Bluetooth microphones are also an option.
There are a ton of excellent
external microphones you can pick from.
How Do You Use A Bluetooth Microphone With The MacBook Air?
- Put your Bluetooth microphone into Pairing Mode.
- Make your microphone detectable by Bluetooth-compatible devices.
- Make sure your MacBook Air and microphone are adequately charged.
- Go to your MacBook Air and click on the Apple Menu icon in the top corner of the screen.
- Click System Preferences, and then select Bluetooth.
- Click on the + symbol in the lower-left corner of the window to add a new device.
- Select your microphone from the list of devices, and then click Continue.
- Type in a name for your microphone, and then click OK.
How to Test Your Microphone on MacBook Air
If you feel like the mic on your MacBook Air isn’t working, you can test it easily by using your QuickTime Player.
- Open QuickTime Player.
- Click File > New Audio Recording.
- Increase the volume and click the red record button to make an audio recording.
- Speak for a few seconds.
- Listen to your audio recording.
- If you can hear yourself clearly and without any background noises, your Mac’s microphone works perfectly.
Where is the microphone location on MacBook Pro?
The MacBook Pro actually has three microphones.
The three microphones are challenging to locate because they are designed to blend in with the laptop’s body. This can make it difficult for you to record audio or make video calls in some cases.
Apple has changed the location of these microphones many times over the years, which only adds to the confusion.
If you have a newer version of the MacBook Pro, the three microphones are in the upper right area of the keyboard and the speaker section of the computer.
How To Activate The Dictation Feature
One of the best parts of your MacBook Air having a built-in microphone is being able to type out entire documents by just speaking. You can do this with the dictation feature.
First, adjust your microphone’s input level so that all your words come in nicely and clearly. To do this:
- Open System Preferences.
- Click on the Sound icon.
- From the Input tab, drag the Input Level slider to the right until your MacBook clearly hears every word you say.
- Now that your microphone is properly configured, you can start using the Dictation feature on your Mac. To do so, press the FN (Function) key twice and start talking. After a few seconds, your Mac will type every word you say.
The dictation feature is intuitive to use, but here are a few more
tips and tricks you should be aware of.


You now know exactly where the built-in speaker is in your MacBook Air. I hope you enjoyed this article and all the extra tips that came with it.
Please comment below if you have any questions. Please share this article with anyone you know who can’t find the speaker on their MacBook Air.