Ever switched from a Windows computer to a Mac and found yourself at sea, trying to find the familiar C Drive? Unlike Windows PCs that label their primary hard drive as ‘C’, Macs call it “Macintosh HD”.
This guide will illuminate navigating this new territory, helping you understand how Mac’s storage structure functions. Intrigued by Understanding the C Drive Equivalent on Mac? Keep reading!
Quick Summary
- The equivalent of the C Drive on a Mac is called “Macintosh HD”, which serves as the primary hard drive containing the operating system, applications, and personal files.
- Navigating through folders and directories on a Mac can be done using the Finder app, which allows for quick access to commonly used folders and customizable shortcuts in the sidebar.
- It is important to differentiate between system files (essential for Mac’s operation) and user files (documents, photos, etc.), as modifying or deleting system files can affect your computer’s functionality.
- Accessing and managing the Macintosh HD drive through Finder gives you control over organizing your files. Customizing Finder with toolbar icons, enabling Path Bar, creating Smart Folders, and utilizing keyboard shortcuts enhances efficiency in file management.
C Drive Equivalent on Mac
To understand the equivalent of the C Drive on a Mac, you need to familiarize yourself with the “Macintosh HD” drive, where files, folders, and disks are located.
Understanding the Macintosh HD drive
The Macintosh HD drive is a crucial element of the Apple environment, analogous to the C Drive on Windows computers. This primary hard drive contains your operating system, applications, and personal files in various folders.
It is a master storage unit for all software data necessary to run your MacBook Air or MacBook Pro.
Contrary to popular belief, managing the Macintosh HD isn’t rocket science. Using Finder – a powerful built-in feature exclusive to Mac –you can explore directories and seamlessly manage files stored within this storage facility.
Notably different from Windows’ file explorer, Finder boasts convenience with quick access commands and category breakdowns for easy navigation through the labyrinthine folder hierarchy beneath the surface of your Apple machine’s sleek interface.
Exploring the folder structure on a Mac
Exploring the folder structure on a Mac is essential to understanding how files and folders are organized.

Here are some key points to help you navigate through the folder structure:
- Finder: The Finder app allows you to access and manage files, folders, and disks on your Mac. It is similar to File Explorer on Windows.
- Sidebar: The sidebar in Finder displays shortcuts to commonly used folders such as Documents, Downloads, and Desktop. You can customize it to add or remove specific folders.
- Home Directory: When you open Finder, you will land in your home directory, indicated by a house icon in the sidebar. This is where your files and folders are stored.
- Subfolders: Inside your home directory, you may have subfolders such as Documents, Pictures, Music, and Movies, where you can organize your files based on their types.
- All My Files: In Finder’s sidebar, there’s an option called “All My Files”, showing all the files stored on your Mac regardless of location.
- Other Volumes: Besides the Macintosh HD drive, volumes like external hard drives or network storage devices appear under Devices in the sidebar.
- Folder Hierarchy: The folder structure on a Mac follows a hierarchical system. Each level represents a folder within another folder. For example, Documents > Financial Reports > 2022 > Q1 would be a hierarchical path showing nested folders.
- Column View: To get a detailed view of the folder structure, use the column view mode in Finder by pressing Command + 3 or selecting View > as Columns from the menu bar.
- Quick Look: If you want to preview a file without opening it fully, select it in Finder and press Spacebar for Quick Look. This feature is handy when exploring multiple files quickly.
- Search Functionality: If you’re looking for specific files or folders, use the search bar in the top-right corner of Finder. It can help you locate items based on their names or contents.
Differentiating between system files and user files
System files and user files are two distinct files found on a Mac. System files are essential for the Mac’s operating system and its various functionalities.
These include important system programs, drivers, and configuration settings that keep the Mac running smoothly.
On the other hand, user files consist of documents, photos, videos, and any other files created or downloaded by the user.
Differentiating between system files and user files is crucial because it allows users to understand which files are safe to modify or delete without affecting the stability or functionality of their Mac.
While modifying or deleting certain system files can cause serious issues with your computer’s performance or even render it unusable, managing user-generated content poses minimal risk to the overall functioning of your Mac.
Finding and Managing the Macintosh HD Drive
To find and manage the Macintosh HD drive, access it through Finder, navigate folders and directories, and customize the Finder app for easier access.
Accessing the Macintosh HD drive through Finder
To access the Macintosh HD drive on your Mac, follow these simple steps:
- Click on the “Finder” icon in the Dock, typically at the bottom of your screen.
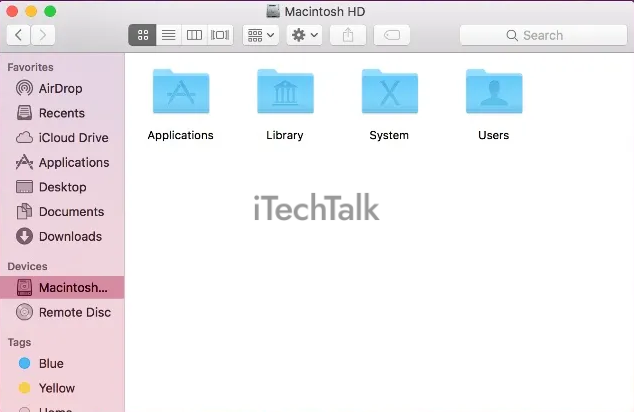
- You will see a sidebar on the left-hand side in the Finder window that opens. Look for “Macintosh HD” under “Devices” or “Locations.” Click on it to select it.
- Once you’ve selected the Macintosh HD drive, its contents will appear in the main section of the Finder window.
- You can now navigate through folders and directories within the Macintosh HD drive to find and manage your files.
Navigating through folders and directories
To navigate through folders and directories on a Mac, follow these simple steps:
- Open the Finder app by clicking the Finder icon in the Dock or using the keyboard shortcut Command + N.
- Once the Finder window opens, you will see a sidebar on the left-hand side. This sidebar displays shortcuts to frequently accessed folders such as Documents, Downloads, and Applications.
- To access a specific folder or directory, click on its name in the sidebar. For example, if you want to open your Documents folder, click “Documents” in the sidebar.
- If you don’t see the folder you are looking for in the sidebar, you can use the “Go” menu located at the top of your screen. Click on “Go” and select “Go to Folder” from the dropdown menu (or use Command + Shift + G).
- A small window will appear where you can type in the full path or name of the folder or directory you want to navigate. For example, if you want to go directly to your Pictures folder, type “~/Pictures” (without quotes) and click “Go”.
- Alternatively, you can use search functionality within Finder by clicking on the magnifying glass icon in the top-right corner of any Finder window or using Command + F. Type keywords related to your desired folder or file, and Finder will display relevant results.
- To navigate back to a previous folder or directory, click on the back arrow button located at the top-left corner of any Finder window.
- You can also use breadcrumbs navigation at the bottom of each Finder window to quickly jump back through recent folders.
Customizing the Finder app for easier access
To make navigation and file management even more convenient, you can customize the Finder app on your Mac.
Here are some ways to customize the Finder for easier access:
- Customize the toolbar: You can add or remove icons from the toolbar to include your most frequently used commands. Simply right-click on the toolbar and select “Customize Toolbar.” Then, drag and drop your desired icons onto the toolbar or remove unnecessary ones.
- Enable Path Bar: The Path Bar displays the current folder’s path at the bottom of the Finder window. To enable it, go to View in the Menu bar and click on “Show Path Bar.” This will give you a clear overview of where you are within the file hierarchy.
- Use Sidebar shortcuts: The Sidebar provides quick access to your favourite folders, devices, and network locations. You can easily customize it by dragging folders into or out of the Sidebar. Right-clicking on an item in the Sidebar gives you additional options like renaming or removing it.
- Create Smart Folders: Smart Folders automatically gather files based on your specific criteria. To create a Smart Folder, go to File in the Menu bar and select “New Smart Folder.” Customize the criteria based on file attributes such as name, date modified, or file type.
- Utilize keyboard shortcuts: Mac offers a range of keyboard shortcuts to speed up your workflow within Finder. For example, pressing Command + Shift + H will take you directly to your Home directory, while Command + Shift + G allows you to navigate to a specific folder using its path.
Creating and Managing Volumes on Mac
Learn how to create and manage volumes on your Mac to improve organization and optimize storage space. Dive into the concept of volumes, formatting options, and partitioning techniques for a seamless experience.
Understanding the concept of volumes on Mac
Volumes on Mac refer to the different partitions or virtual drives created within the Macintosh HD. Think of volumes as separate sections on your Mac where you can store and organize your files, similar to having multiple hard drives.
Each volume has its storage capacity and can be formatted differently depending on your needs.
Creating additional volumes allows for better file organization, especially if you have many files or want to separate certain data types.
For example, you could have one volume dedicated to personal documents and another for work-related files.
By partitioning your hard drive into multiple volumes, you can easily manage and access specific sets of files without cluttering up one main drive.
You can use the built-in Disk Utility tool to create and manage volumes on your Mac. Disk Utility provides options for formatting, repartitioning, and resizing volumes according to your preferences.
Creating additional volumes for the organization
Creating additional volumes on your Mac can help you stay organized and manage your files more efficiently.
Here’s how you can create additional volumes:
- Open Disk Utility: Launch Disk Utility by clicking on the “Finder” icon in the Dock, selecting “Applications” from the sidebar, and then opening the “Utilities” folder. Double-click on “Disk Utility” to launch it.
- Select your main hard drive: In the left sidebar of Disk Utility, you will see a list of drives and volumes connected to your Mac. Click on your main hard drive (usually named “Macintosh HD”) to select it.
- Click on Partition: With your main hard drive selected, click the “Partition” button at the top of the Disk Utility window.
- Add a new volume: Click on the “+” button below the partition diagram to add a new volume. You can choose the size and format for your new volume by adjusting the size slider and selecting a format from the drop-down menu.
- Adjust volume settings: You can name your new volume by typing it into the “Name” field. Additionally, you can choose whether to encrypt or not encrypt the volume using FileVault encryption options.
- Apply changes: Once you configure your new volume settings, click the “Apply” button to create the new volume. Note that applying changes may involve reformatting or erasing existing data on your drive, so back up any important files before proceeding.
- Accessing and managing volumes: After creating additional volumes, they appear as separate disks in Finder and your desktop. You can access them like any other disk or folder by double-clicking their icons or navigating through Finder.
Formatting and partitioning volumes
Understanding how to format and partition volumes is important to ensure efficient organisation and management of your Mac storage.
Here are the steps you need to follow:
- Format a Volume:
- Open Disk Utility on your Mac by clicking on the “Finder” icon in the Dock, selecting “Applications,” then “Utilities,” and finally “Disk Utility.”
- In the Disk Utility window, locate and select the volume you want to format from the list on the left-hand side.
- Click on the “Erase” button at the top of the window.
- Choose a suitable format for your needs, such as APFS or Mac OS Extended (Journaled).
- Enter a name for the volume in the field provided.
- Finally, click the “Erase” button to format the volume.
- Partition a Volume:
- Open Disk Utility on your Mac as described above.
- Select the primary hard drive or an existing volume from the list on the left-hand side.
- Click on the “Partition” tab at the top of the window.
- Click on the “+” button below the partition layout to add a new partition.
- Adjust the size of each partition by dragging its boundaries or entering precise values in GB.
- Assign names to each partition for easy identification.
- Choose appropriate formats for each partition based on your requirements, considering compatibility with other devices if needed.
- Once satisfied with your partition layout, click “Apply” to save and apply changes.
- Managing Volumes:
- To access and manage your newly formatted or partitioned volumes, go back to Finder and select “Macintosh HD” or whichever drive contains these volumes from within Finder’s sidebar menu.
- You can create folders and move files between volumes using simple drag-and-drop actions within Finder’s interface.
Conclusion
In conclusion, understanding the C Drive equivalent on a Mac is essential for efficient file management and organization. By familiarizing yourself with the Macintosh HD drive and how to navigate through folders using Finder, you can easily locate and manage files on your Mac.
Additionally, learning about creating and managing volumes on Mac allows for further customization and optimization of storage space. This comprehensive guide allows you to confidently navigate the Mac file system and maximise your storage capabilities.
FAQs
1. What is the equivalent of the C drive on a Mac?
On a Mac, the equivalent of the C drive is called the “Macintosh HD” or simply the “Mac hard drive.” It is where all your system files and applications are stored.
2. How do I access my Mac’s hard drive?
To access your Mac’s hard drive, click on the “Finder” icon in your dock, then select “Go” from the menu bar at the top of your screen. From there, choose “Computer,” you will see your hard drive listed as “Macintosh HD.”
3. Can I partition my Mac’s hard drive like I can with a C drive on Windows?
Yes, you can partition your Mac’s hard drive just like you can with a C drive on Windows. This allows you to create separate sections on your hard drive for different purposes or operating systems.
4. What should I know when managing files on my Mac’s hard drive?
When managing files on your Mac’s hard drive, it’s important not to delete any system files or folders necessary for proper functioning. Make sure to back up important data before making any changes and consult official documentation or seek professional guidance if unsure about certain actions.