Have you ever wondered where your voice memos are saved on your iPhone, only to be lost in the iOS labyrinth? Fear not; we’ve got you covered!
This blog post will dive into audio messages and Voice Memos Save On iPhone.
We’ll explore their
default saving location and how you can
access them efficiently. Whether you’re a busy professional relying on voice notes for critical reminders or just someone who loves
recording fun sound bites, understanding how to locate and
manage these files effectively is essential.
Quick Summary
- Voice Memos are audio recordings made on an iPhone using the built-in microphone or an external mic compatible with iOS devices.
- By default, voice memos save to the Voice Memos app chronologically based on when they were recorded. They can be accessed by opening the app and searching for them within the Utilities folder or Spotlight search.
- Users cannot change the default storage location of voice memos on iPhone but can export them to other applications or devices as needed. It is possible to choose where to save voice memos manually or automatically by adjusting settings within the app under “Default Account”.
- To manage and organize saved audio messages, users can rename recordings, delete unwanted recordings, use folders for organized storage, share/export recordings via apps like Dropbox or Google Drive, trim recordings, and save transcriptions for IOS 14 users onward.
Understanding Voice Memos On iPhone
– Voice Memos are audio recordings made on an iPhone using the
built-in microphone or an external mic compatible with iOS devices.
– To access the app, users can locate it in their Utilities folder or search for it using Spotlight.
– By default, voice memos save to the
Voice Memos app chronologically based on when they were recorded.
– While users cannot change the default storage location of voice memos on iPhone, they can export them to other applications or devices as needed.
What Are Voice Memos, And How Do They Work?
Voice Memos is a built-in iPhone app that allows users to record audio messages, notes, interviews, and more with just a few taps.
It’s an incredibly handy tool when you need to capture thoughts or information quickly without needing to type it out.
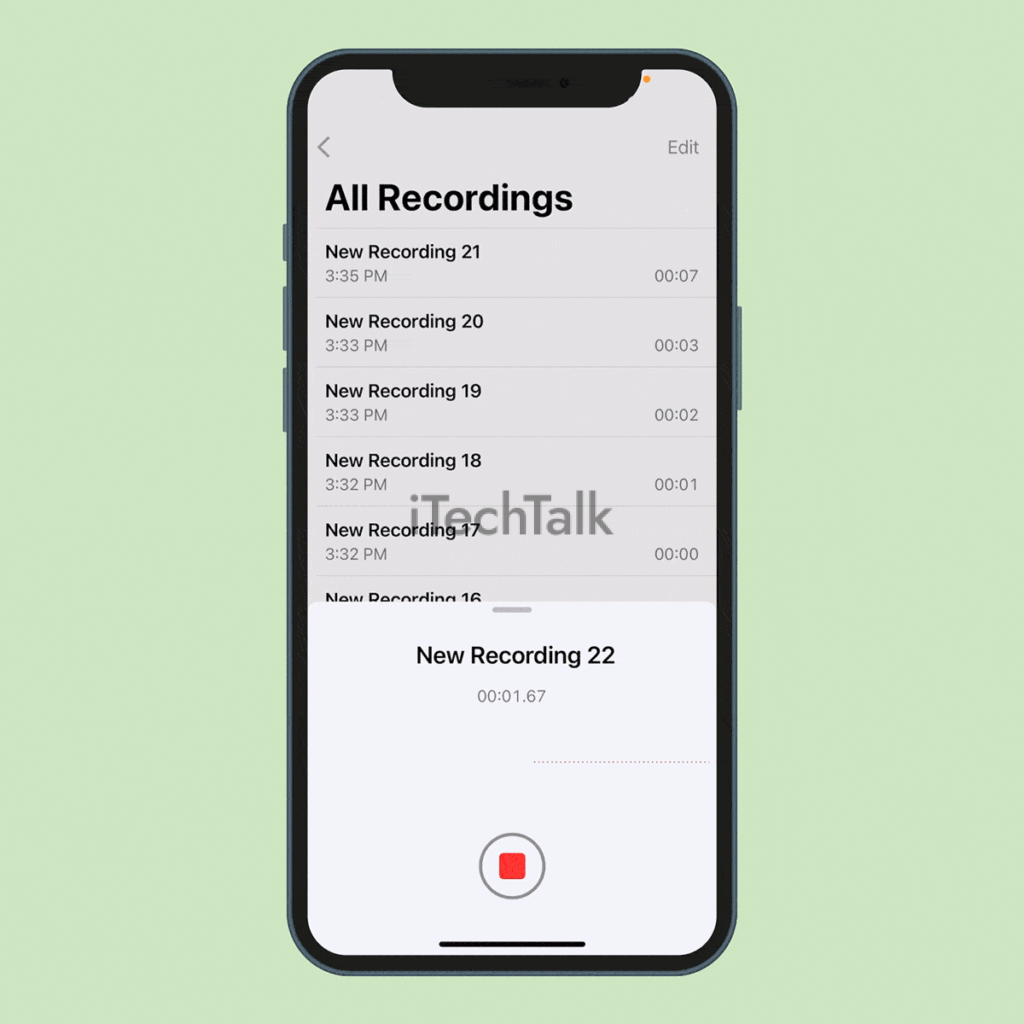
To create a voice memo, open
the app, tap the red record button at the bottom of the screen, and start speaking.
When you stop recording your voice memos on your iPhone, save them automatically in
M4A format in your
Voice Memos app.
Additionally, they are given a default name based on your current location if available or labelled as “New Recording” otherwise; however, this can be easily edited by tapping on its title within the app.
You can also use other features within Voice Memos, such as
trimming recordings or adding labels for easier organization and identification later.
Default Saving Location For Voice Memos On iPhone
When you make a new recording on your iPhone using the Voice Memos app, it automatically saves in the app itself.
If you’re searching for saved voice memos, you can usually find them by opening up your Voice Memos app and looking through your list of recordings.
On earlier versions of iOS (before iOS 12), audio files were stored in the “Recordings” folder within the Voice Memos app.
However, with later
iOS updates, a Utilities folder may be
where apps like Voice Memos get sorted automatically.
Can You Choose Where Voice Memos Save On iPhone?
Yes, you can choose where to save voice memos on your iPhone. By default, all audio messages are saved in the Voice Memos app. However, users can change the location of their saved recordings by adjusting the settings within the app.
To do this, go to “Settings” > “Voice Memos” and then select a new storage location under “Default Account”.
It’s worth noting that some iOS versions may have slightly different settings and features available within the Voice Memos app.
Additionally, certain third-party recording apps may offer additional customization options for saving and organizing audio files on an iPhone.
Finding And Accessing Voice Memos Save On iPhone
To access saved audio messages on iPhone, open the Voice Memos app or search for them in the Messages app; alternatively, you can find them by accessing the Utilities folder, where they may be automatically sorted.
How To Access Saved Audio Messages In The Voice Memos App
As someone who frequently uses the Voice Memos app on my iPhone to record important audio messages, I must know where to access them later.
Here’s how to do it:
- Open the Voice Memos app on your iPhone.
- Scroll through your recordings until you find the one you want to listen to or edit.
- Tap on the recording to open it and access its playback controls.
- From here, you can play, pause, rewind, fast-forward, and adjust the volume of your recorded audio message.
It’s as simple as that! With these steps, you should have no trouble accessing any saved audio messages in the Voice Memos app on your iPhone.
How To Access Saved Audio Messages In iMessage
To
access saved audio messages in iMessage, follow these steps:
- Open the Messages app on your iPhone.
- Go to the conversation where the audio message was sent or received.
- Tap and hold on to the audio message you want to access.
- From the pop-up menu, select “More.”
- Select the “Save” option to save the audio file to the Voice Memos app.
- Open the Voice Memos app on your iPhone to access the saved audio message.
If you don’t see any saved audio files in Voice Memos, try looking in your Utilities folder or
check if you have enabled the automatic saving of voice memos on your iPhone settings.
Additionally, remember that some older iOS versions may handle voice memos differently than newer ones.
Explanation Of Where Saved Voice Messages Go
When you save an audio message on your iPhone, it’s essential to know where it’s stored. By default, saved voice messages are located in the Voice Memos app, which may be hidden in a Utilities folder, depending on your iOS version.
If you’ve received an audio message through iMessage or any other messaging app and saved it by tapping “Keep,” it will be stored under a specific conversation thread in the Messages app.
If you experience issues with voice memos not saving automatically or disappearing after being recorded, check your device storage settings and ensure there is enough space for new recordings.
Managing And Saving Audio Messages On iPhone
To manage and save audio messages on iPhone, you can either automatically or manually save them, organize and edit the voice memos within the app, or back up and export them through iCloud or iTunes.
How To Automatically Save Voice Messages On iPhone
In this section, I will explain how to
save voice messages on an iPhone automatically.

This feature ensures that you never lose any audio messages accidentally:
- Open the Settings app on your iPhone.
- Scroll down to find the Voice Memos option and tap it.
- Under “Audio” settings, toggle on the switch next to “Auto – Save Recording”.
- When you stop recording a voice memo, it will be saved automatically to the Voice Memos app on your iPhone.
- You can also choose whether to keep or delete old recordings after saving them by setting a limit under “Keep Deleted Recordings”.
By enabling the automatic saving of voice memos, you ensure that you don’t miss out on an important message, even if you forget to save it manually.
It’s a simple but highly useful feature that is handy for busy individuals who receive and record many audio messages throughout the day.
How To Manually Save Voice Messages On iPhone
If you want more control over where your audio messages are saved on your iPhone, you can manually save them by following these simple steps:
- Open the Voice Memos app on your iPhone.
- Find the audio message that you want to save and tap on it.
- Tap on the “Share” button at the screen’s bottom left-hand corner.
- Scroll down and select “Save to Files“.
- Choose a folder or location to save the file to.
That’s it! You have now manually saved your audio message to a location of your choice on your iPhone. This method can be helpful if you want to keep your audio messages organized or need quick access to them in the future.
How To Organize And Edit Voice Memos On iPhone
If you have many voice memos saved on your iPhone, keeping them organized and easy to find can be overwhelming.
Here are some ways to manage and organize your recordings:
- Rename Voice Memos: Tap on the recording you want to rename, then tap on the title. This will allow you to edit the name of the recording so you can easily recognize it later.
- Delete unwanted recordings: Swipe left on an individual recording in the Voice Memos app to delete it, or tap Edit in the top right corner to select multiple recordings for deletion.
- Use folders: In the Voice Memos app, tap Edit in the upper left corner and then tap New Folder. Give the folder a name, then add recordings for more organized storage.
- Share or export recordings: To share or export a recording, tap on it, then tap More (three dots). You’ll see options like Messages, Mail, AirDrop and more. You can also save your voice memo as a file in apps like Dropbox or Google Drive for safekeeping.
- Trim Recordings: If there’s a specific section of a voice memo you want to use or listen to again without having to sift through extraneous content, trim it down by selecting “Edit” from within each recording’s details page.
- Save transcriptions: For iOS 14 users, there’s an option to have your voice memos transcribed automatically from inside settings.
- Set up automatic deletion time frame: By default, audio messages over two minutes old get deleted, but if one wishes, they can set up a custom deletion schedule from the settings app under “Messages”.
By following these tips, managing and organizing your voice memos should become more manageable and less stressful!
Backing Up And Exporting Voice Memos
To back up and export voice memos, users can utilize
iCloud or iTunes backup or export the files to other applications or devices.
iCloud Backup
I always back up my important files, including my saved audio messages on my iPhone.
Here’s how I use iCloud backup for my Voice Memos:
- Open the Settings app on your iPhone.
- Tap your Apple ID at the top of the screen.
- Select “iCloud” from the list of options.
- Scroll down and turn on the switch next to “Voice Memos.”
- Your voice memos will now be backed up automatically to iCloud whenever you’re connected to Wi-Fi.
It’s important to note that if you have
limited iCloud storage space, you may want to consider deleting older or unnecessary voice recordings or upgrading your storage plan.
Additionally, restoring a backup from iCloud can sometimes cause lost data, so it’s a good idea to export and save your voice memos in other ways regularly.
iTunes Backup
Backing up your iPhone
voice memos to iTunes is a great way to ensure you don’t lose any important recordings.
Here’s how to do it:
- Connect your iPhone to your computer and open iTunes.
- Click on the iPhone icon in the upper left corner of the iTunes window.
- Click on “Summary” in the left-hand menu.
- Scroll down and find the “Options” section.
- Check the box next to “Manually manage music and videos.”
- Click “Apply” in the lower right corner of the window.
Now that you have enabled manual management, you can manually back up your voice memos by doing the following:
- Click on “File” in the iTunes menu bar.
- Select “Devices,” then choose “Transfer Purchases from [your device name].”
- Wait for iTunes to transfer your voice memos from your iPhone to your computer.
That’s it! Your iPhone voice memos are now backed up to your computer via iTunes, and you can access them anytime you need them.
Exporting Voice Memos To Other Applications Or Devices
When it comes to exporting voice memos on iPhone, there are a few different methods you can use.
Here are some options:
- iCloud backup: If you have iCloud enabled on your iPhone, your voice memos and the rest of your device’s data will automatically be backed up. Go to Settings > iCloud > Manage Storage > Backups to access your backed-up voice memos. You can restore the backup to another device or export specific voice memos.
- iTunes backup: Similar to iCloud backup, your voice memos will be included in an iTunes backup of your iPhone. Simply connect your device to your computer and open iTunes to create a backup with all your voice memos.
- AirDrop: If you want to transfer a single voice memo or a small selection of them, AirDrop is a quick and easy option. Simply open the Voice Memos app, select the memo(s) you want to export, and tap the share icon. From there, select “AirDrop” and choose the device you want to send the memo(s).
- Third-party apps: Several third-party apps allow you to export voice memos from your iPhone in various formats (such as MP3 or WAV). Some popular options include AudioShare and Dropbox.
- Email or messaging: If you only need to share one or two small voice memos, sending them via email or messaging may be the simplest solution. Simply find the memo(s) in the Voice Memos app and tap the share icon, then select “Mail” or “Messages” and enter the recipient’s information.
Overall, exporting voice memos on an iPhone is relatively straightforward and offers several options depending on your needs.
Conclusion: Tips For Managing And Organizing Voice Memos On iPhone
In conclusion, knowing the location of your saved audio messages is essential for managing and organizing them on your iPhone. The Voice Memos app allows you to easily access and edit your recordings while saving them manually or automatically.
Utilizing backup options like iCloud or iTunes can ensure that your important voice memos are never lost.