The number one cause for a muffled AirPod speaker is compounded dirt and grime on your AirPods. Little bits of dirt and dust can easily block the microphone, leading to a muffled sound on the other end of the line. Clean your AirPods with a damp, clean cloth and a cotton swab at least every one or two months to prevent this.
Nothing ruins a phone call quite like bad audio. AirPods may be the best in the business at what they do, but that doesn’t make them impenetrable to dirt, grime, and other issues that might plague sound quality.
In the following guide, I’ll walk you through how to fix your muffled sound problem so your friends can finally hear you again.
Clean The AirPods Thoroughly To Fix Muffled Airpods
If you use your AirPods every day, inevitably, they will get very dirty, very quickly. Dust, dirt, pocket lint, you named it, your AirPods aren’t safe.
If you don’t clean your AirPods regularly, the dust and dirt will compound around the Mic and muffle your calls.
To
keep your AirPods working well, clean them every one to two months.
Here is how to clean your AirPods safely:
- Use a clean cloth and soak it in freshwater. Squeeze out the extra water until the cloth is only damp.
- Use the wet part of the cloth to gently wipe down the surface of each earbud. Be careful not to press or scrub too hard, as this might damage delicate surfaces like the plastic housing parts.
- Dry each earbud by lightly wiping each one with a soft-dry napkin. Do this until all moisture is absorbed off each earbud.
- To clean your microphone, use a Q-tip to remove any residual earwax.
- To clean the charging case, use a damp cloth.
Never use water on your AirPods. Any kind of water penetration can damage your device.
Related Reading
Charge Each AirPod
If the
battery of your AirPods falls below 10%, you might start to experience “battery throttling.” This often leads to sound interruptions and terrible microphone output.
To avoid this, charge your earbuds for 1-3 hours, depending on your case and the battery level.
If you want to test the headphones properly, do not unplug them until the battery is at 50%.
When you plug your charging case in, make sure that the charging case is emitting an
orange light. This indicates that both your earbuds and charging case are receiving power.
Switch To Other AirPods Microphone
All models of AirPods feature a microphone in each individual earbud.
In other words, if one microphone is damaged, you can easily connect to the second operational microphone through your phone’s settings.
Here’s how to switch to the other AirPod mic:
- Have your AirPods paired to your device and outside of the charging case.
- Open the Settings app and tap on Bluetooth.
- Find your AirPods in your list of Bluetooth devices. Tap on the Info icon.
- Tap on Microphone.
- From here, tap on either Left or Right, depending on which earbud you want to be activated.
You can use this method to test each microphone separately to determine which one is not working.
Turn Off Noise Cancellation To Fix Muffled AirPods Mic
If you use noise cancellation, it may sometimes change how your microphone sounds to the people you’re talking to. It’s worth turning this feature off to see if it helps.
If your AirPods are from gen 1 to 3, noise cancellation won’t be an option for you. Noise cancellation is only available on AirPod Pros and AirPod Maxes.
To turn off noise cancellation:
- Make sure your AirPods are connected to your device.
- Hold and long press the force sensor on either stem of either one of your earbuds.
- You will hear a signal letting you know that your noise cancellation has been switched off.
You can also turn off noise cancellation by:
- Go to Settings > Bluetooth.
- Tap the Info icon near your Airpods.
- Under Noise Control, tap on Noise Cancellation.
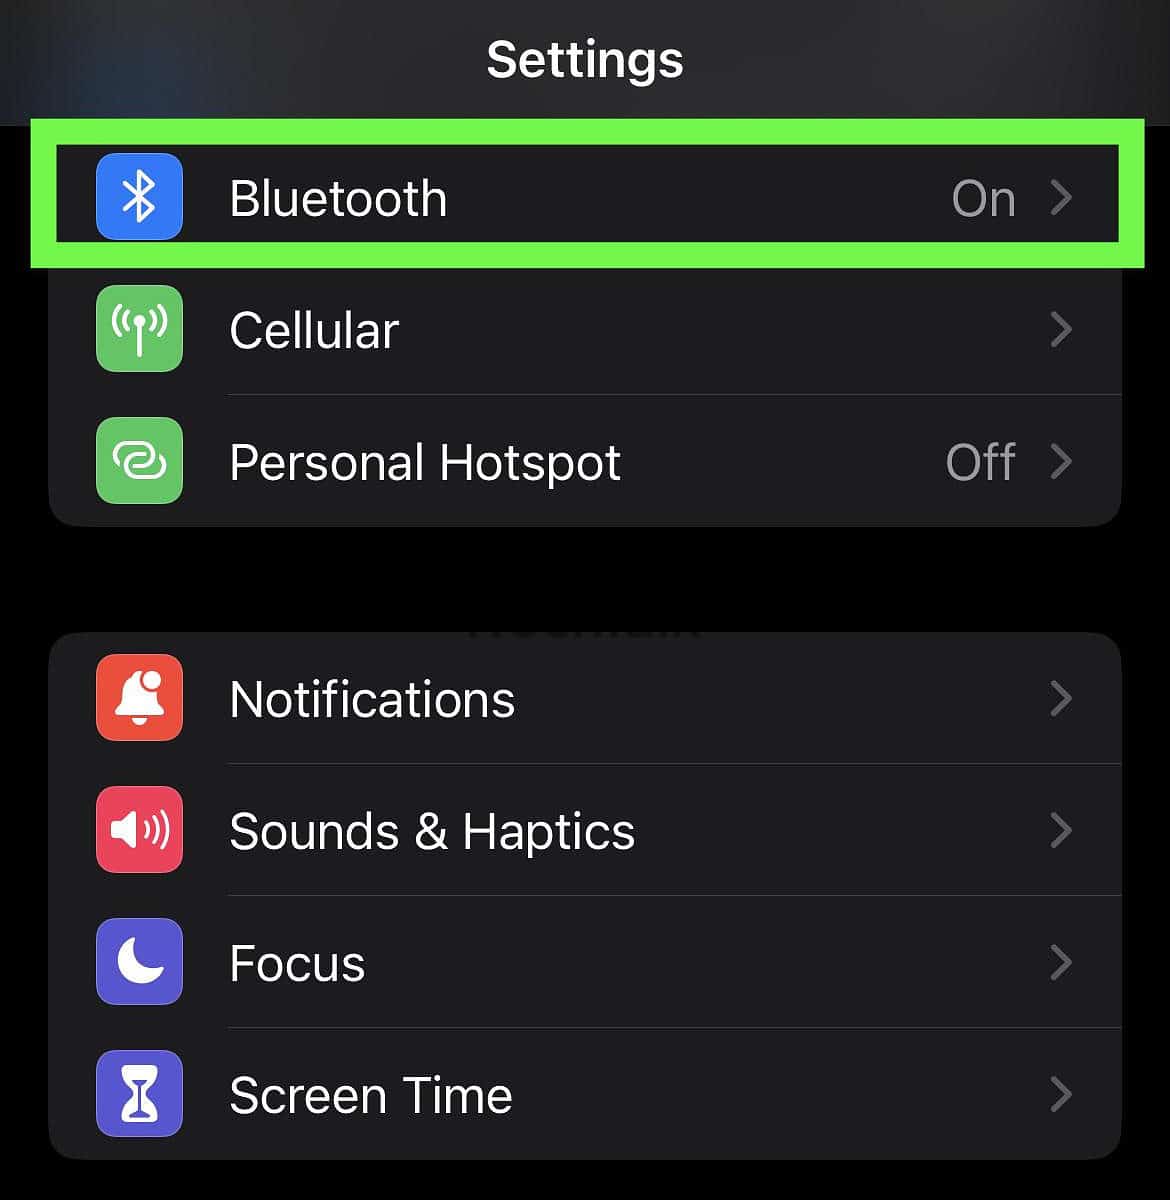
Restart the Bluetooth Connection
If you’re experiencing muffled sound on your AirPods, it’s possible that your Bluetooth is having connectivity issues. To fix this, restart the Bluetooth on your device.
It’s easy to quickly restart your Bluetooth connection:
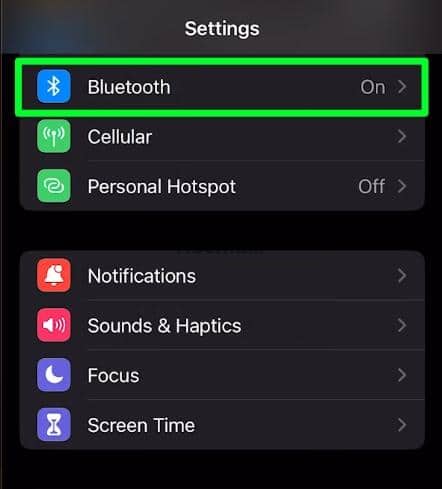
- Open up the Settings app.
- Tap on Bluetooth.

- Tap the Bluetooth switch to turn it off.
- Wait for about 30 seconds, then tap the switch again to turn Bluetooth back on.
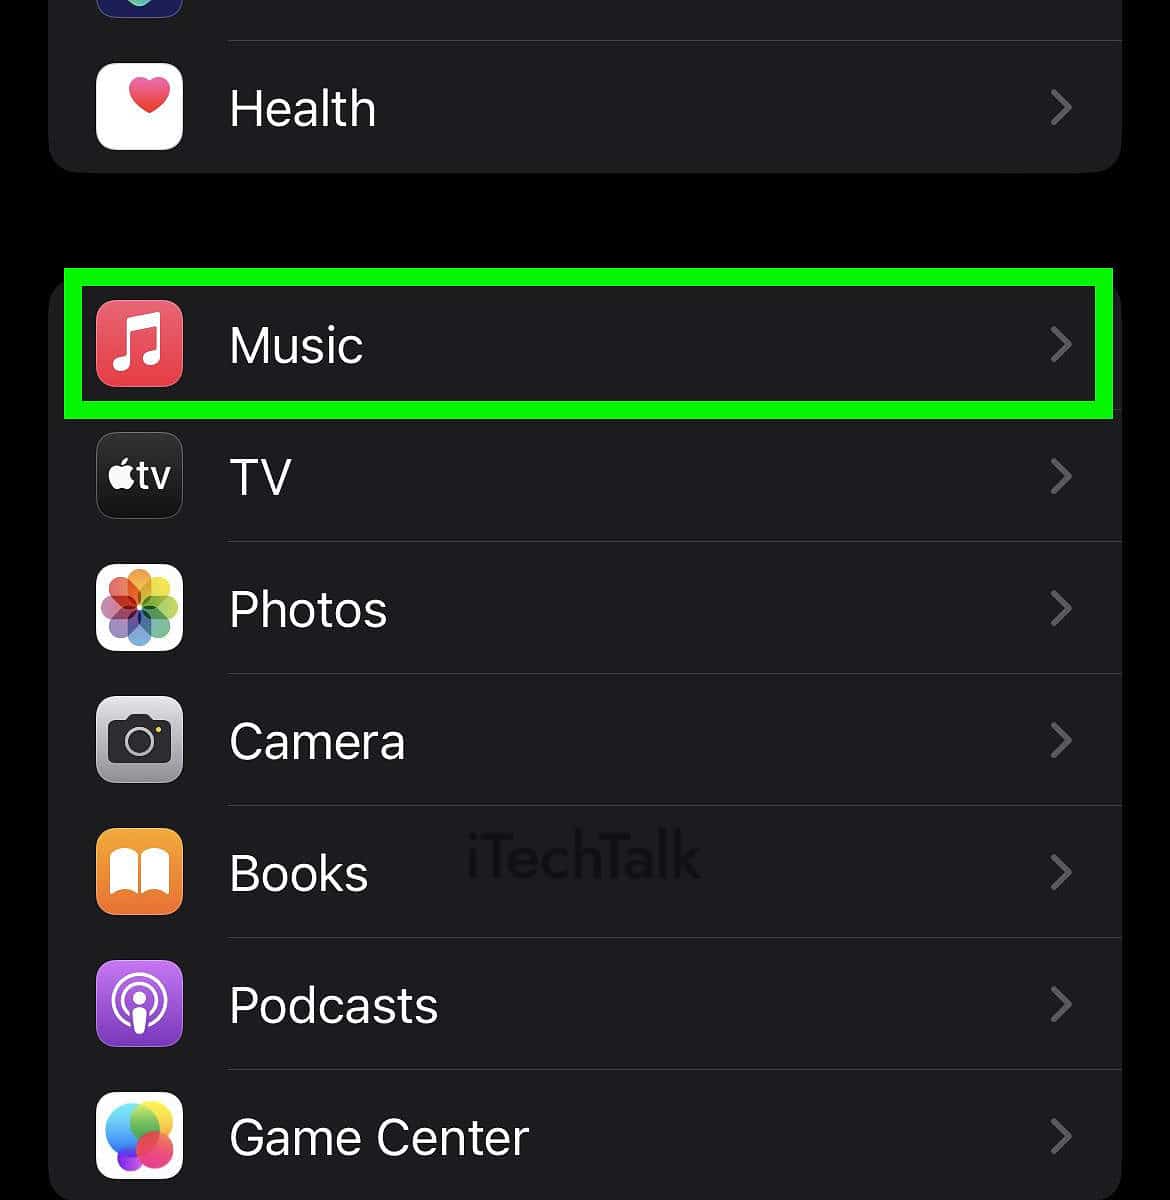
Turn Off Equalizer In Microphone Settings To Help With Microphone Quality
A potential fix to your muffled sound AirPod problem is turning off the Equalizer Settings.
The Equalizer Settings are designed to improve the sound of your AirPods. This setting can also ajust the base too much, causing a muffled output from the microphone.
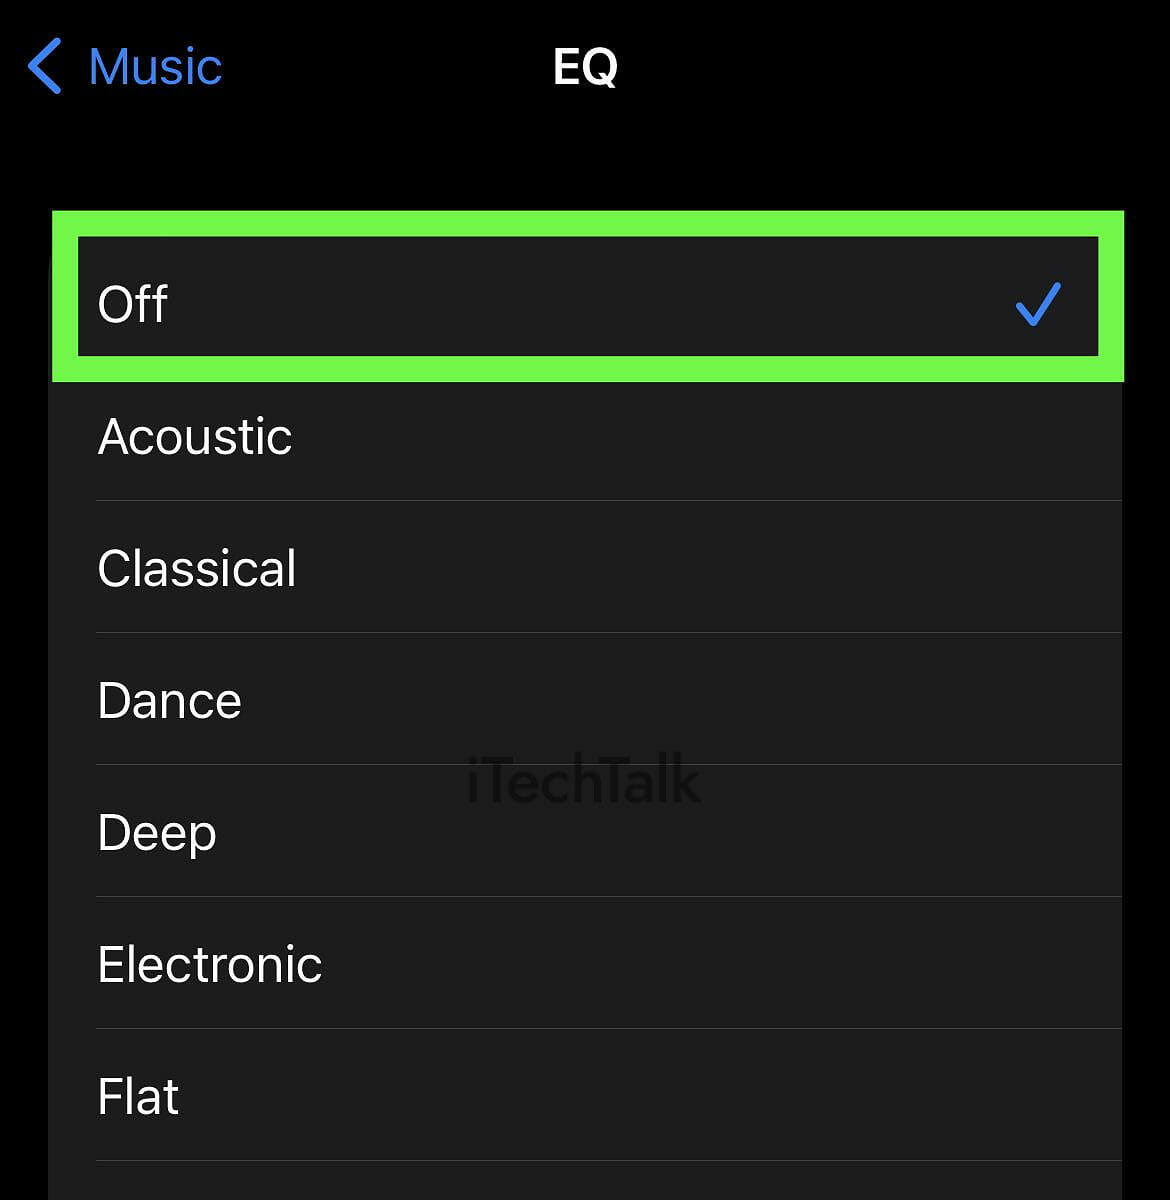
Here is how to turn off your Equalizer Settings:
- Open your Settings App and tap on Music.
- Scroll down until you find the EQ setting. Tap this setting.

- With the EQ settings open, select Off.
AirPods Still Sound Muffled? Reset Your AirPods.
If all else fails, one of the most likely
ways to fix your muffled speaker problem is to reset your AirPods. By resetting your Airpods back to factory settings, any deep-seated glitches in your device should be cleared out.
Here is a step-by-step guide to resetting your AirPods:
- Make sure your earbuds are in the charging case with the lid open.
- Go to the Settings app and tap on Bluetooth.
- Find your AirPods in the list of Bluetooth devices and tap on them.
- With your AirPods settings open, scroll down and tap “Forget this Device.”

- Once your AirPods are disconnected, close your charging case.
- Press and hold down the pairing button on the case for at least 30 seconds.
- Pair your AirPods as if you’re pairing them for the very first time.
Resetting your
AirPods means that they will return back to default settings. Any custom settings that you had will have to be reconfigured.
Did you manage to fix the muffled sound coming out of your Airpod speaker? Please leave a comment and let me know.