You can sync your Mac and iPhone when they’re connected using the Continuity feature. Make sure you are signed in to the same iCloud account on both devices and join the same WiFi network with both devices. You should also enable Bluetooth on both devices.
- Now, on both devices, enable the Handoff Continuity feature.
- On your iPhone, go to Settings > General > Handoff and turn the Handoff slider ON.
- Similarly, on your Mac, go to System Preferences > General and check the “Allow Handoff between this Mac and your iCloud devices” box.
There are several ways you can connect your MacBook and iPhone without USB, either by AirDrop or the Continuity feature offered for Apple products, or any of the other ways we are going to cover in this article.
[toc]
For situations where you don’t have your USB cable or it’s not working, this knowledge could come in handy. In this article, we are going to break down every step for all the ways you can connect your iPhone to your MacBook without a USB cable.
What You Need Before Connecting Your iPhone to MacBook
Before you can connect your iPhone to a Mac, you must first meet certain requirements to properly establish a connection between the devices. You must have:
- An iPhone running the most recent iOS version
- A Mac running the most recent macOS version
- An active Apple ID account
- A wireless network to which both the iPhone and the Mac can connect, as well as a cellular network on the iPhone.
- For one-time setups, use the USB-A-to-Lightning or USB-C-to-Lightning cable that came with your iPhone.
How to Connect Your iPhone to Mac Without USB Cable
1. Use Airdrop
AirDrop is a secure peer-to-peer WiFi transfer software from Apple that allows you to transfer all of your app data and personal files between Mac, iPhone, iPad, and iPod touch.
Keep in mind that before you can use AirDrop, your iPhone has to be running iOS 7 or later, and your Mac, macOS 10.0 or later. You’ll also have to make sure that AirDrop is enabled in settings.
To do this on your iPhone, go to Settings > General > AirDrop to enable AirDrop. Choose one of the three options – Receiving Off, Contacts Only, or Everyone – as desired (Everyone in this case).

After you’ve enabled it, follow these steps to transfer data from your iPhone to your Mac (or vice-versa).
- Open the file that you are willing to share (videos, photos, documents, etc.).
- Select the Share option.
- Under the Tap to share with AirDrop section, you’ll see a list of AirDrop-enabled devices.
- Choose the name of the device or person with whom you want to share data.
Related Reading
2. Use Bluetooth
Bluetooth is another way you can connect your iPhone to your Macbook.
If you are only looking to sync iTunes across both devices, or use your iPhone as a personal hotspot for the Mac, Bluetooth will suffice.
Bluetooth is no longer widely used for a variety of reasons. Not only do the devices need to be close together for a stable connection, but Bluetooth is much slower than WiFi direct, so you’ll only see limited speeds if you transfer data via Bluetooth. Regardless, Bluetooth still works fine if you want to connect your iPhone wirelessly with your Mac.
Here’s how to go about it:
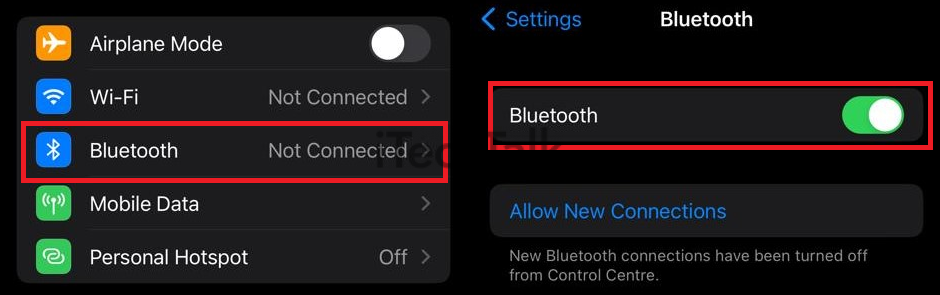
- Go to Settings > Bluetooth on your iPhone. Turn the Bluetooth on.
- On your Mac, go to the Apple menu > System Preferences > Bluetooth.
- When you turn on Bluetooth, you’ll see a list of available devices to connect to. Choose your iPhone from the drop-down menu. You will receive a confirmation code or a connection request if you have not previously paired the two. Tap Connect and, if required, enter the code.
3. Use Continuity
One of the amazing things about Apple Products is the seamless synchronization between their devices. The Continuity feature is a testament to that.
The Continuity feature is a collection of apps or features that allow you to answer iPhone calls from your Mac, unlock your Mac while wearing an Apple Watch, scan documents from your iPhone and have them appear instantly on your Mac, and much more.
Here’s how to wirelessly sync your iPhone with your Mac using Continuity:

- On both devices, sign in to the same iCloud account.
- Join the same WiFi network with both devices.
- Bluetooth should be enabled on both devices.
- Now, on both devices, enable the Handoff Continuity feature.
- On your iPhone, go to Settings > General > Handoff and turn the Handoff slider ON.
- Similarly, on your Mac, go to System Preferences > General and check the “Allow Handoff between this Mac and your iCloud devices” box.
4. Use iCloud
Apple’s Cloud Storage and Cloud Computing software, iCloud, is available on the majority of their devices and can be used to connect devices without the need for a USB cord.
To connect an iPhone to a Macbook via iCloud, both devices must be signed in to the same account. Furthermore, your iPhone must be running iOS 5 or later, and your Mac must be running macOS 10.7.5 or later.
Note that because it is cloud storage software, any changes made to data on either device are automatically synced to your iCloud account. You must sign up for an iCloud account with your Apple ID on both devices.
iCloud is usually set up automatically when you first sign in to your Apple ID, but if it isn’t, here’s how to set it up.
On your iPhone
- Open Settings.
- Tap on your name, and select iCloud.
- Sign in with your Apple ID and password.
- Select all the apps/data you want to sync with iCloud.
On your Mac
- Go to the Apple menu > System Preferences.
- Select iCloud.
- Sign in with your Apple ID and password.
- Select the apps you want to sync with iCloud.
If you’d like to access the same data on your iPhone and Mac, make sure to choose the same apps to sync on both devices. iCloud lets you sync all the data ranging from photos, contacts, calendars, emails, files, bookmarks, Apple news, and notes to even device backups.
Related
5. Use Wi-fi
WiFi syncing is one of the simplest ways to connect and transfer content between your iPhone and Mac while also backing up your iPhone data to your Mac.
But first, if you’ve already discarded your USB cable, pick it up again because we’ll need it one more time. You must enable wireless syncing on your iPhone, which requires connecting it to the Mac via a data cable. After that, you won’t be needing your USB cable.
- On your Mac, launch iTunes.
- Using a USB cable, connect your iPhone to the Mac.
- In the iTunes application, click the iPhone button and enable the “Sync with this iPhone over Wi-Fi option.”
- If you want it to sync automatically, enable the “Automatically sync when this iPhone is connected” option. Click Apply.
This will successfully enable wireless syncing on your iPhone.
After you’ve configured your iPhone for wireless syncing, the process for syncing your data is pretty straightforward. To begin, ensure that both devices are linked to the same WiFi network.
If you selected the Automatically sync when this iPhone is connected option above, you won’t have to do anything else, it will sync automatically. However, if you did not enable it, then follow the steps outlined below.
Go to Settings > General on your iPhone and select iTunes Wi-Fi Sync. Now, select Sync.
Similarly, open iTunes on your Mac and select the iPhone option. To begin syncing the devices, click “Apply.”
Conclusion
I hope you enjoyed the article and now understand how to connect your iPhone to your MacBook without a USB cable.